I’m not sure there’s anything cosier than a handmade quilt. The layers of soft fabric and wadding stitched together can be very welcome as we move into the colder months – perfect for snuggling up on the sofa with, topping your bed, or even hanging on the wall.
Quilting, like many crafts, is becoming more popular again – and many people are trying it out for the first time. It can be a lovely way to showcase your favourite, chosen fabrics – or to use up fabric scraps.
Whatever your goal and style, I thought it’d be fun to put together a little series on beginner quilting. I’ll start with making one of the classic quilt block styles, an ‘Ohio Star’, and move on to other techniques like placing the quilt and attaching binding.
There’ll also be some fun project ideas to follow along with, like a quilted wall hanging and quilted Christmas gifts! William Gee has all the essentials you’ll need to transform your fabrics into beautiful quilted pieces.
How to make an ‘Ohio Star’ quilt block
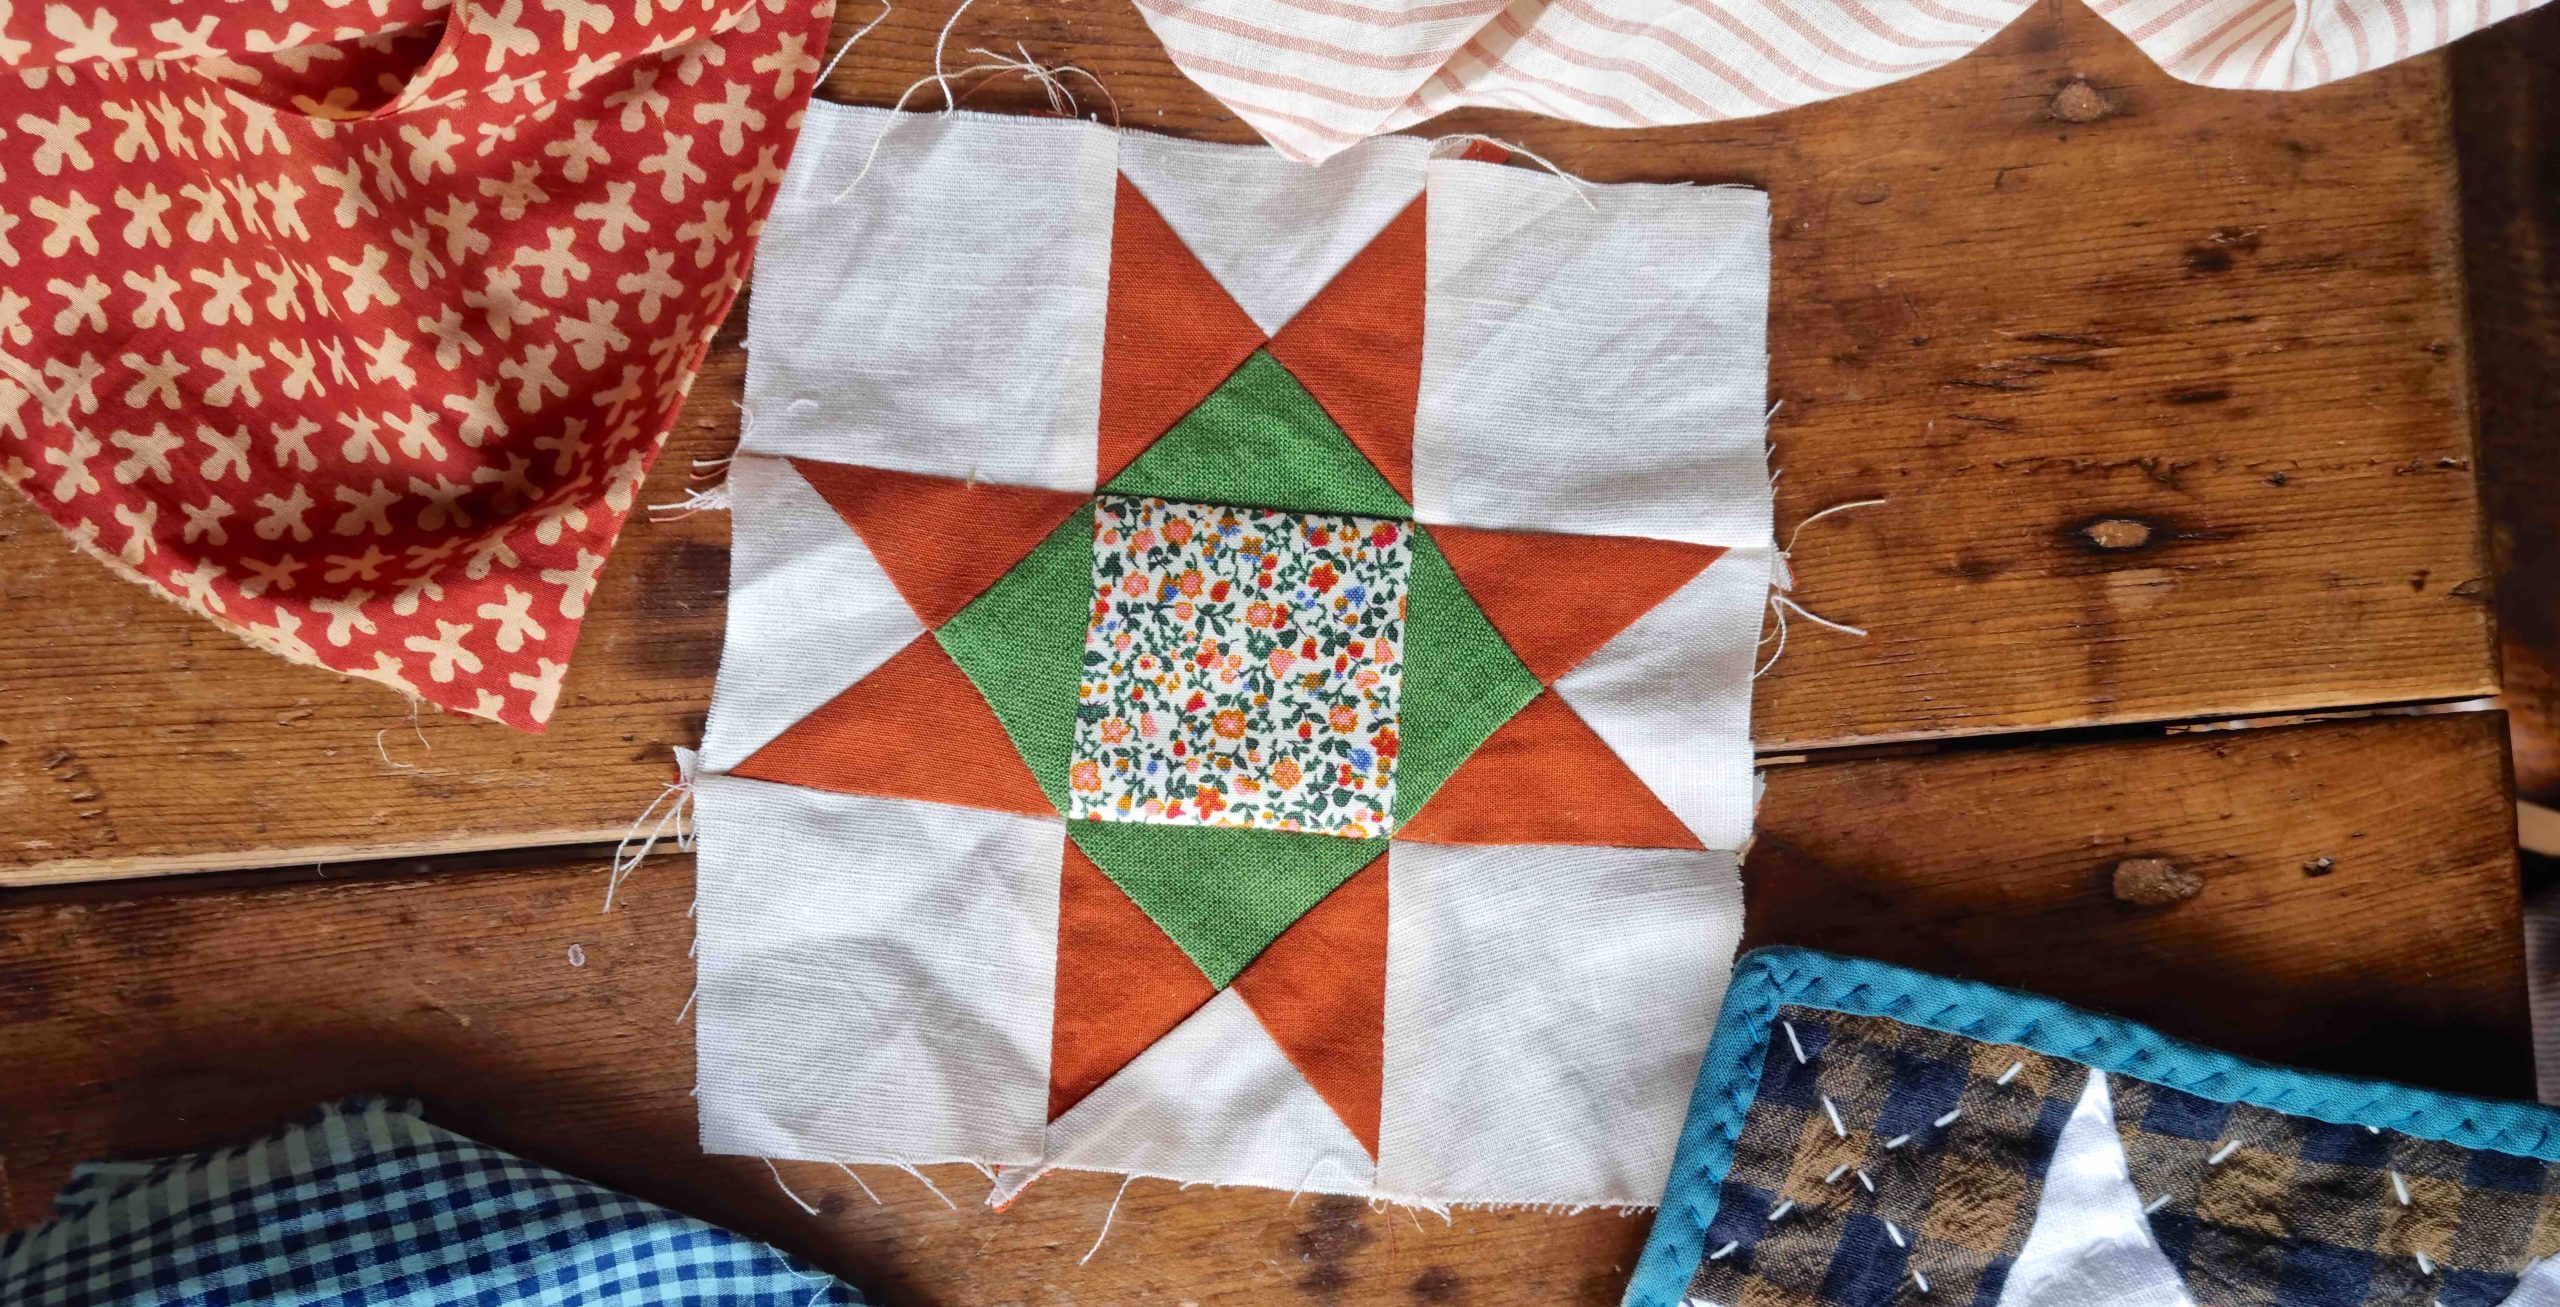
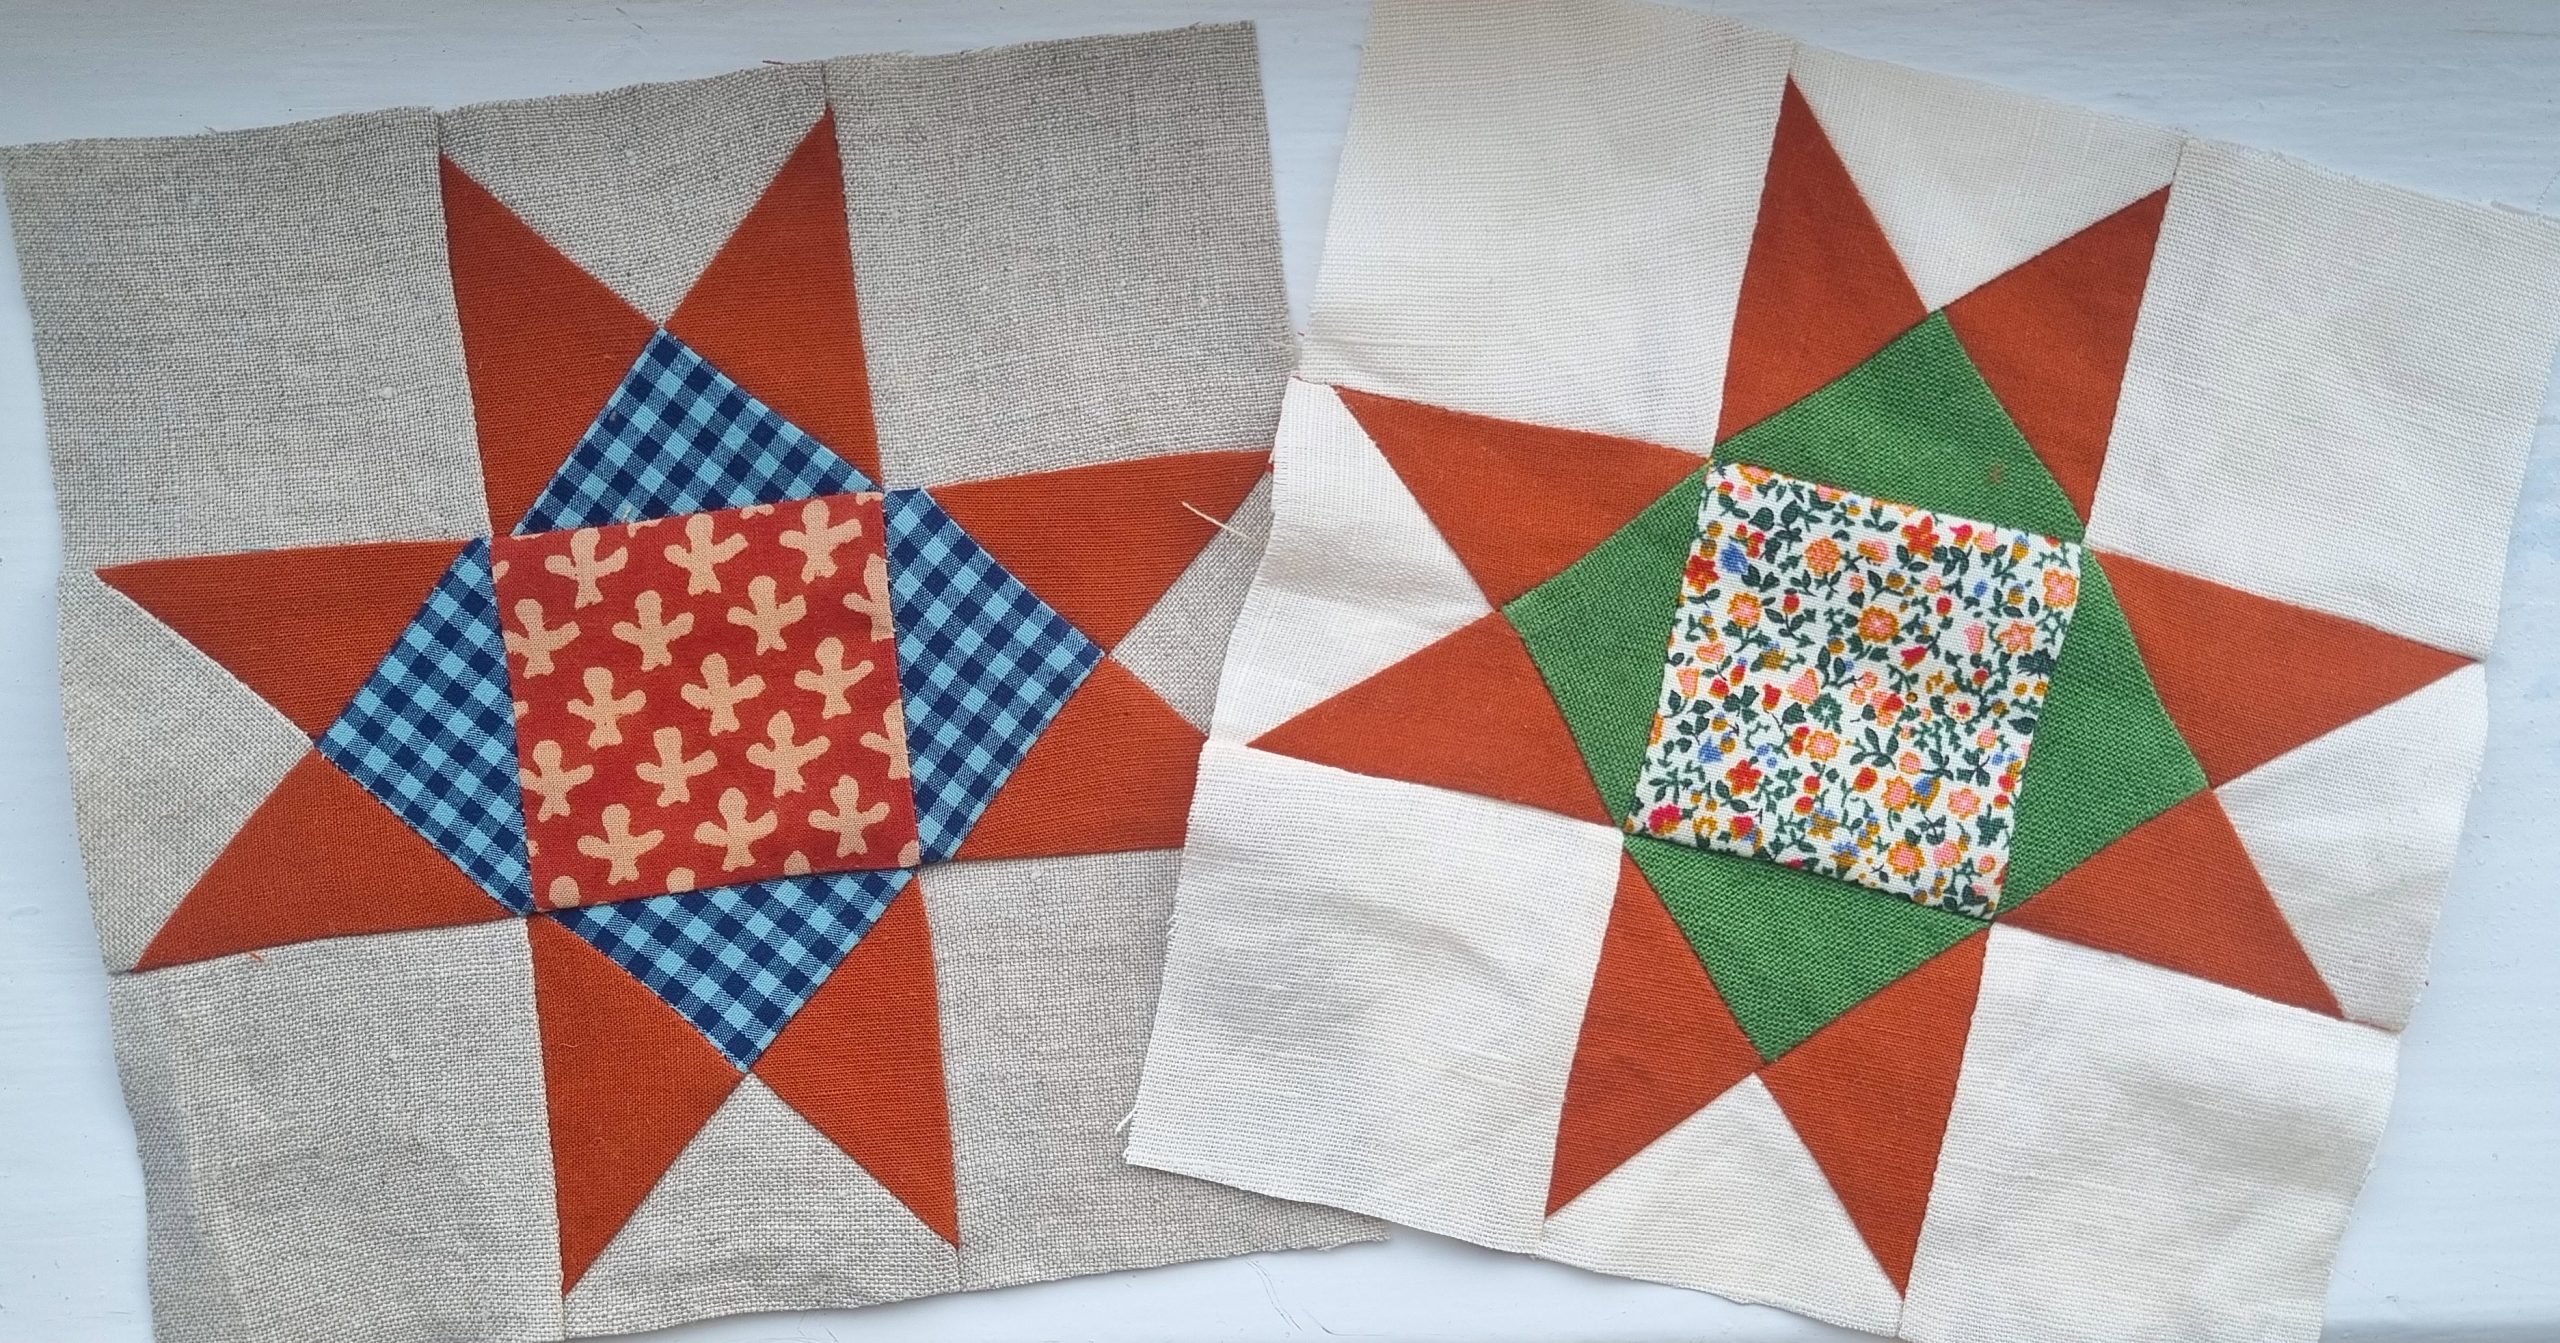
This quilt block style is a classic. The Ohio Star dates back to the 1800s, and can be made with two, three or more fabric colours. I’ve gone for four in this sample – it’s my favourite and it’s also easier to see which bits become what.
You’ll need four different fabric scraps and sewing thread. It’s helpful to have a quilting ruler, cutting mat and rotary cutter.
A few quilting tips
- Seam allowances are 1/4″ (typical for quilting)
- Be careful to cut accurately, it’ll be essential for piecing together neatly!
- Press your seams towards the darker fabric
- It’s easier to get two points to meet if the seam allowances on the wrong side are facing different directions
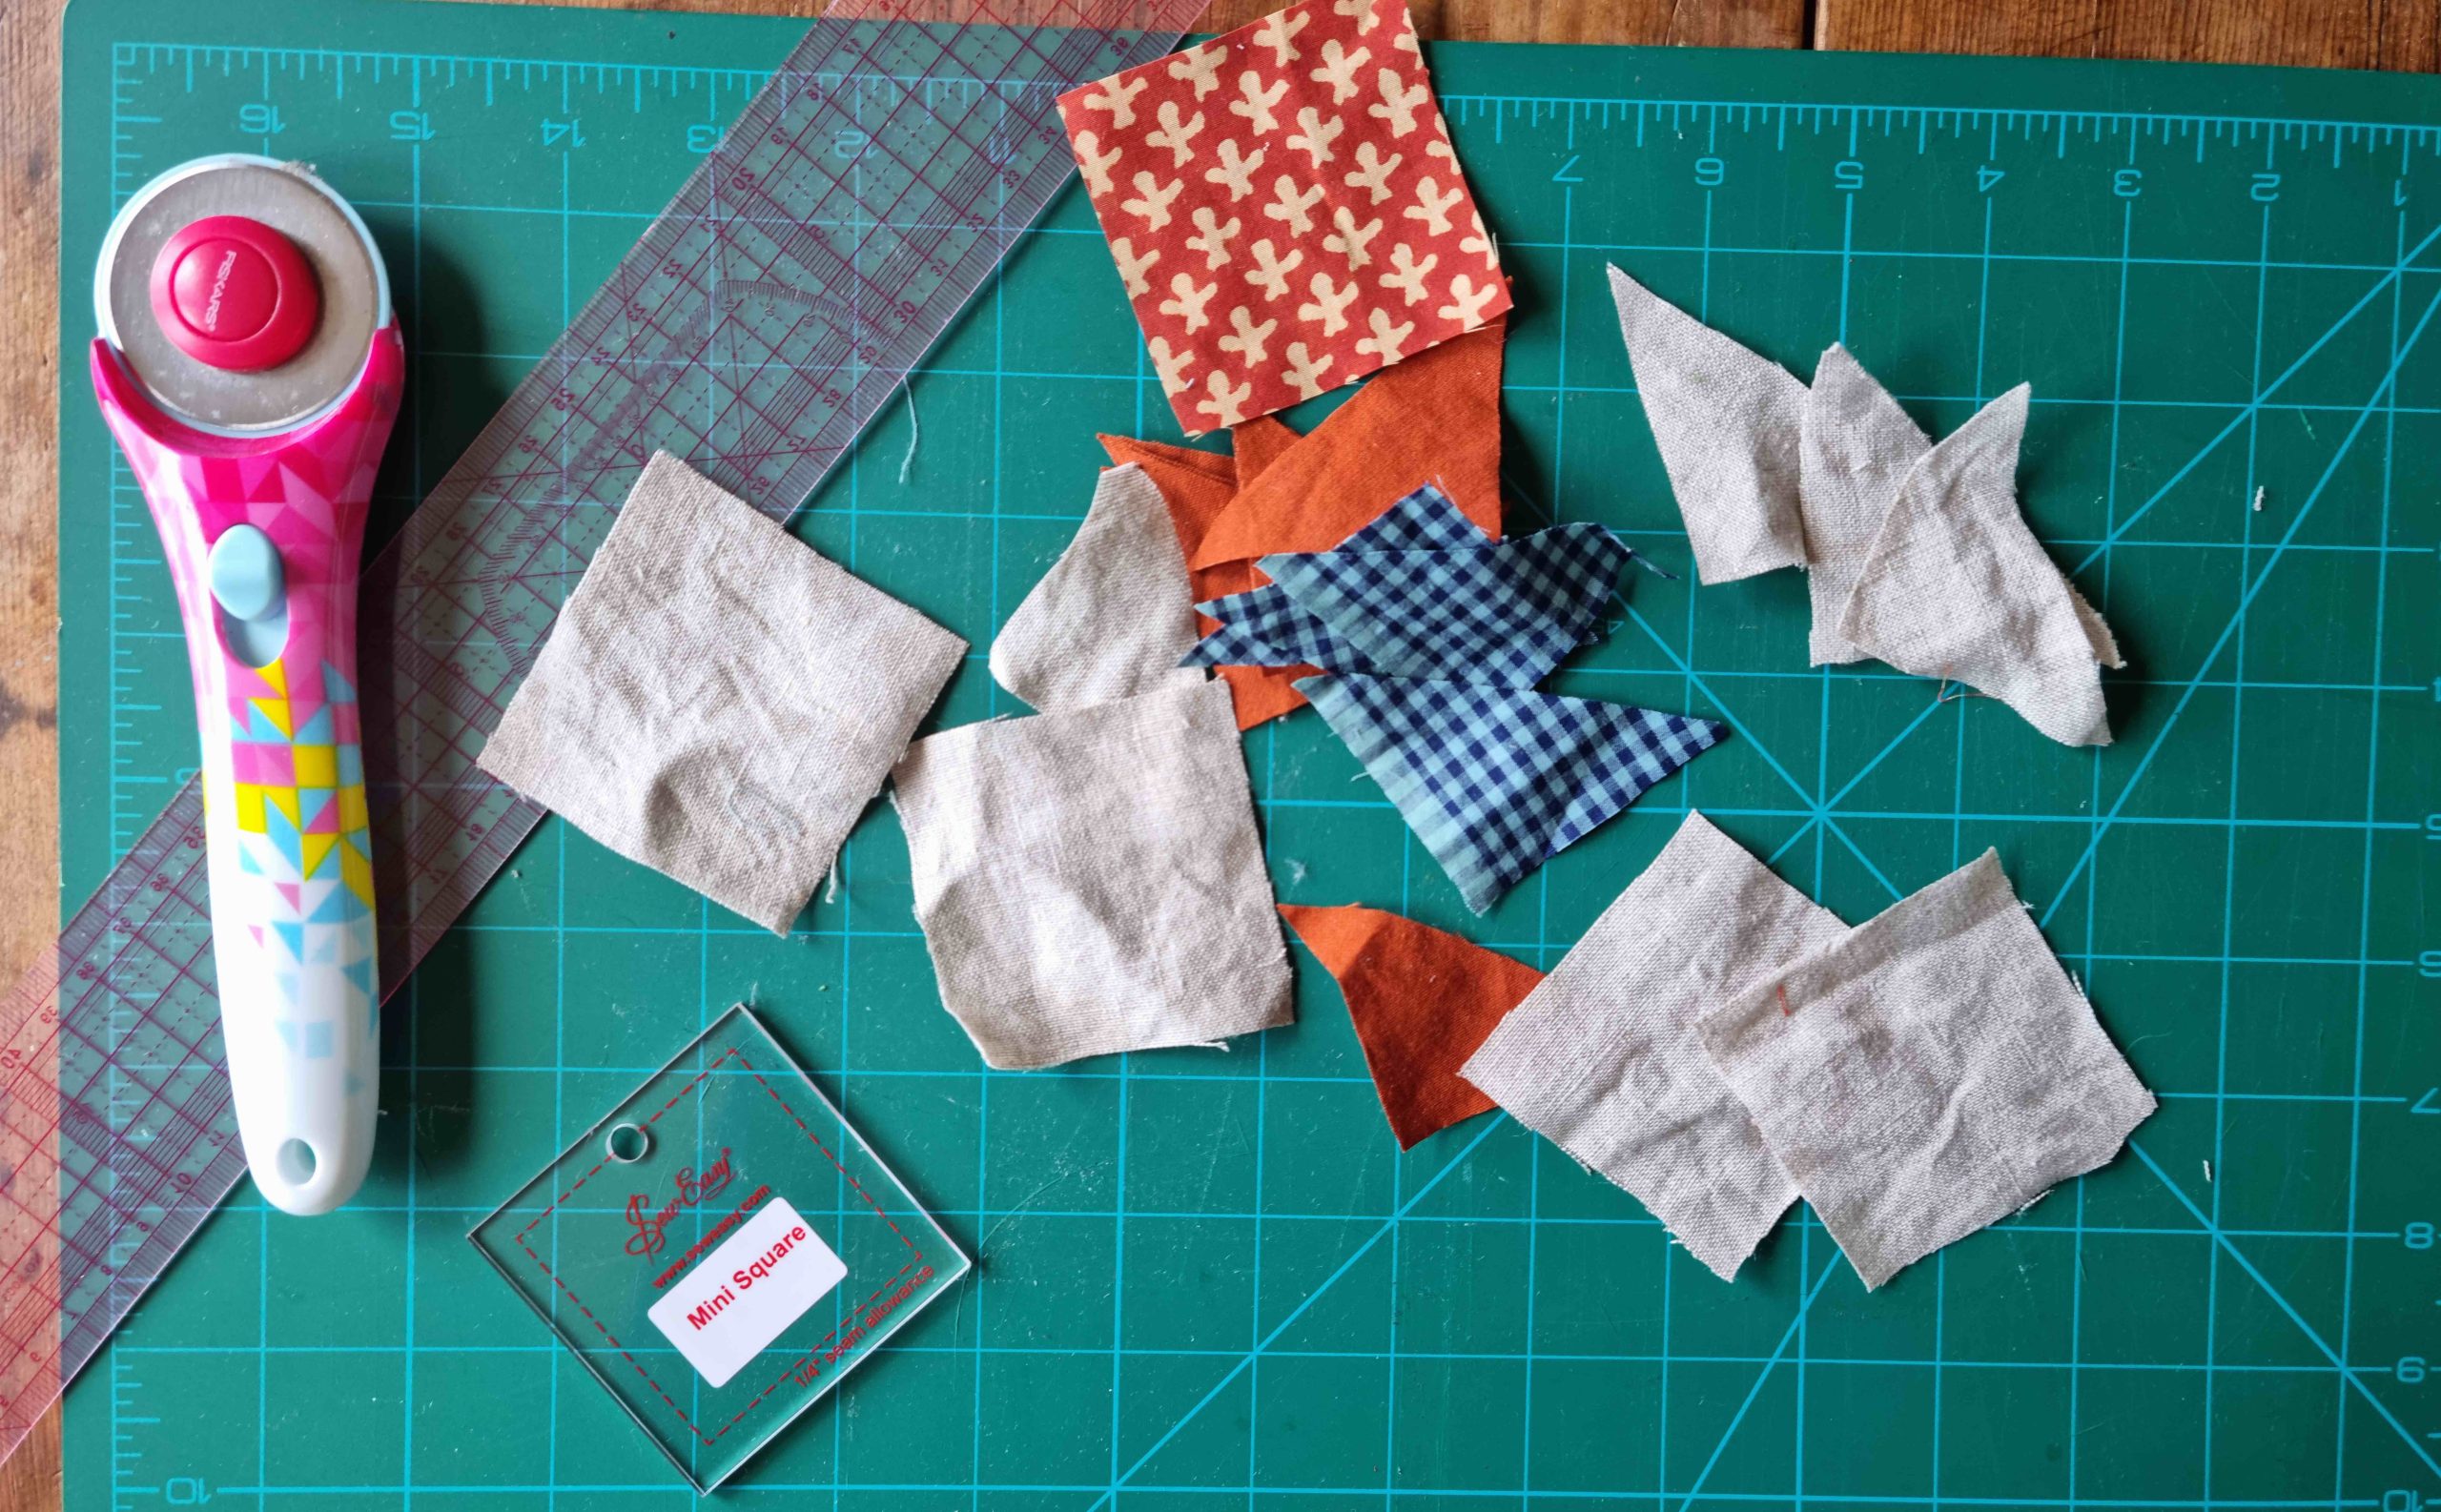
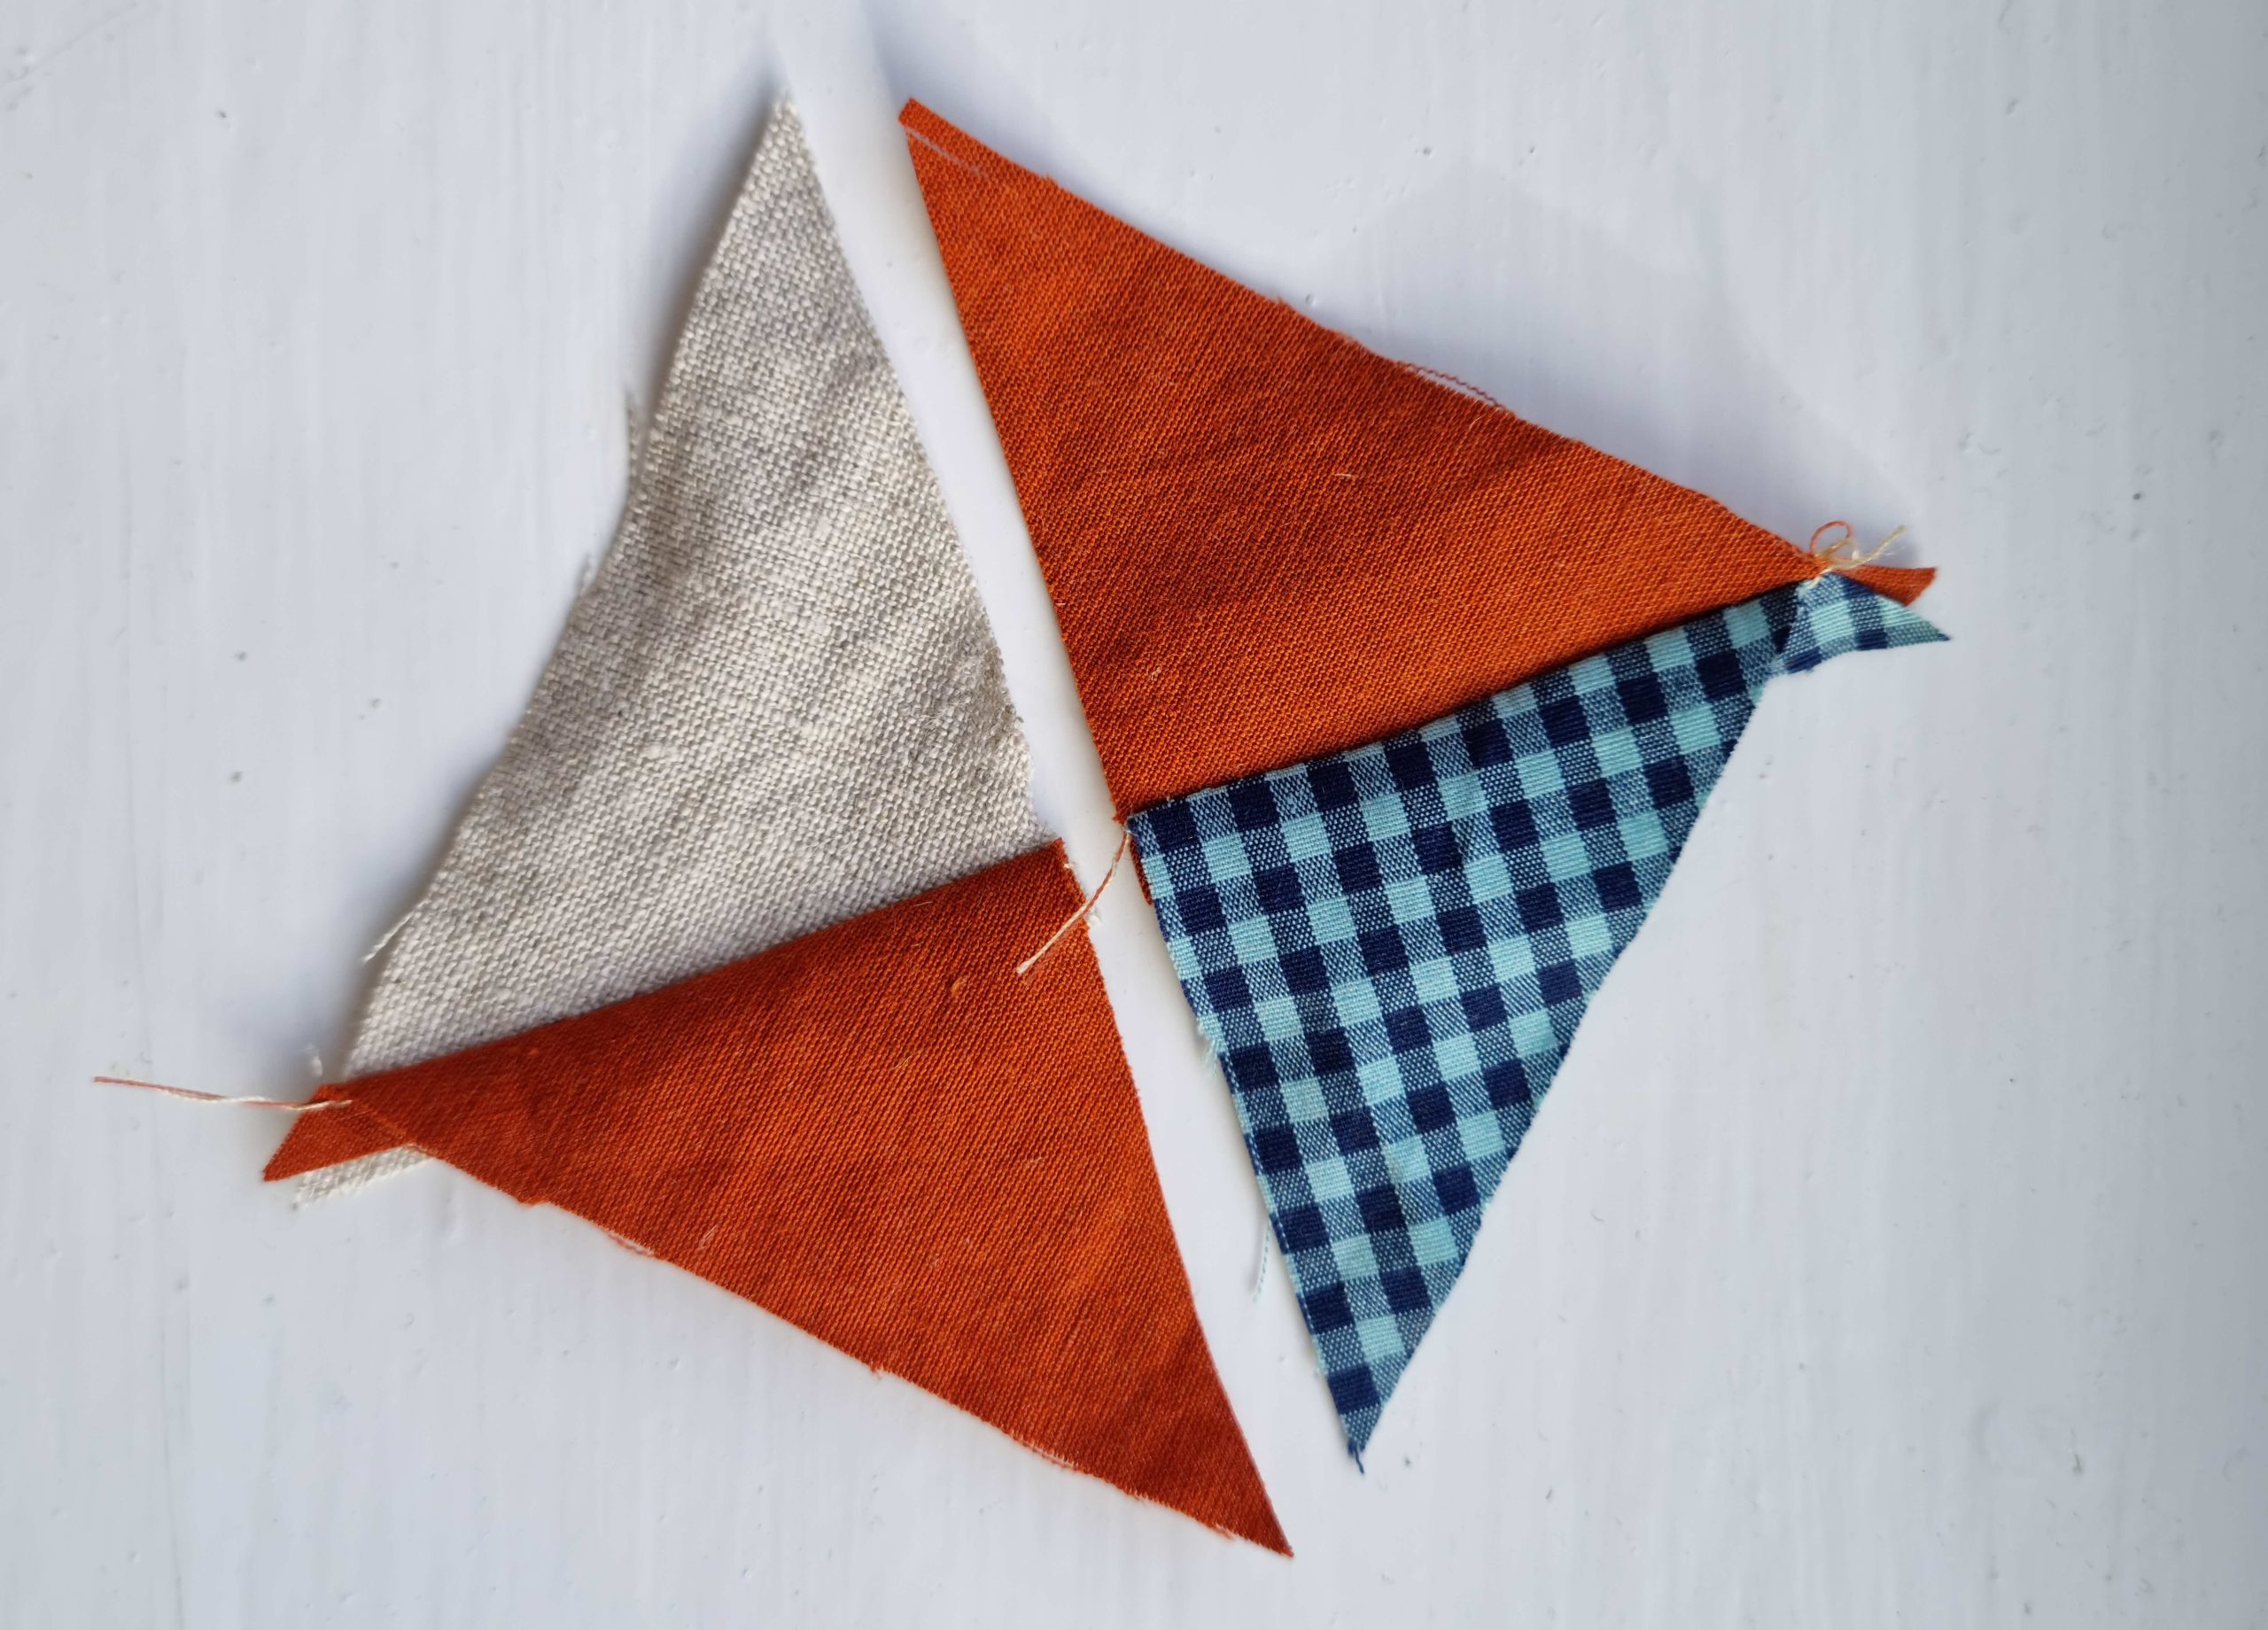
1. Choose four fabric scraps and cut out these shapes
For a 6 inch finished quilt square cut:
- Fabric 1 :
- One 2 1/2″ square (this will be your centre square)
- Fabric 2:
- One 3 1/4″ square, then cut in quarters from point to point to make four smaller triangles
- Fabric 3:
- Two 3 1/4″ squares, then cut in quarters from point to point to make eight smaller triangles
- Fabric 4:
- Four 2 1/2″ squares
- One 3 1/4″ square, then cut in quarters from point to point to make four smaller triangles

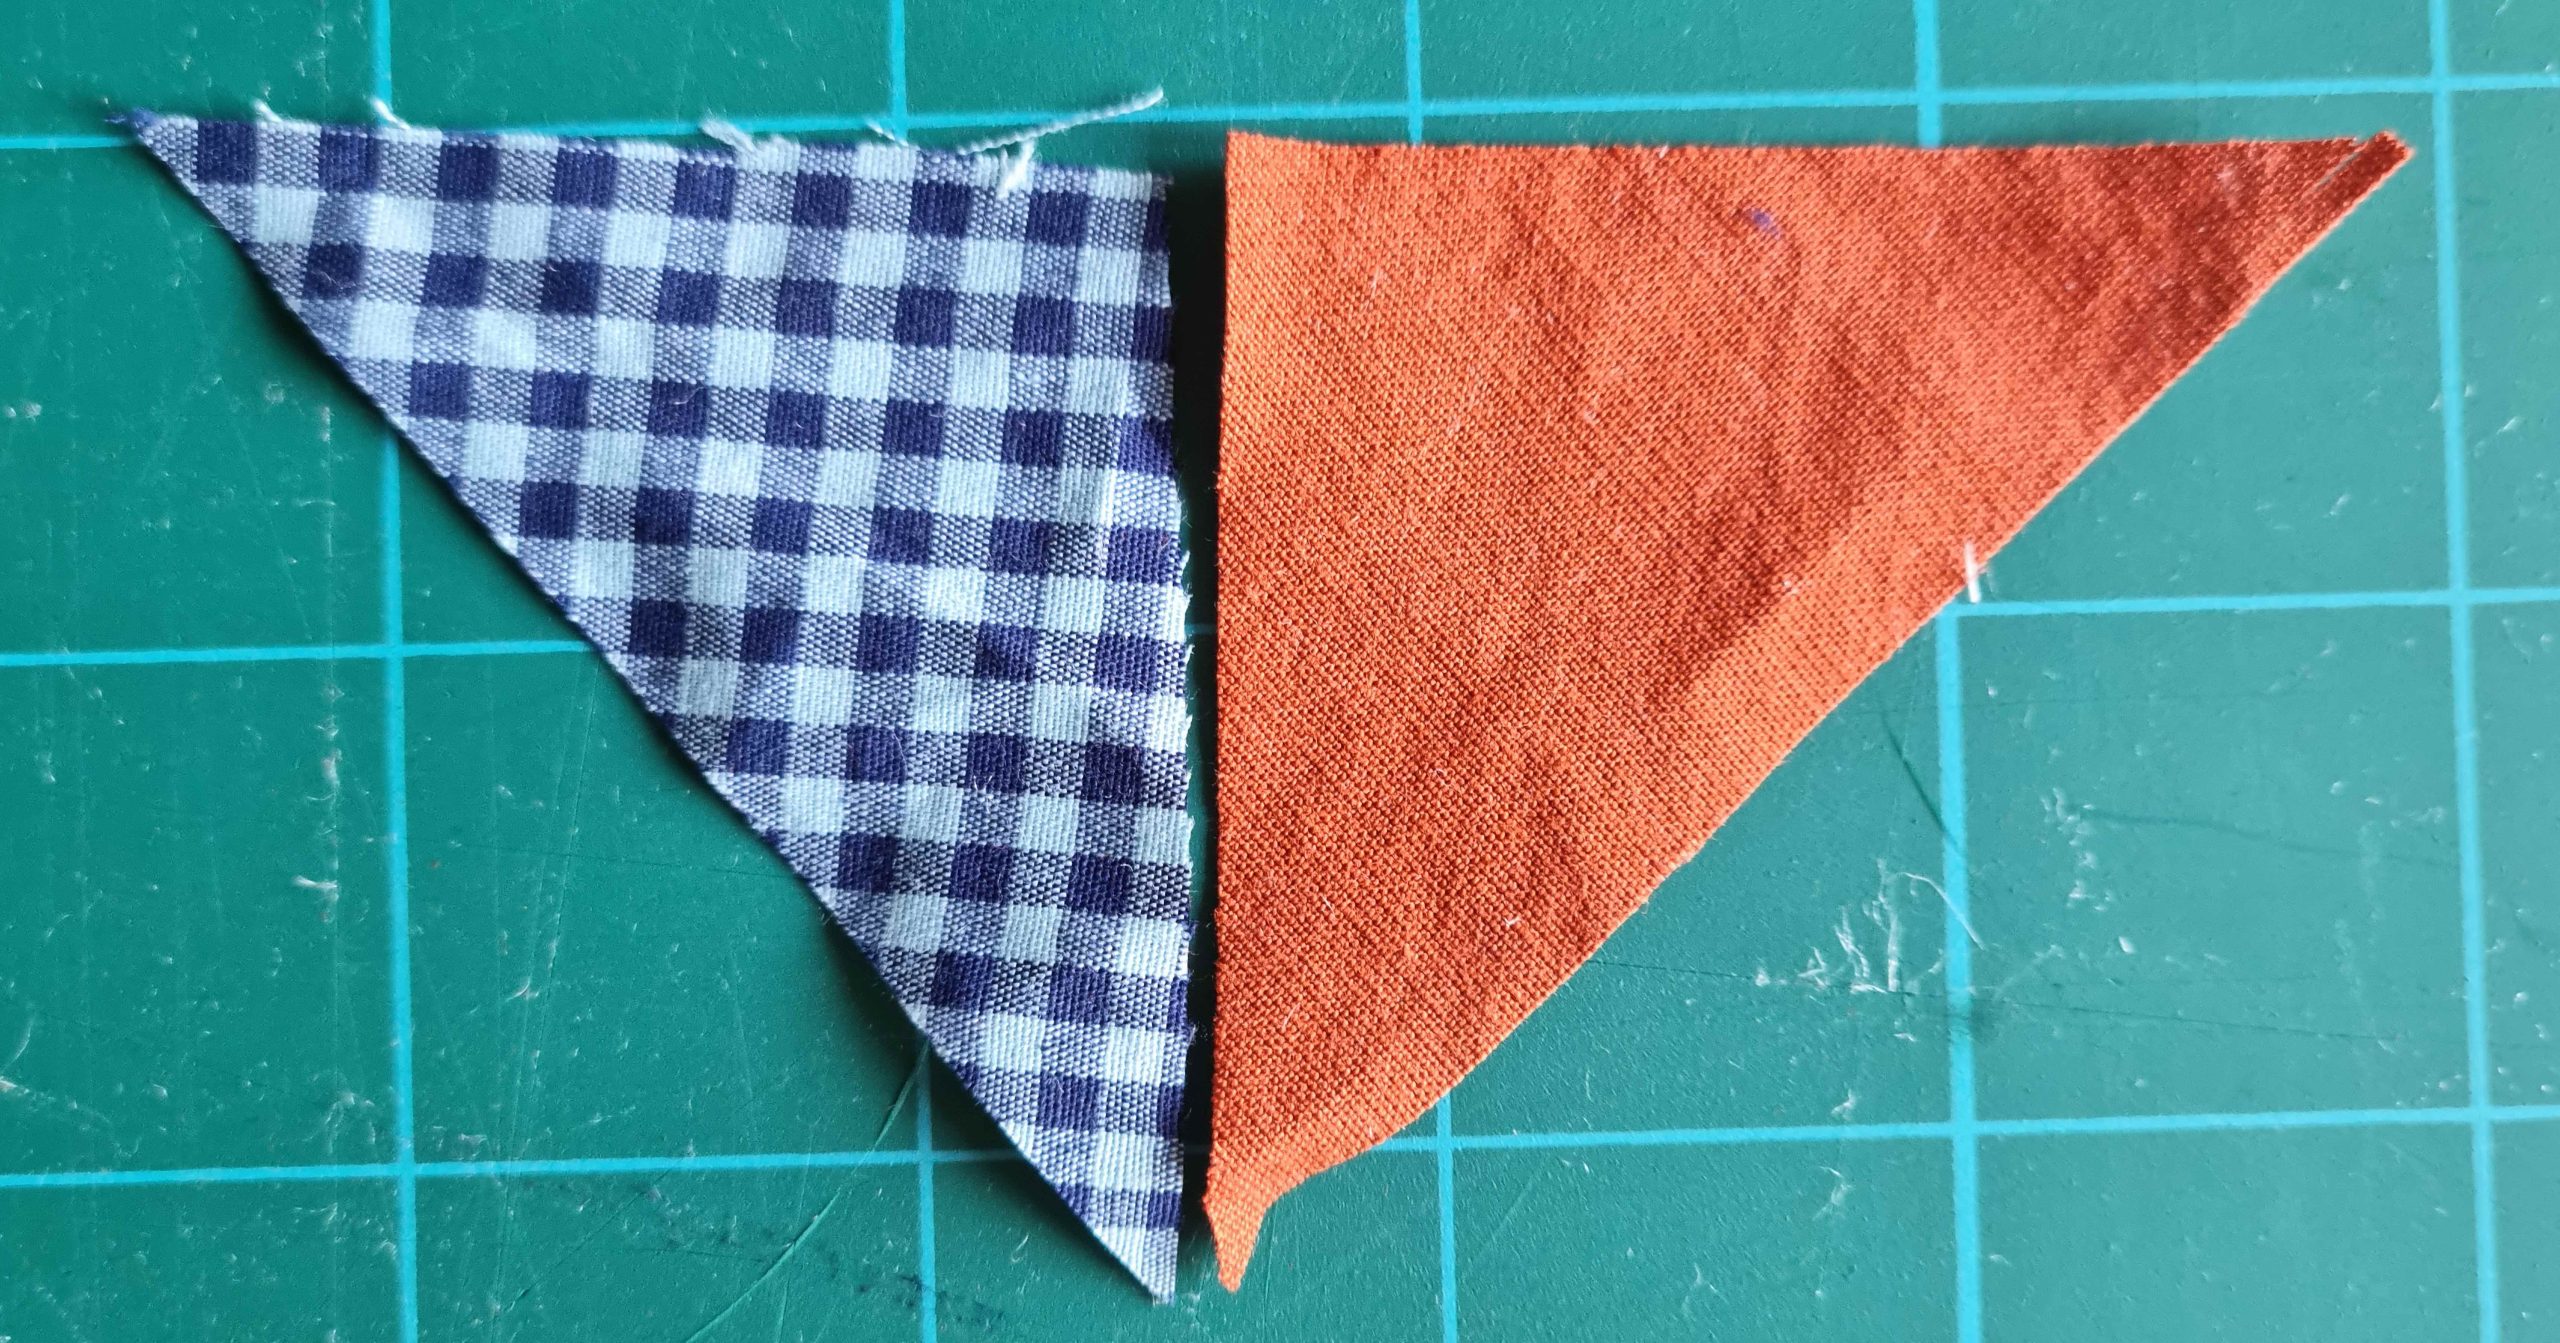
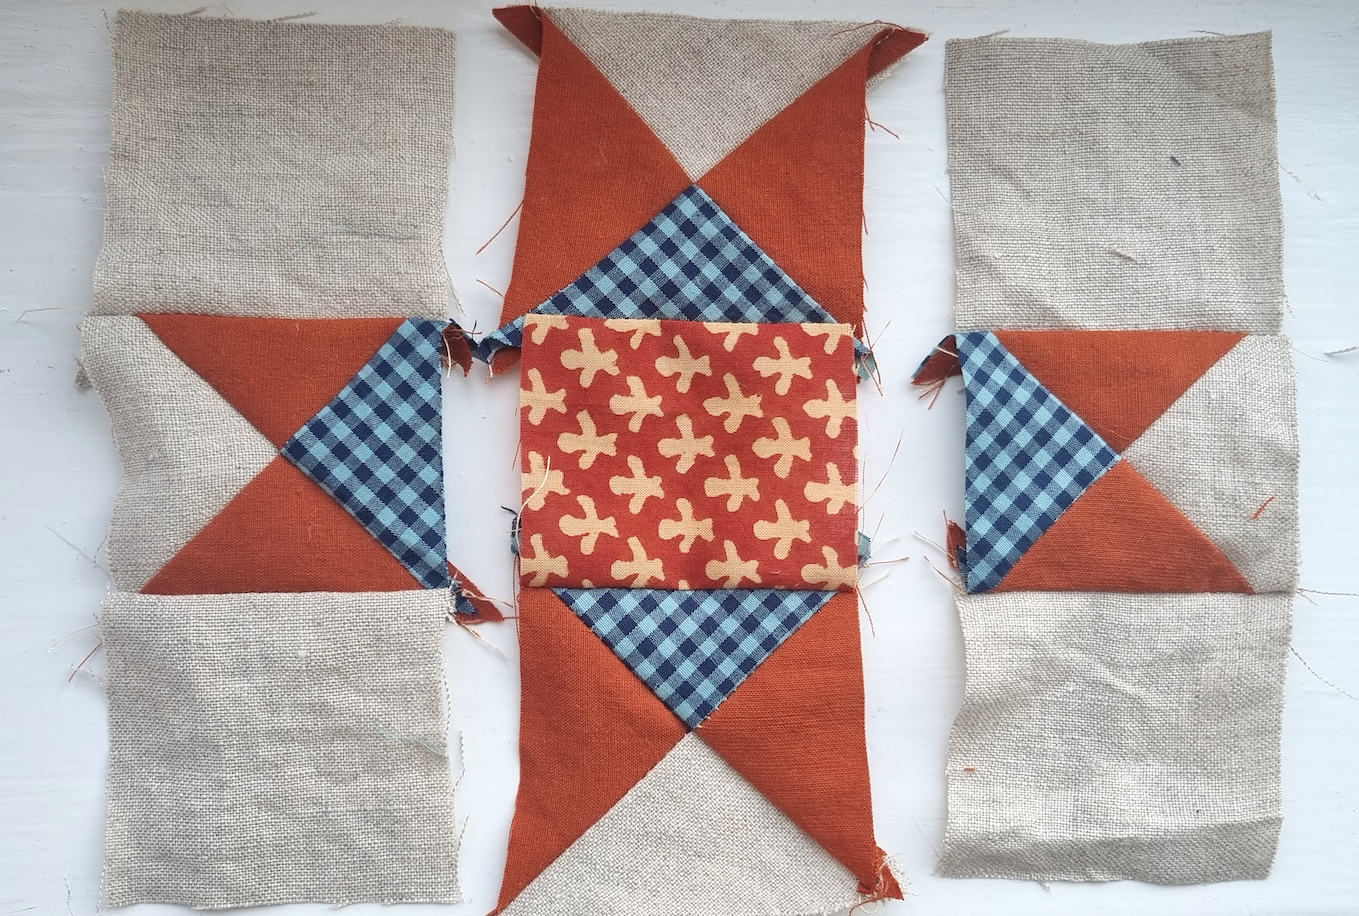
2. Make the points of your star using fabric 2, 3 and 4
Make your first square with four triangles. First, using a 1/2″ seam, join one fabric 2 and one fabric 3 along a short side:
Do the same with fabric 3 and 4. Then join it to the two triangles along the long edge, right sides together:
Do this four times, to make four squares. Make sure the triangles for fabric 3 are opposite, not next to each other within each square.
3. Join the centre square to two of the squares you’ve just made
Line up one of the squares you’ve just made, right sides together, with the centre square (fabric 1).

4. Join two plain squares of fabric four to either side of the 4-triangle square
Attach the plain squares on either side. Do this one at a time, by laying the plain square on top of the middle patchwork square, right sides together. Sew along the edge with a fabric 3 triangle, then repeat on the other side of the patchwork square to have all three squares joined:

Repeat this with your remaining three squares.
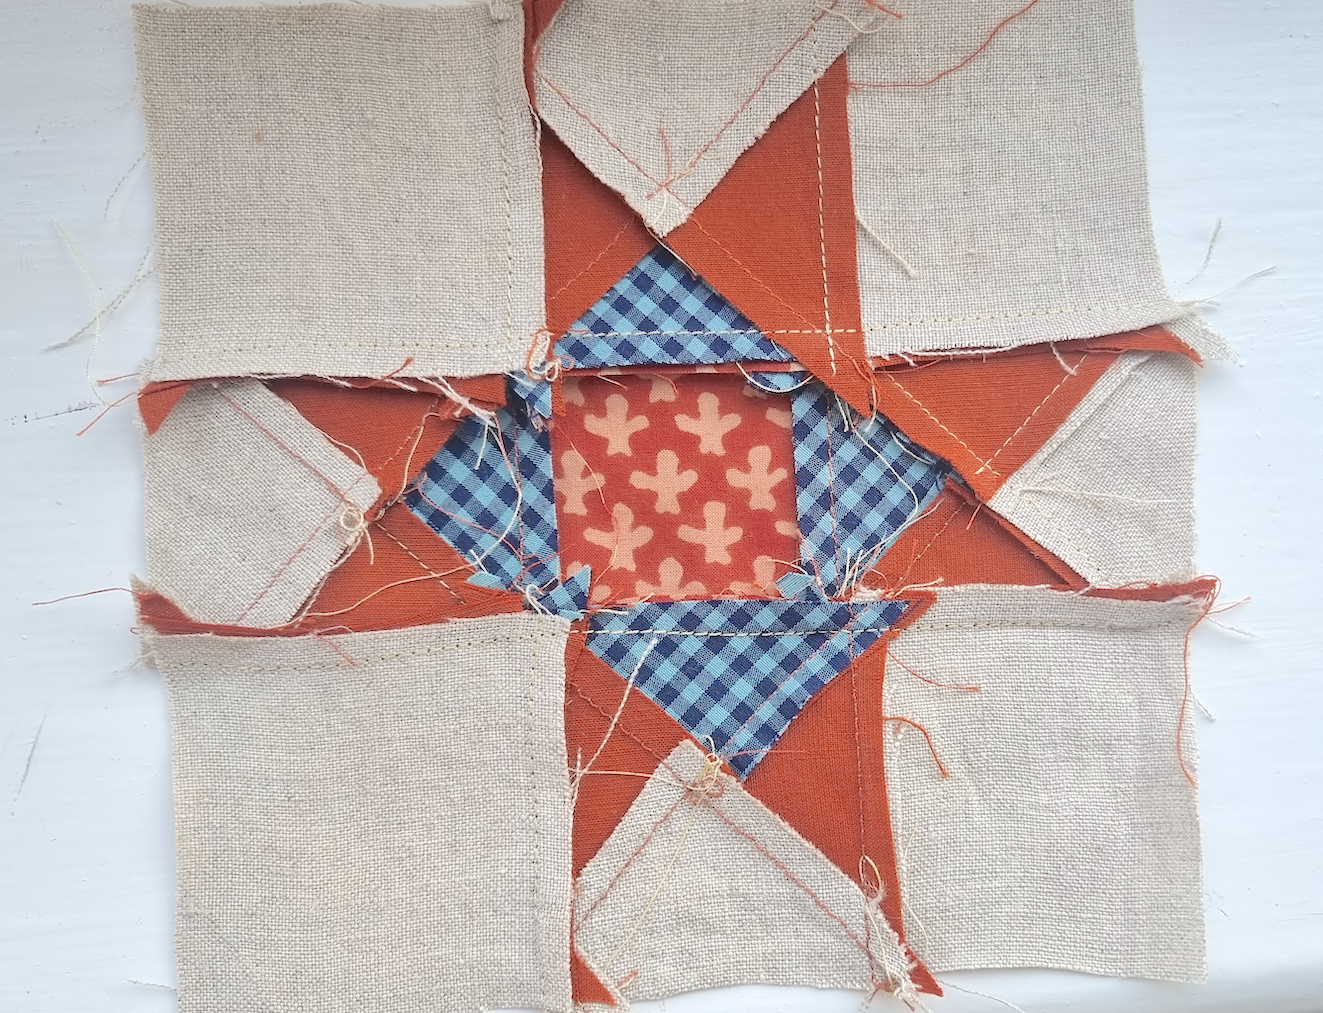
5. Join the three rows of squares together to make your square
Make sure your seams are meeting. Pin in place to stop them slipping apart as you sew.
It helps to have the seams facing in different directions:

6. Give it a good press
Do this from the wrong side, and make sure the seams lie flat.
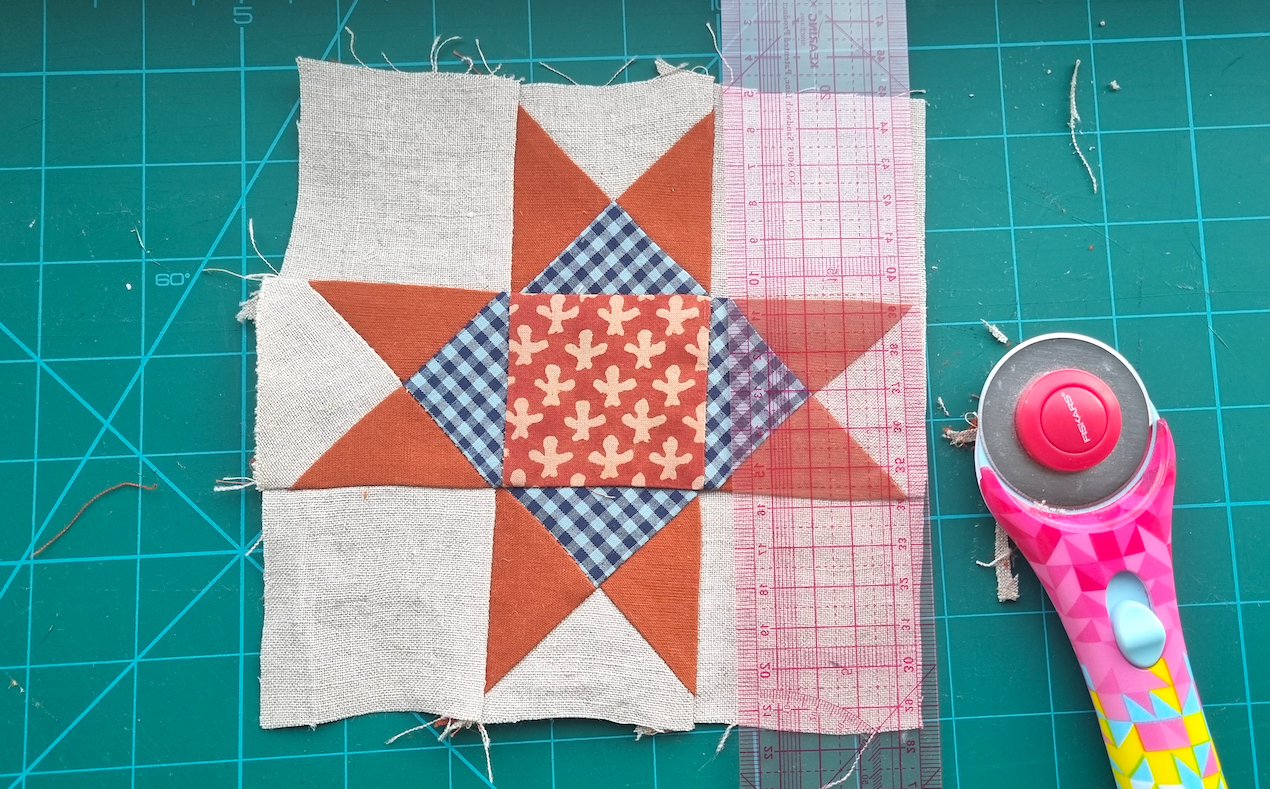
7. Trim the edges
You can trim the edge of the quilt square if you like – use a ruler and a cutting mat to get a square edge. A rotary cutter helps keep this neat.
All done!
You’ve made your Ohio Star quilt block. Next is deciding what you want to do with it! You could add binding around the edge to make a pot rest, or you could make more of them to join together for a quilt.
Check in for our next posts on quilting, where we’ll go over how to quilt your blocks, bind and create bags, wall-hangings and more.
Happy quilting!
Lorna x


 We’re thrilled to announce that we’ve partnered with Tree Nation, the platform to reforest the world & fight climate change! Home to over 90 planting projects in 33 countries, Tree Nation is a non-profit organisation that helps people & companies offset their CO2 emissions.