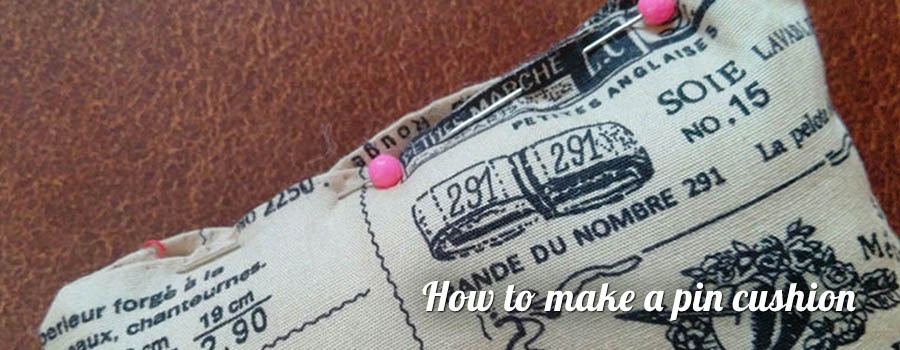
This basic pin cushion pattern needs scraps of fabric but, if you’re starting from new, buy no more than a metre of cotton fabric in a colour or pattern you like. Using these instructions as a basis, you can then make a basic cushion cover in addition to your pin cushion.
Materials:
– Scissors
– Pins
– Needle
– Thread
– Stuffing – fabric scraps are okay, as is proper toy stuffing, but consider using wire wool. Wire wool is an excellent stuffing for a pin cushion – it keeps your pins nice and sharp. Try it some time, even if not for this one. I have a pin cushion kit with fabric, stuffing, cotton thread, needle & pins and some button embellishments for sale in my Etsy shop.
In the pictures accompanying the instructions below, I have used a contrasting colour so you can see what I’m doing more easily.
Method:
Decide how big you think you want your pin cushion to be. I normally use a 4” square pin cushion as a starting size. We will be using quarter inch seams when we sew it together so draw out a 4.5” square on a piece of paper. This will be your template.
Pin your template onto the fabric in line with one of the edges of the fabric. We’ll talk selvages and grainlines another time! Cut two pieces.
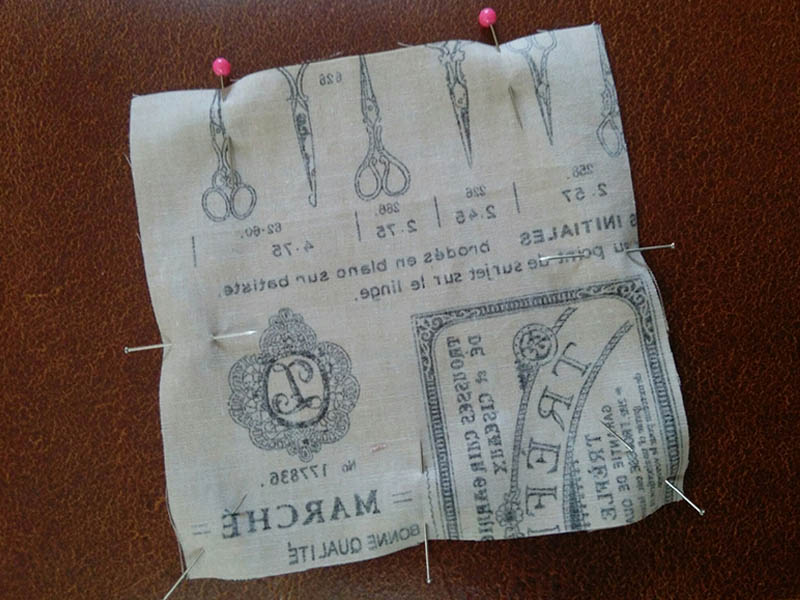
Place the 2 pieces of fabric right sides together and pin. You don’t need to use your whole box of pins, a couple will do! Pin the fabric on 3 sides and then, on the fourth side, place a pin 1 inch in from each corner. The pink pins in the picture are 1 inch in from the corners.
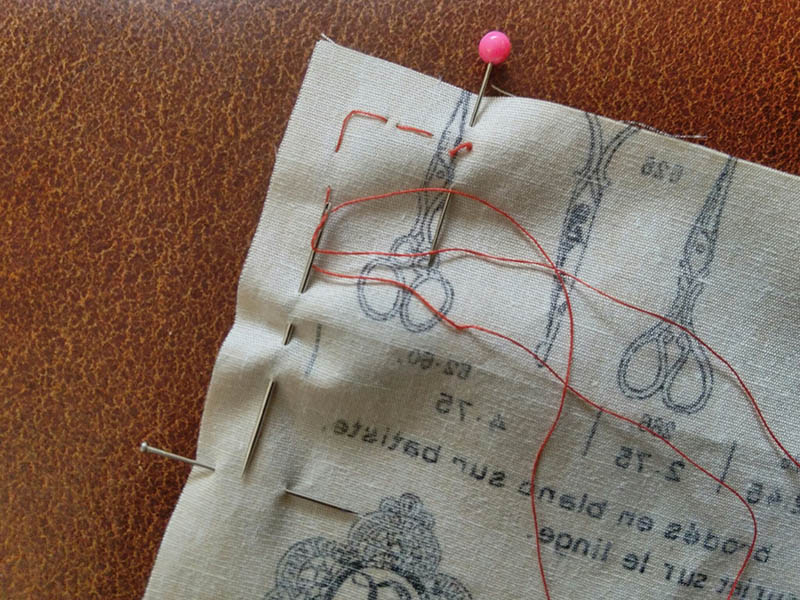
We are going to sew now – excited? Thread your needle and put a knot in the end.
There are 2 ways to sew this by hand: I will show you a method using a running stitch and then how to sew it with a back stitch.
For a running stitch, you simply take several small stitches, weaving the needle in and out of the fabric before pulling it through. Repeat. If the seam is sewn with small stitches, this will be secure enough for a pin cushion – but it is also possible to sew the running stitch around the entire seam twice, to strengthen the stitches. Use whichever one you feel happiest with – small stitches aren’t always the easiest to sew.
For a back stitch, the stitching is slightly different but much stronger. Bring the needle up from the back of the fabric, pulling the needle & thread through. Take a stitch backwards, approx 1/8” in length and bring the needle out about 1/8” in front. Repeat, bringing the needle into the end of the last stitch and bringing it out the same distance in front.
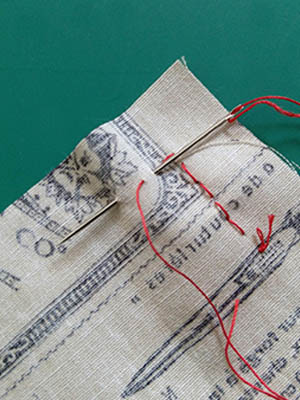
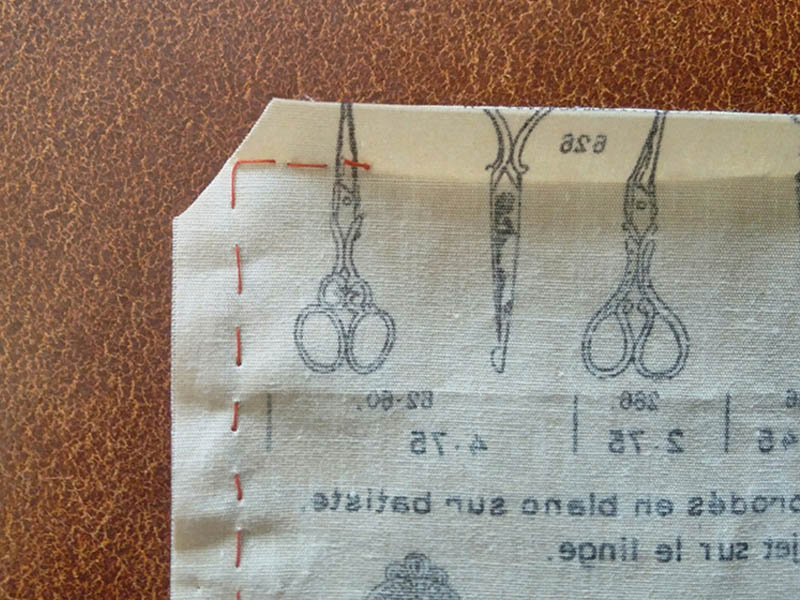
Whichever stitch you choose, starting next to one of the pins located 1” from the corner, sew to the corner and continue round to the final pin on the side you started with. Leave the gap between the pins un-stitched (see picture)
Here is the daring bit – trim the corners as this makes turning the pin cushion easier and gives you a better chance of having square corners! Take your small scissors (if you have some) and cut across the corner close to but not through the stitching.
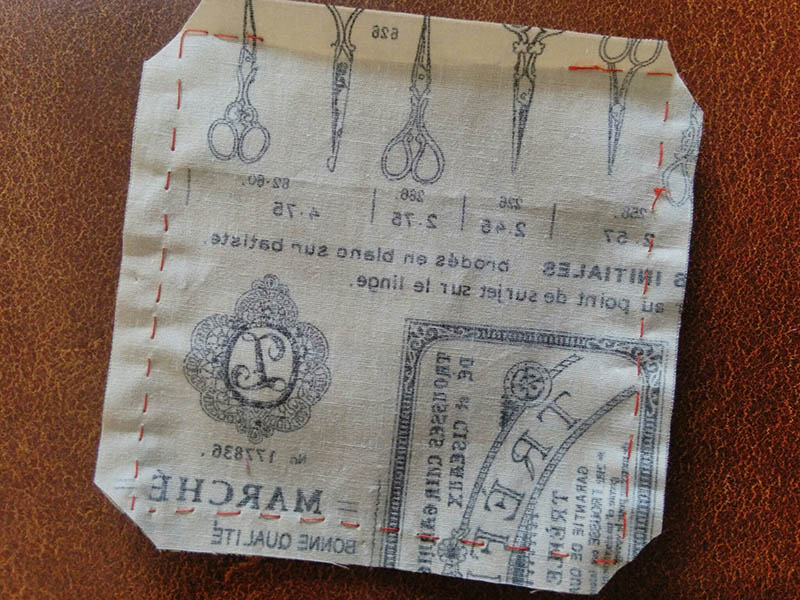
And if you do get carried away and trim through the seam, don’t despair! Grab your needle and thread and, starting half an inch from your corner, stitch up to and around the trimmed seam allowance. Your corner may be slightly rounded now but it doesn’t really matter, does it? See – over-zealous trimming is now fixed!
Turn the pin cushion right side out through the hole you left in the side of one of the seams. Using your fingers – or something blunt like a chopstick, biro (with its lid on) – and gently push the corners out until you are happy. Perfection is not mandatory.
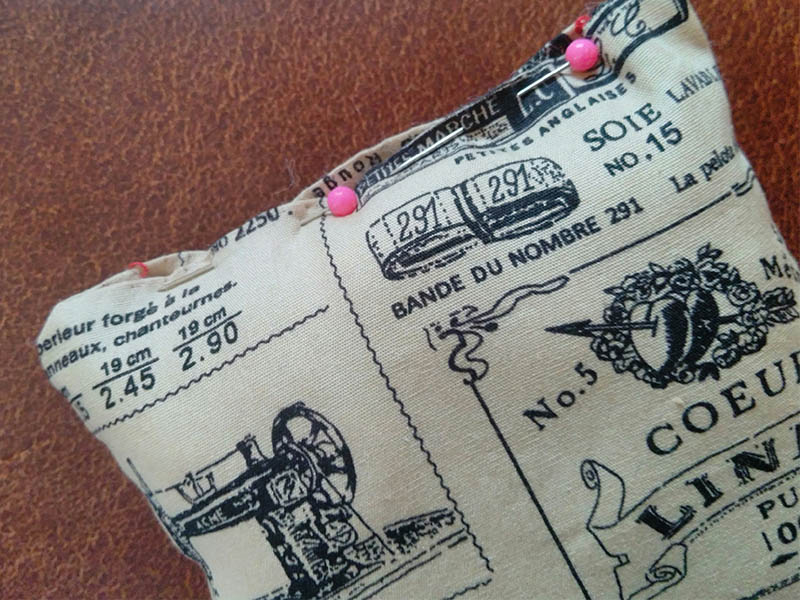
Now fill your pin cushion with whichever stuffing you have decided on.
The pin cushion can be filled to bursting if you want – once it is as full as you want it to be, pin the open edges together, tucking the raw edges to the inside. Have a look at my picture to help you.
We’re not going to do anything fancy to close the gap – thread your needle with some more thread and do a small running stitch across the gap to close it.
Ta-da! A nice relaxing bit of sewing and a finished pin cushion.
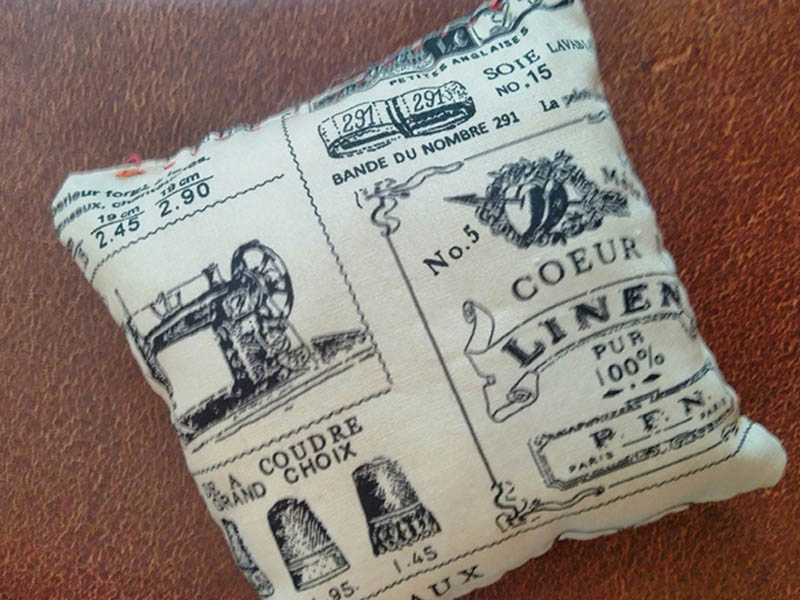
You could sew one of the buttons onto the front of your pincushion to make it even more your own creation.
If you buy the interior of a cushion from your local market, you could use the method above to make a basic cushion cover – more stitching but wow, what an achievement! You would need to measure the size of the cushion inner and add half an inch to each side for your seam allowances. A rectangular cushion inner is also easy!
For example, for a 12” square cushion inner, cut 2 pieces that are 13” square. A 15” by 10” rectangular inner would need 2 16” by 11” pieces. You get the idea – but measure twice, cut once!
You could also make a cushion cover with a zip – but we’ll do that another time.
Alison runs Scissor Sistas – check it out!


 We’re thrilled to announce that we’ve partnered with Tree Nation, the platform to reforest the world & fight climate change! Home to over 90 planting projects in 33 countries, Tree Nation is a non-profit organisation that helps people & companies offset their CO2 emissions.