
Ric rac braid has become increasingly popular over the last few years, and it’s easy to see why – you can use it on just about everything! It comes in a wonderful array of fun colours, and I’ve seen it used in lots creative ways.
First invented in the 1800s, it was often used as edging for finishing garments. Today, there’s so much you can use ric rac for – whether it’s decorating clothing or something for your home like curtains and cushions.
Have a look through sites like Pinterest and Instagram for some ideas.
Getting inspired by ric rac
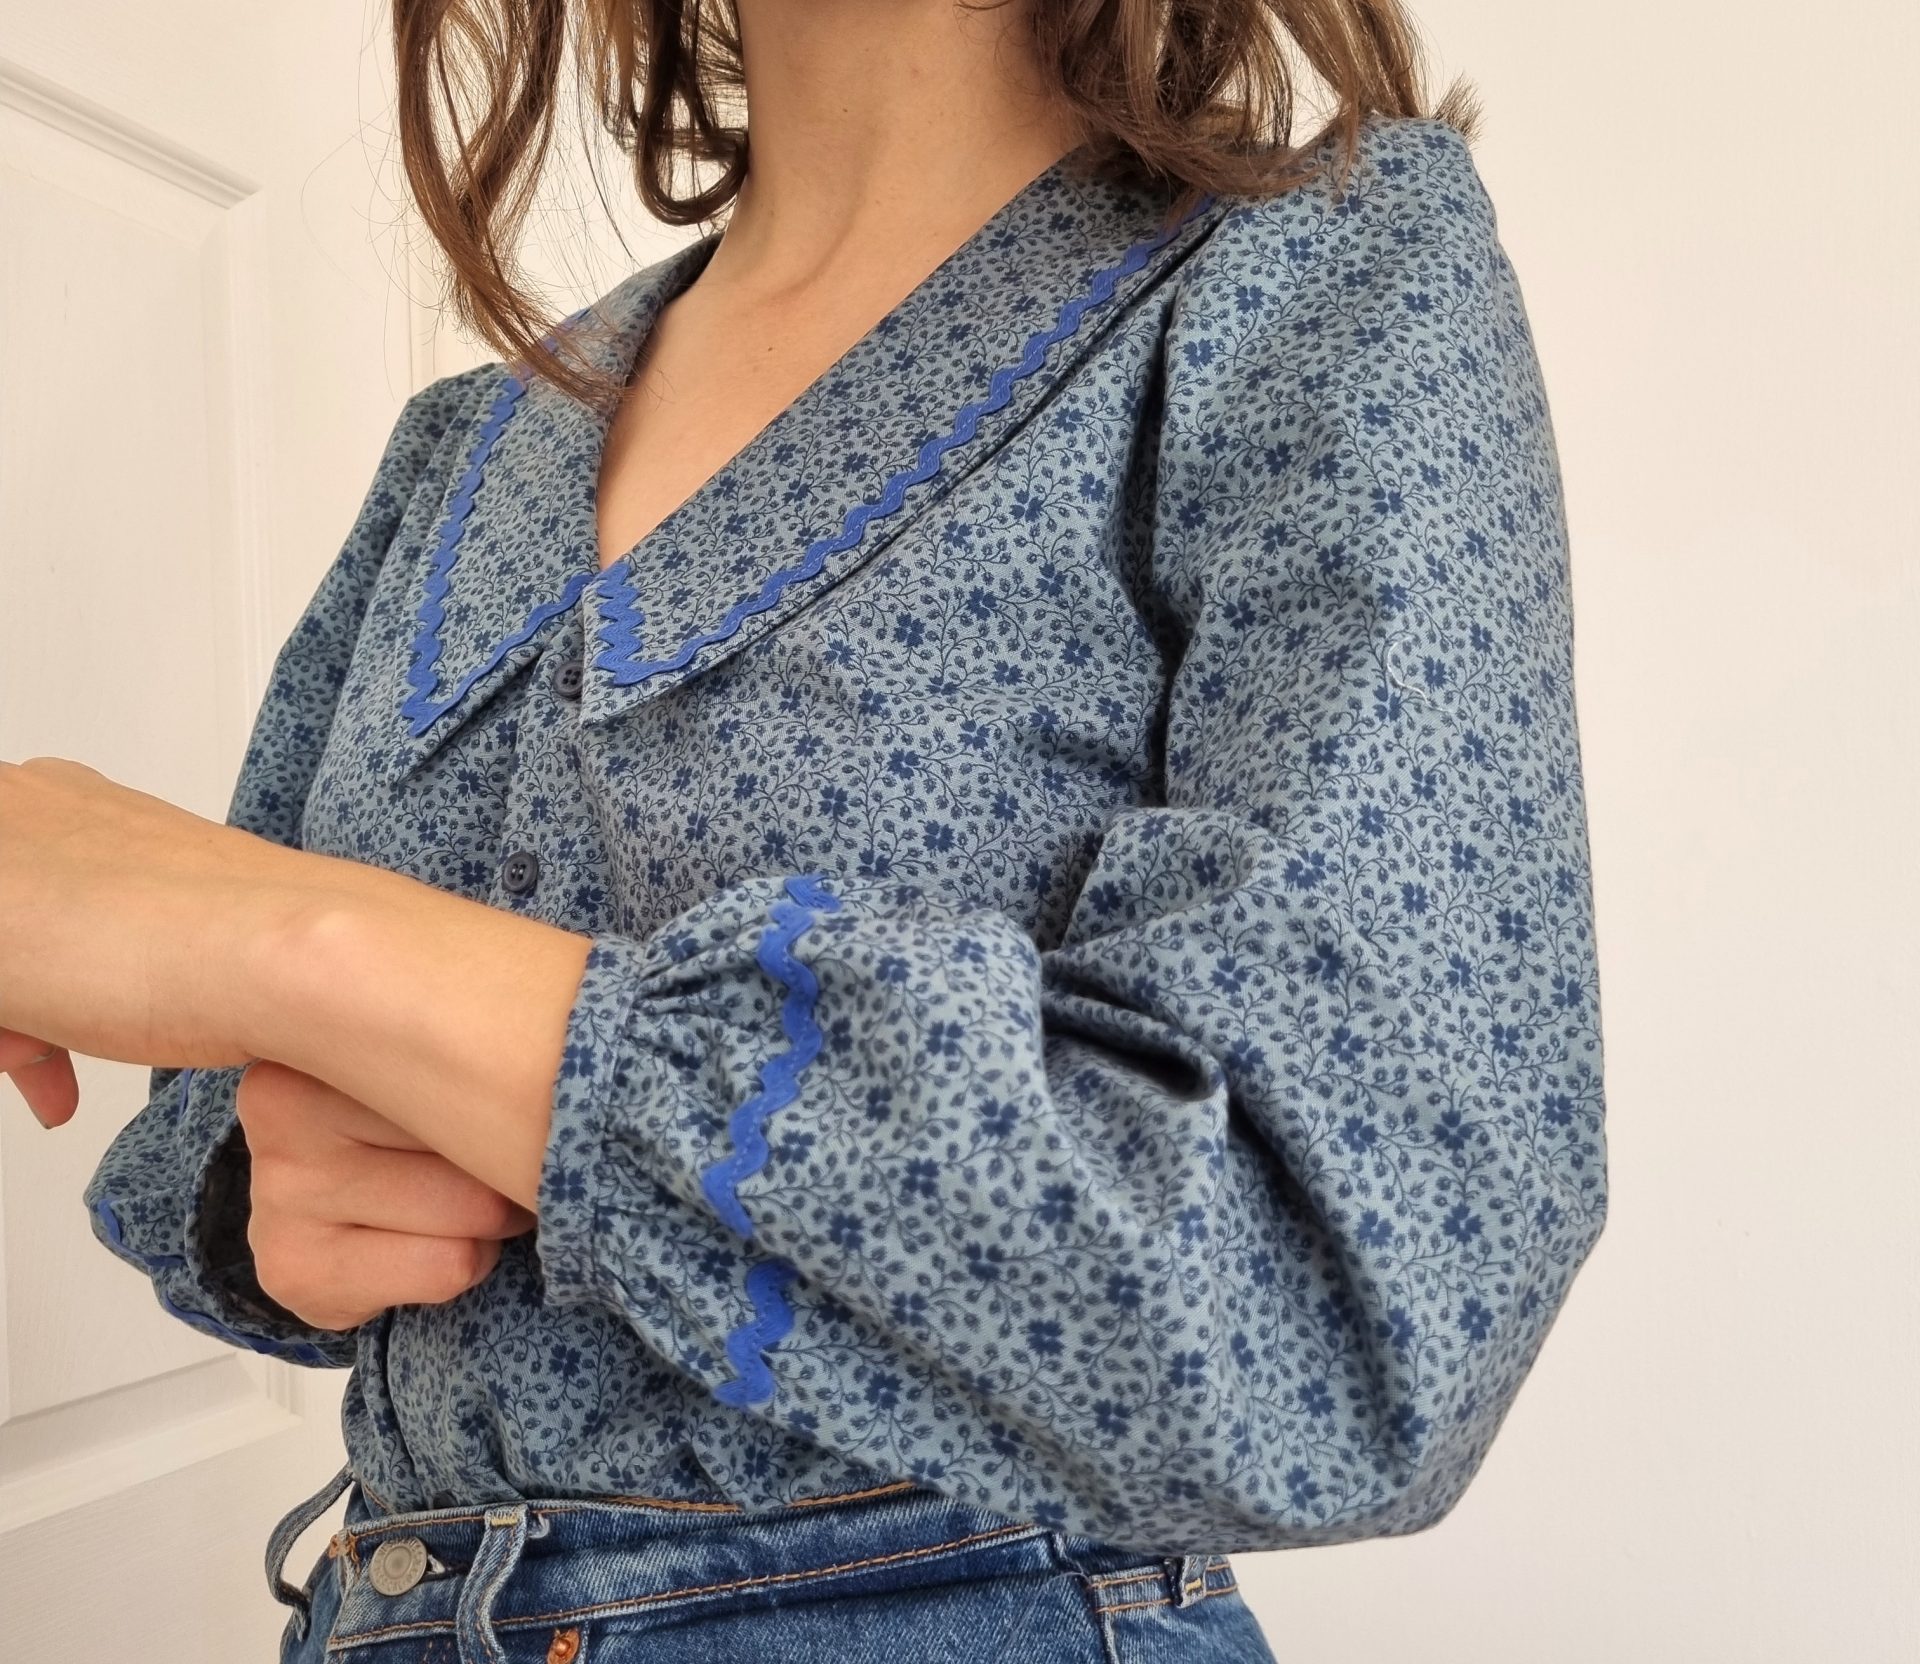
I’ve been thinking of a way to use ric rac that recognises its history, but with a fun twist. In the end I decided on one bigger project (a big, collared blouse), and also a smaller, scrap-busting one!
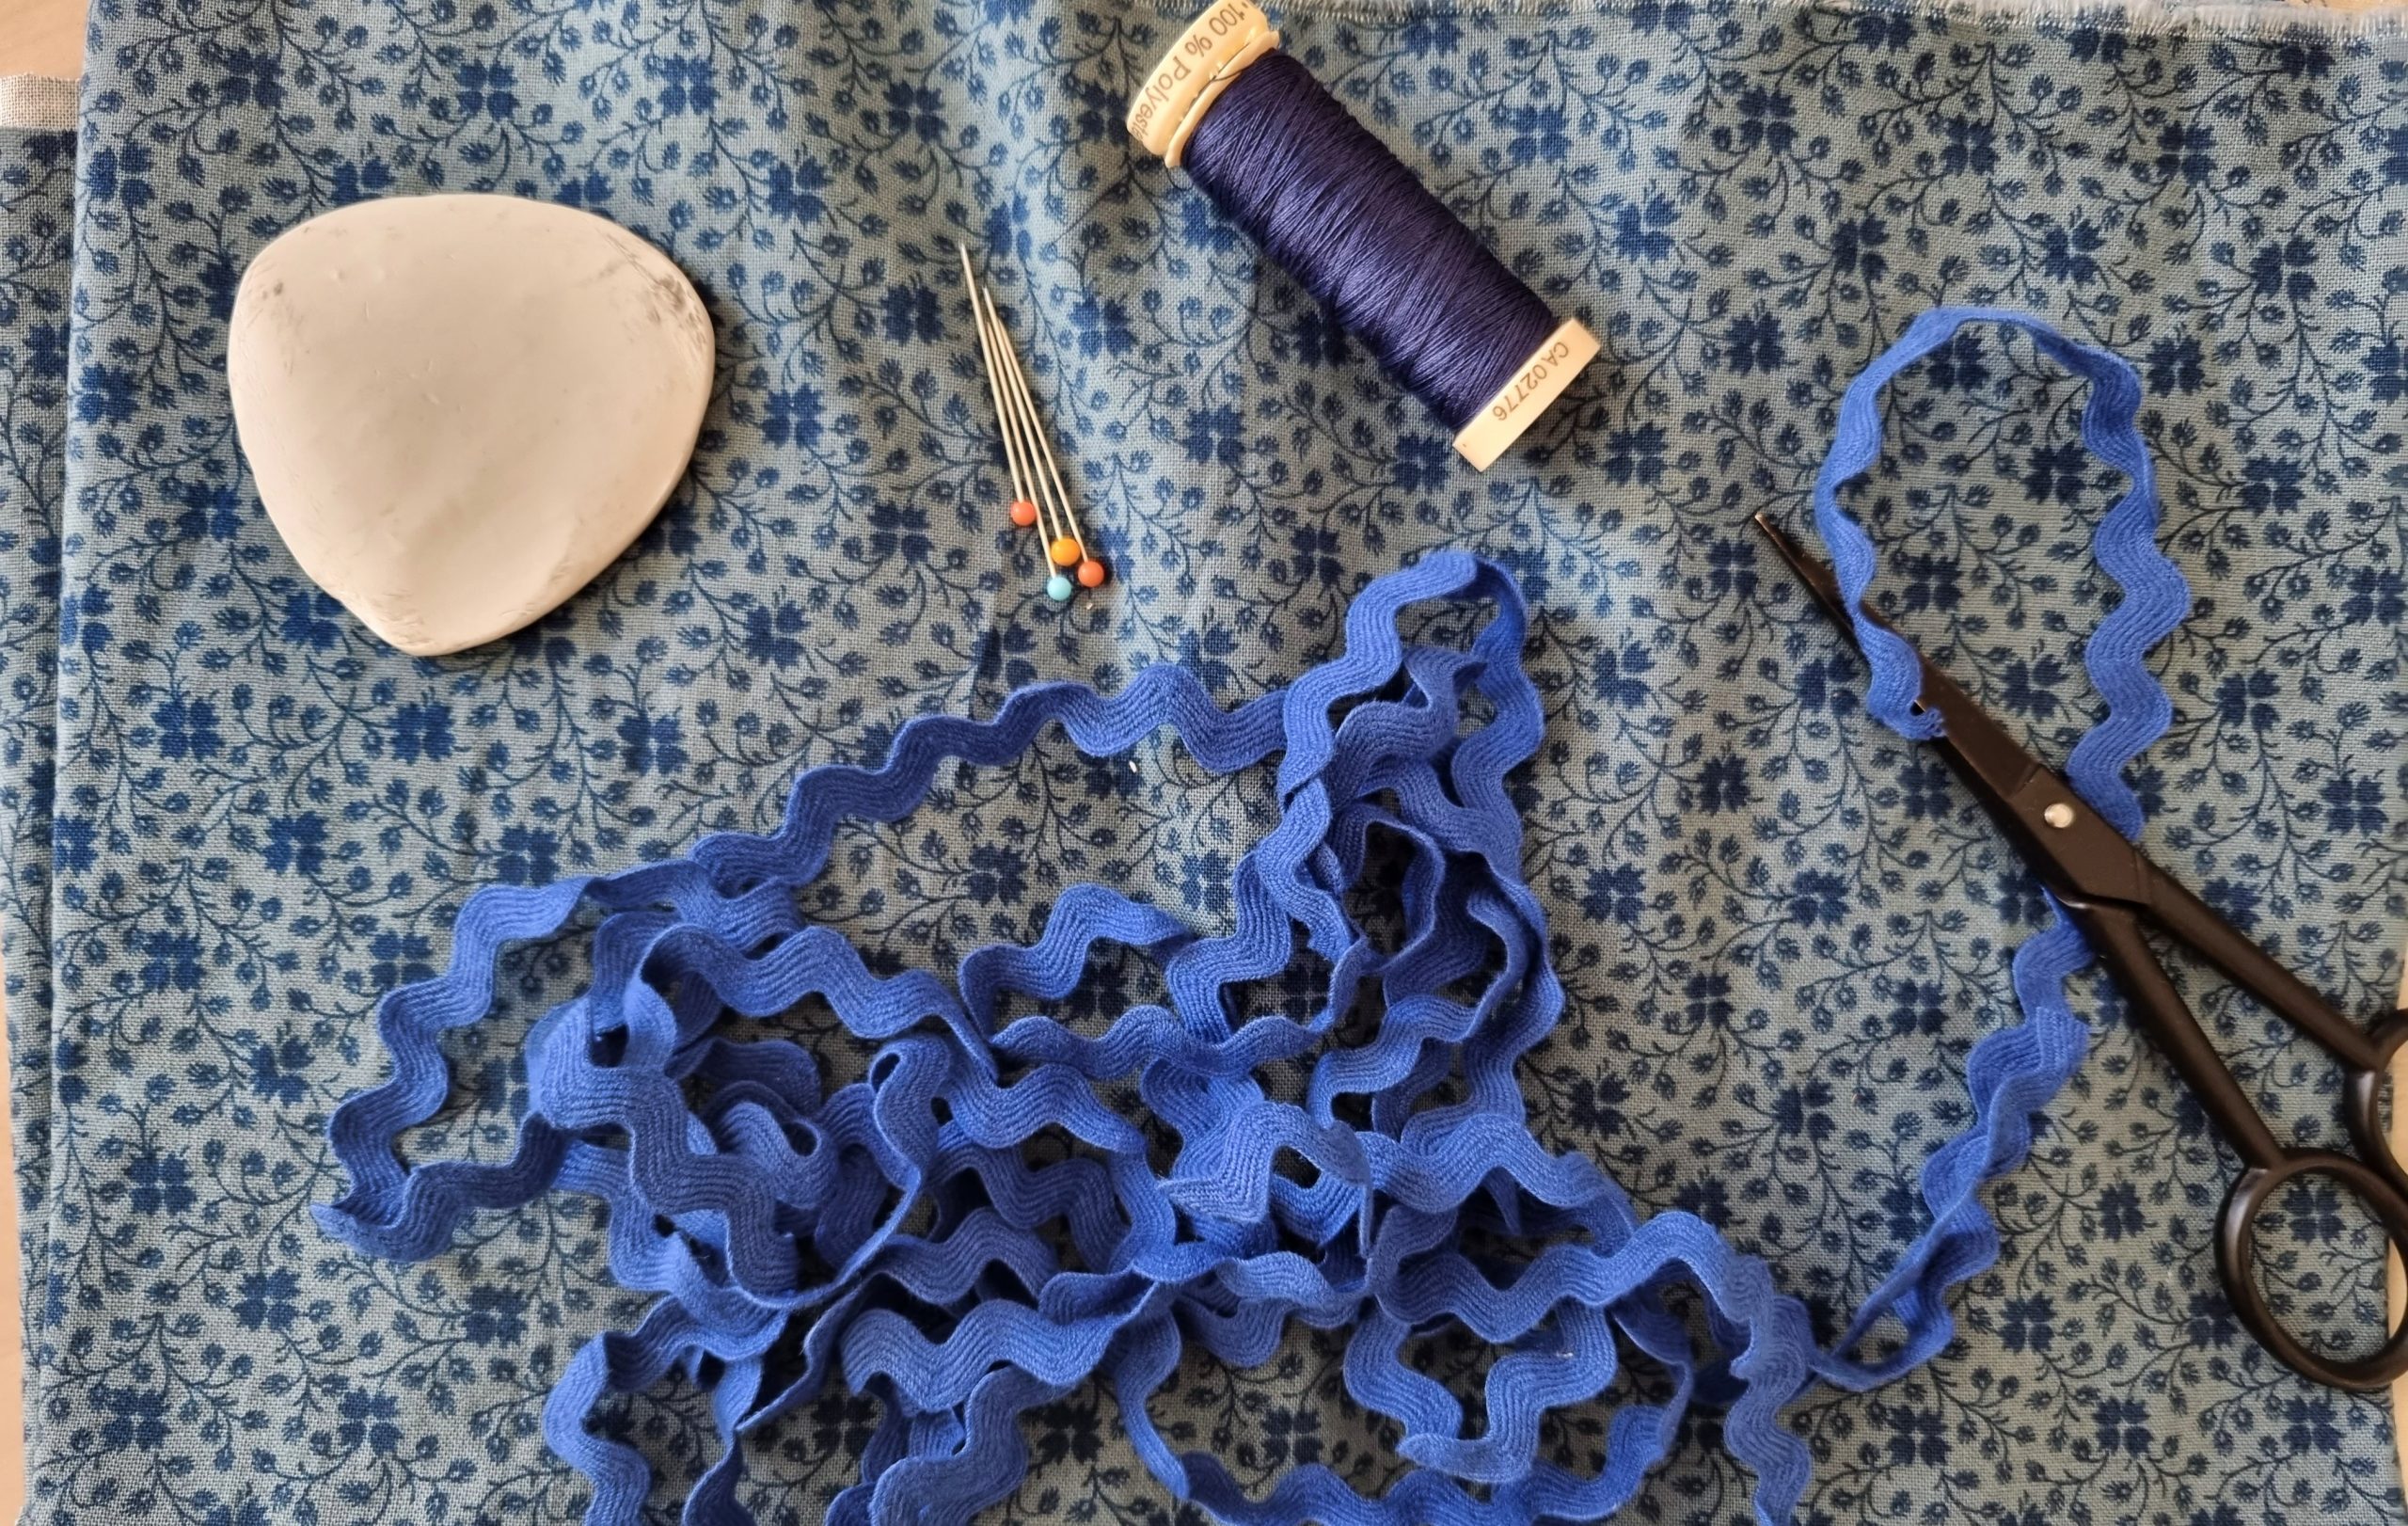
Big collars and puffy blouses are a huge trend at the moment, and are hopefully here to stay. If not, I’m going to keep wearing them anyway! I chose this floral cotton from my local fabric shop, and was excited to pair it with this mid-blue ric rac from William Gee. I quite enjoy the blue-to-blue low contrast, but the extra detail makes it look really fun and special, I know it’s one I’ll wear a lot!
Read on for the extra idea at the end – if you feel like a quick and fun project, this second one is for you!
The ric rac statement collar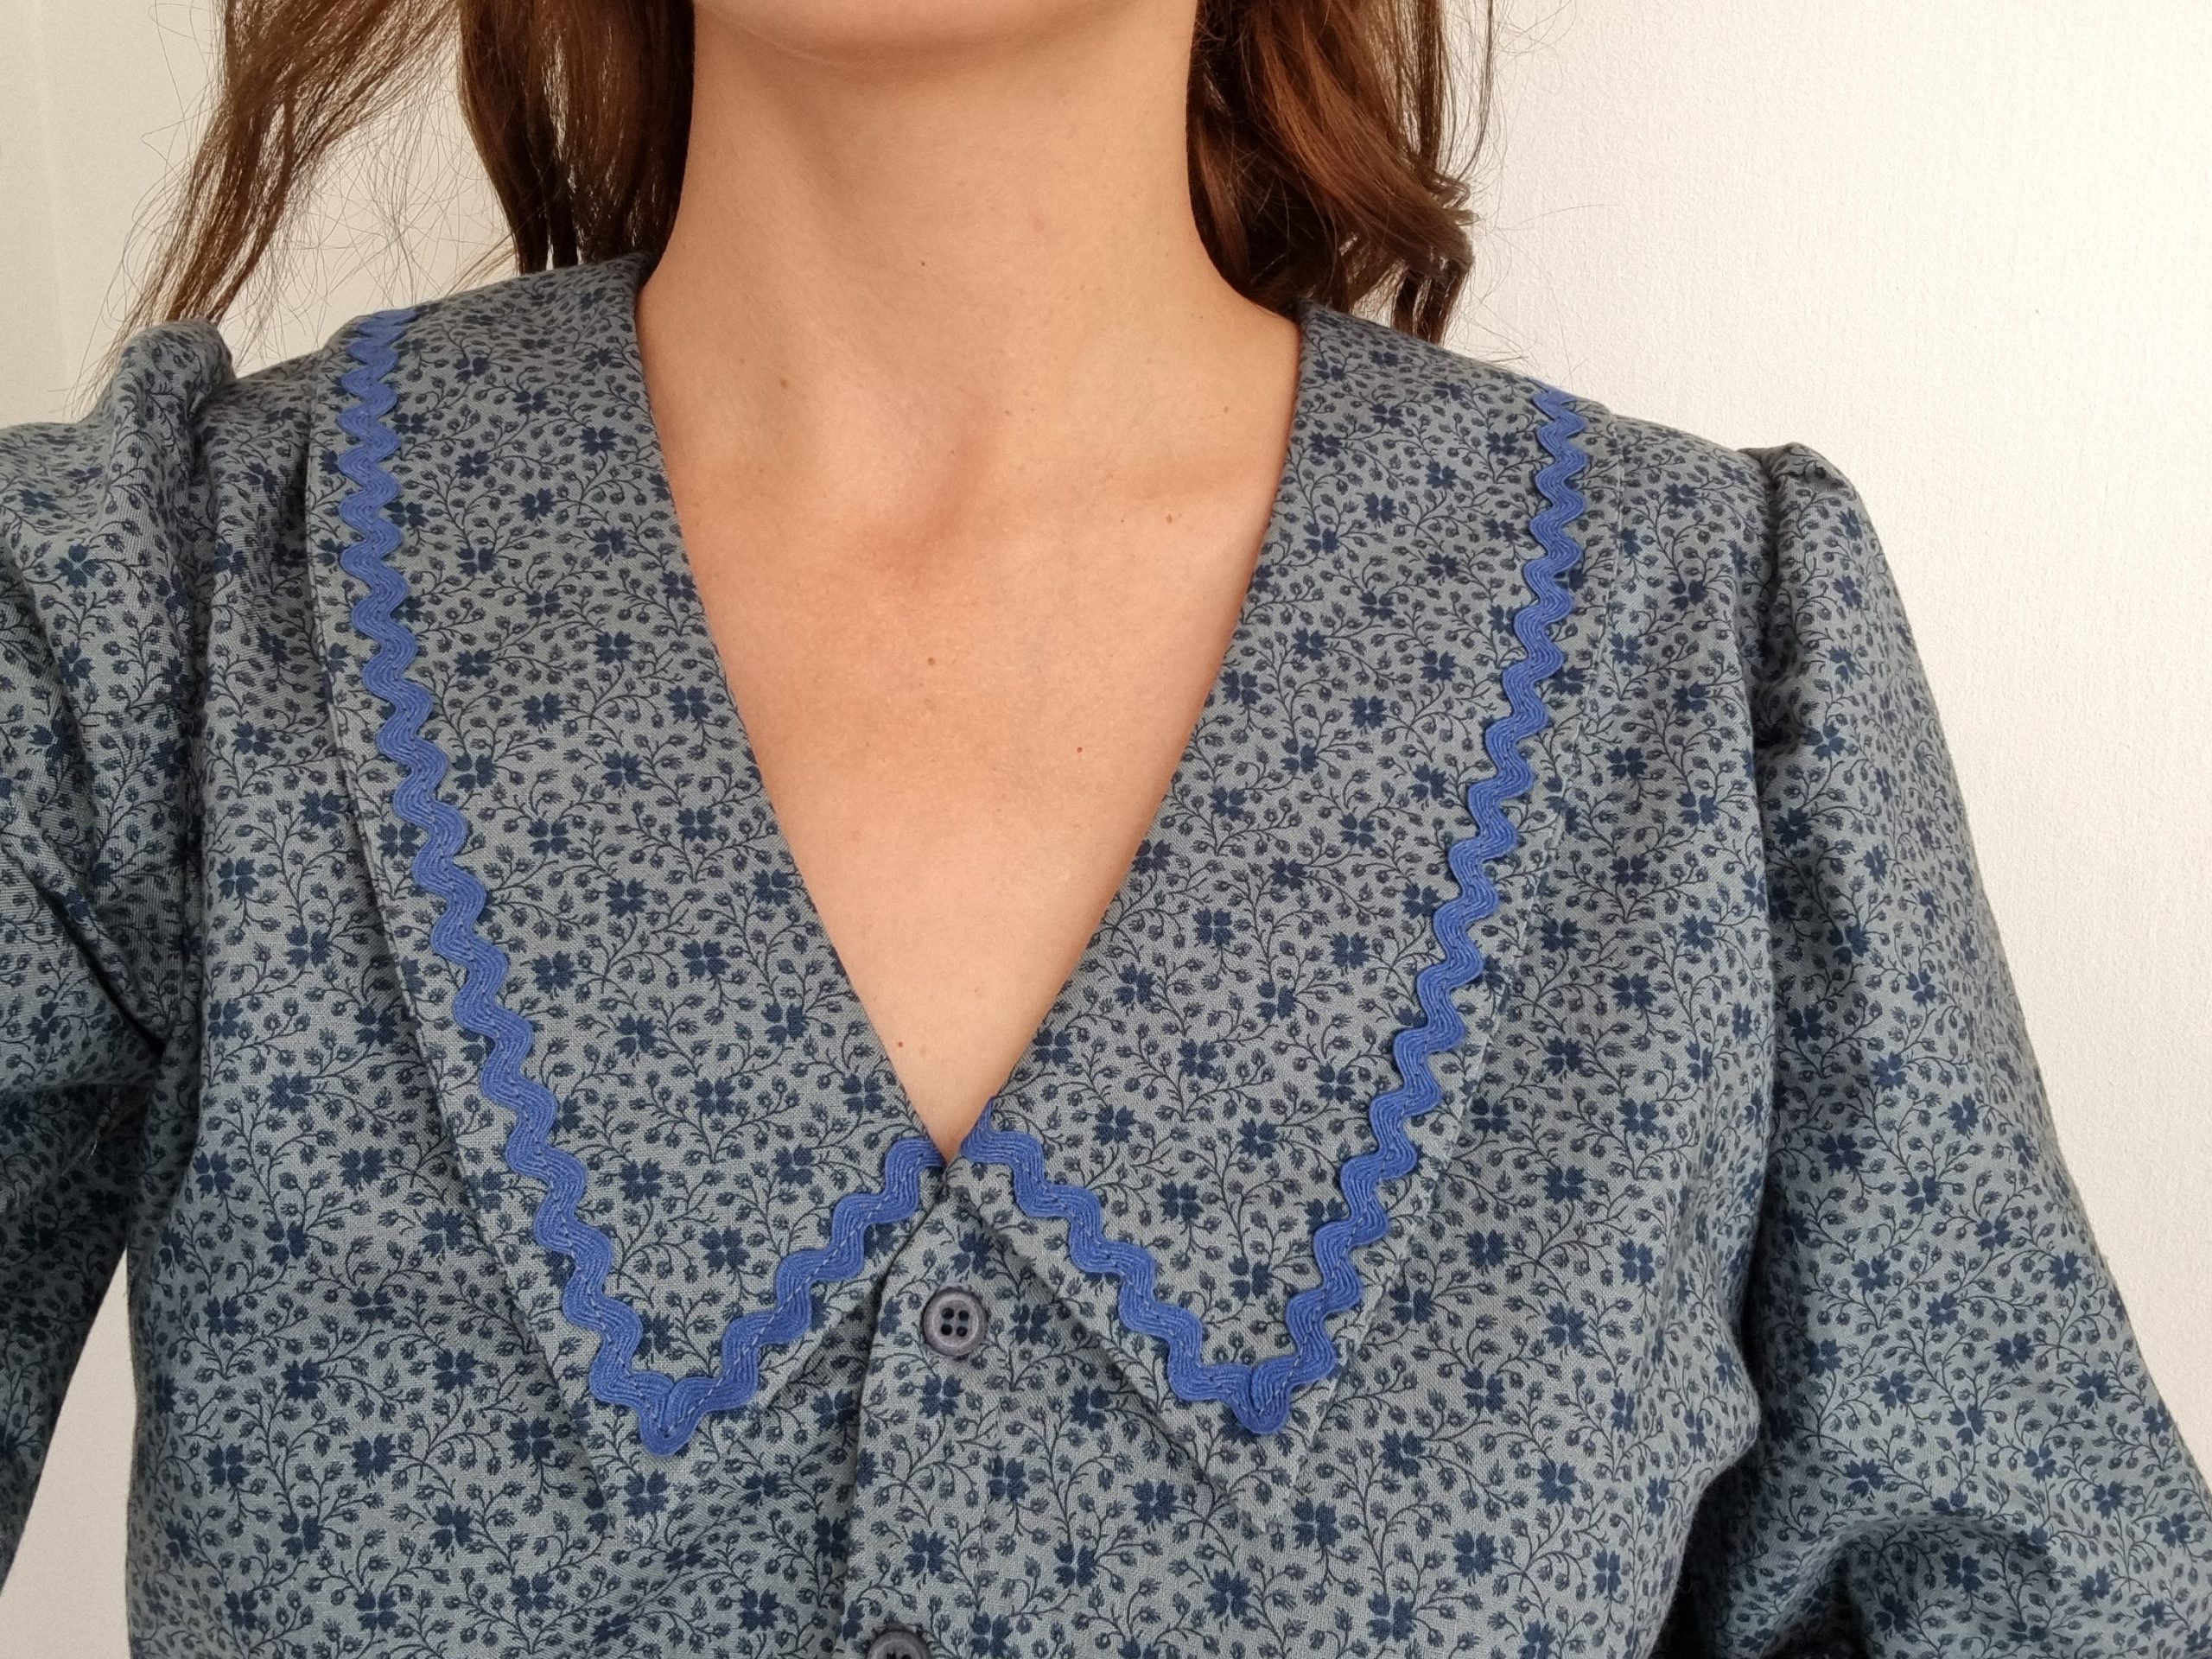
As ric-rac is woven it has a slight bit of stretch in it, so this (combined with its wavy shape) means it’s perfect for going around corners. I chose a pattern with a big, statement collar, and made it up until it was time for the collar. Here’s my step-by-step of how I attached it:
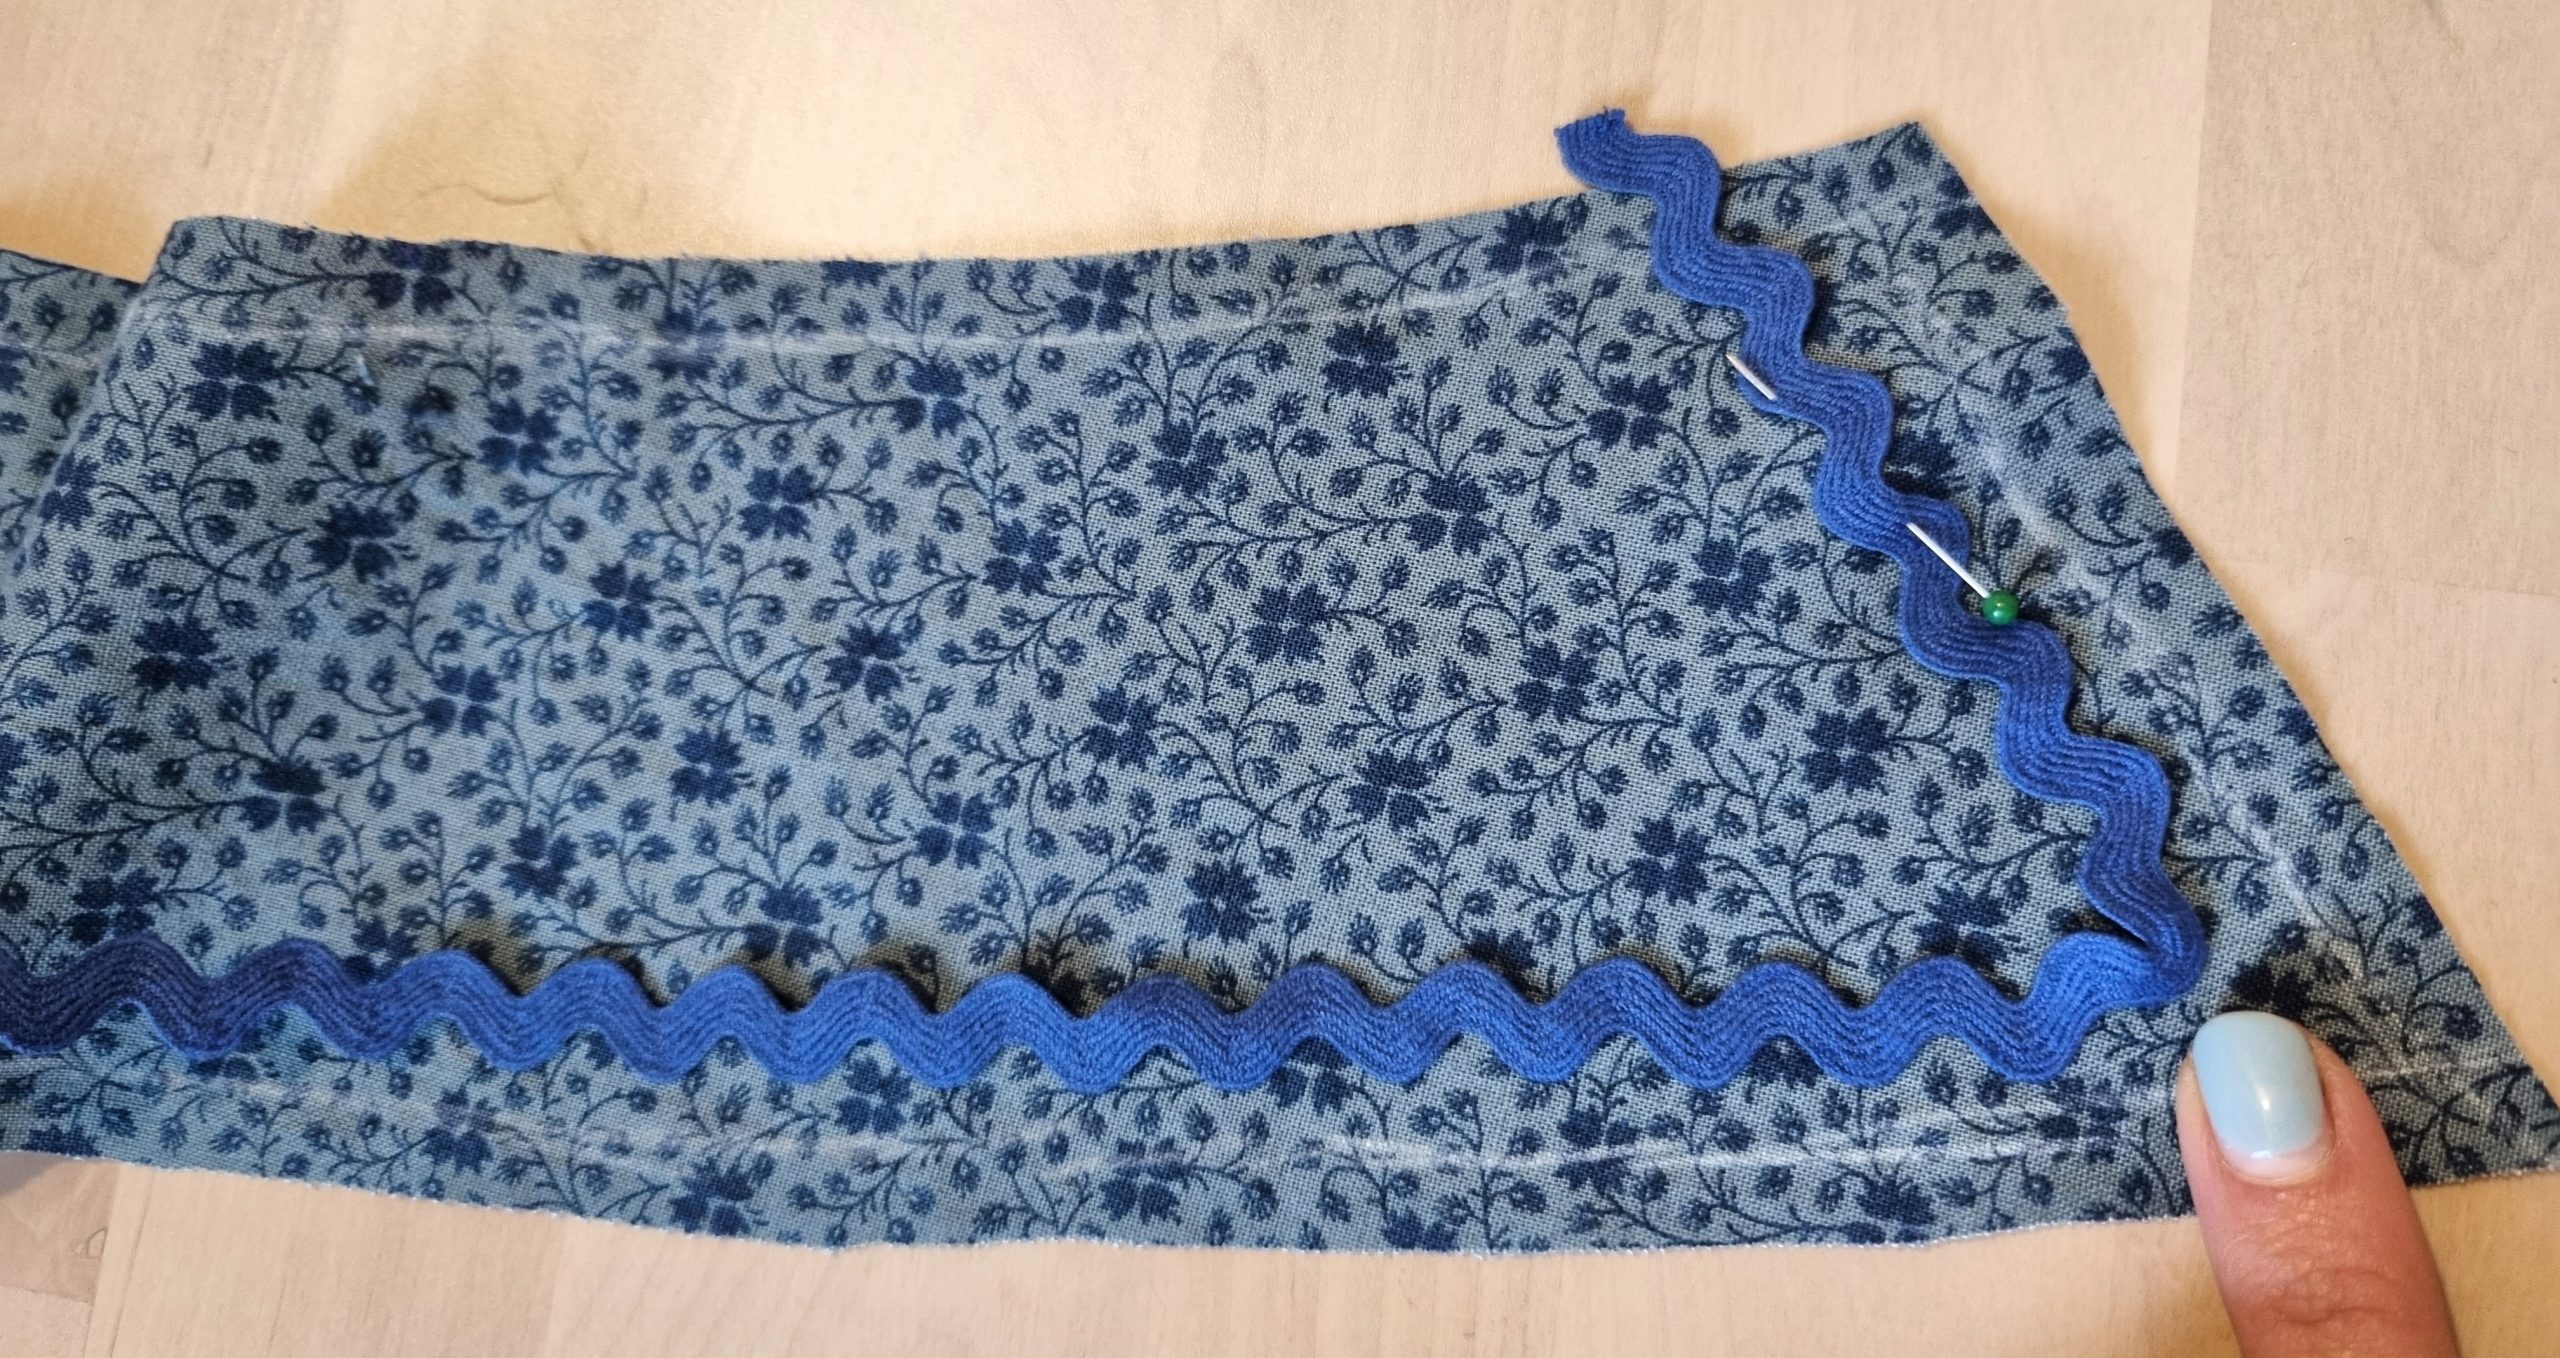
- Lay your collar fabric pieces out. Arrange your ric rac in the style you’d like on the right side of the top collar.
- Double check what the seam allowance of your pattern is and make sure it won’t be caught up in that. I sketched my seam allowance on as a guide and placed it about 1cm in from there.

- Make sure the point of the ric rac curve points down to the corner of the collar, it’ll help with keeping it lying flat! Leave a little excess at the ends and pin in place.
- Very carefully sew down the centre of the ric rac. This can be a bit tricky when you’re looking at the waves! I always look slightly ahead of where I’m sewing – to where I want to end up. This helps with sewing a straight line. Pivot around the corner to keep sewing down the middle of the braid.
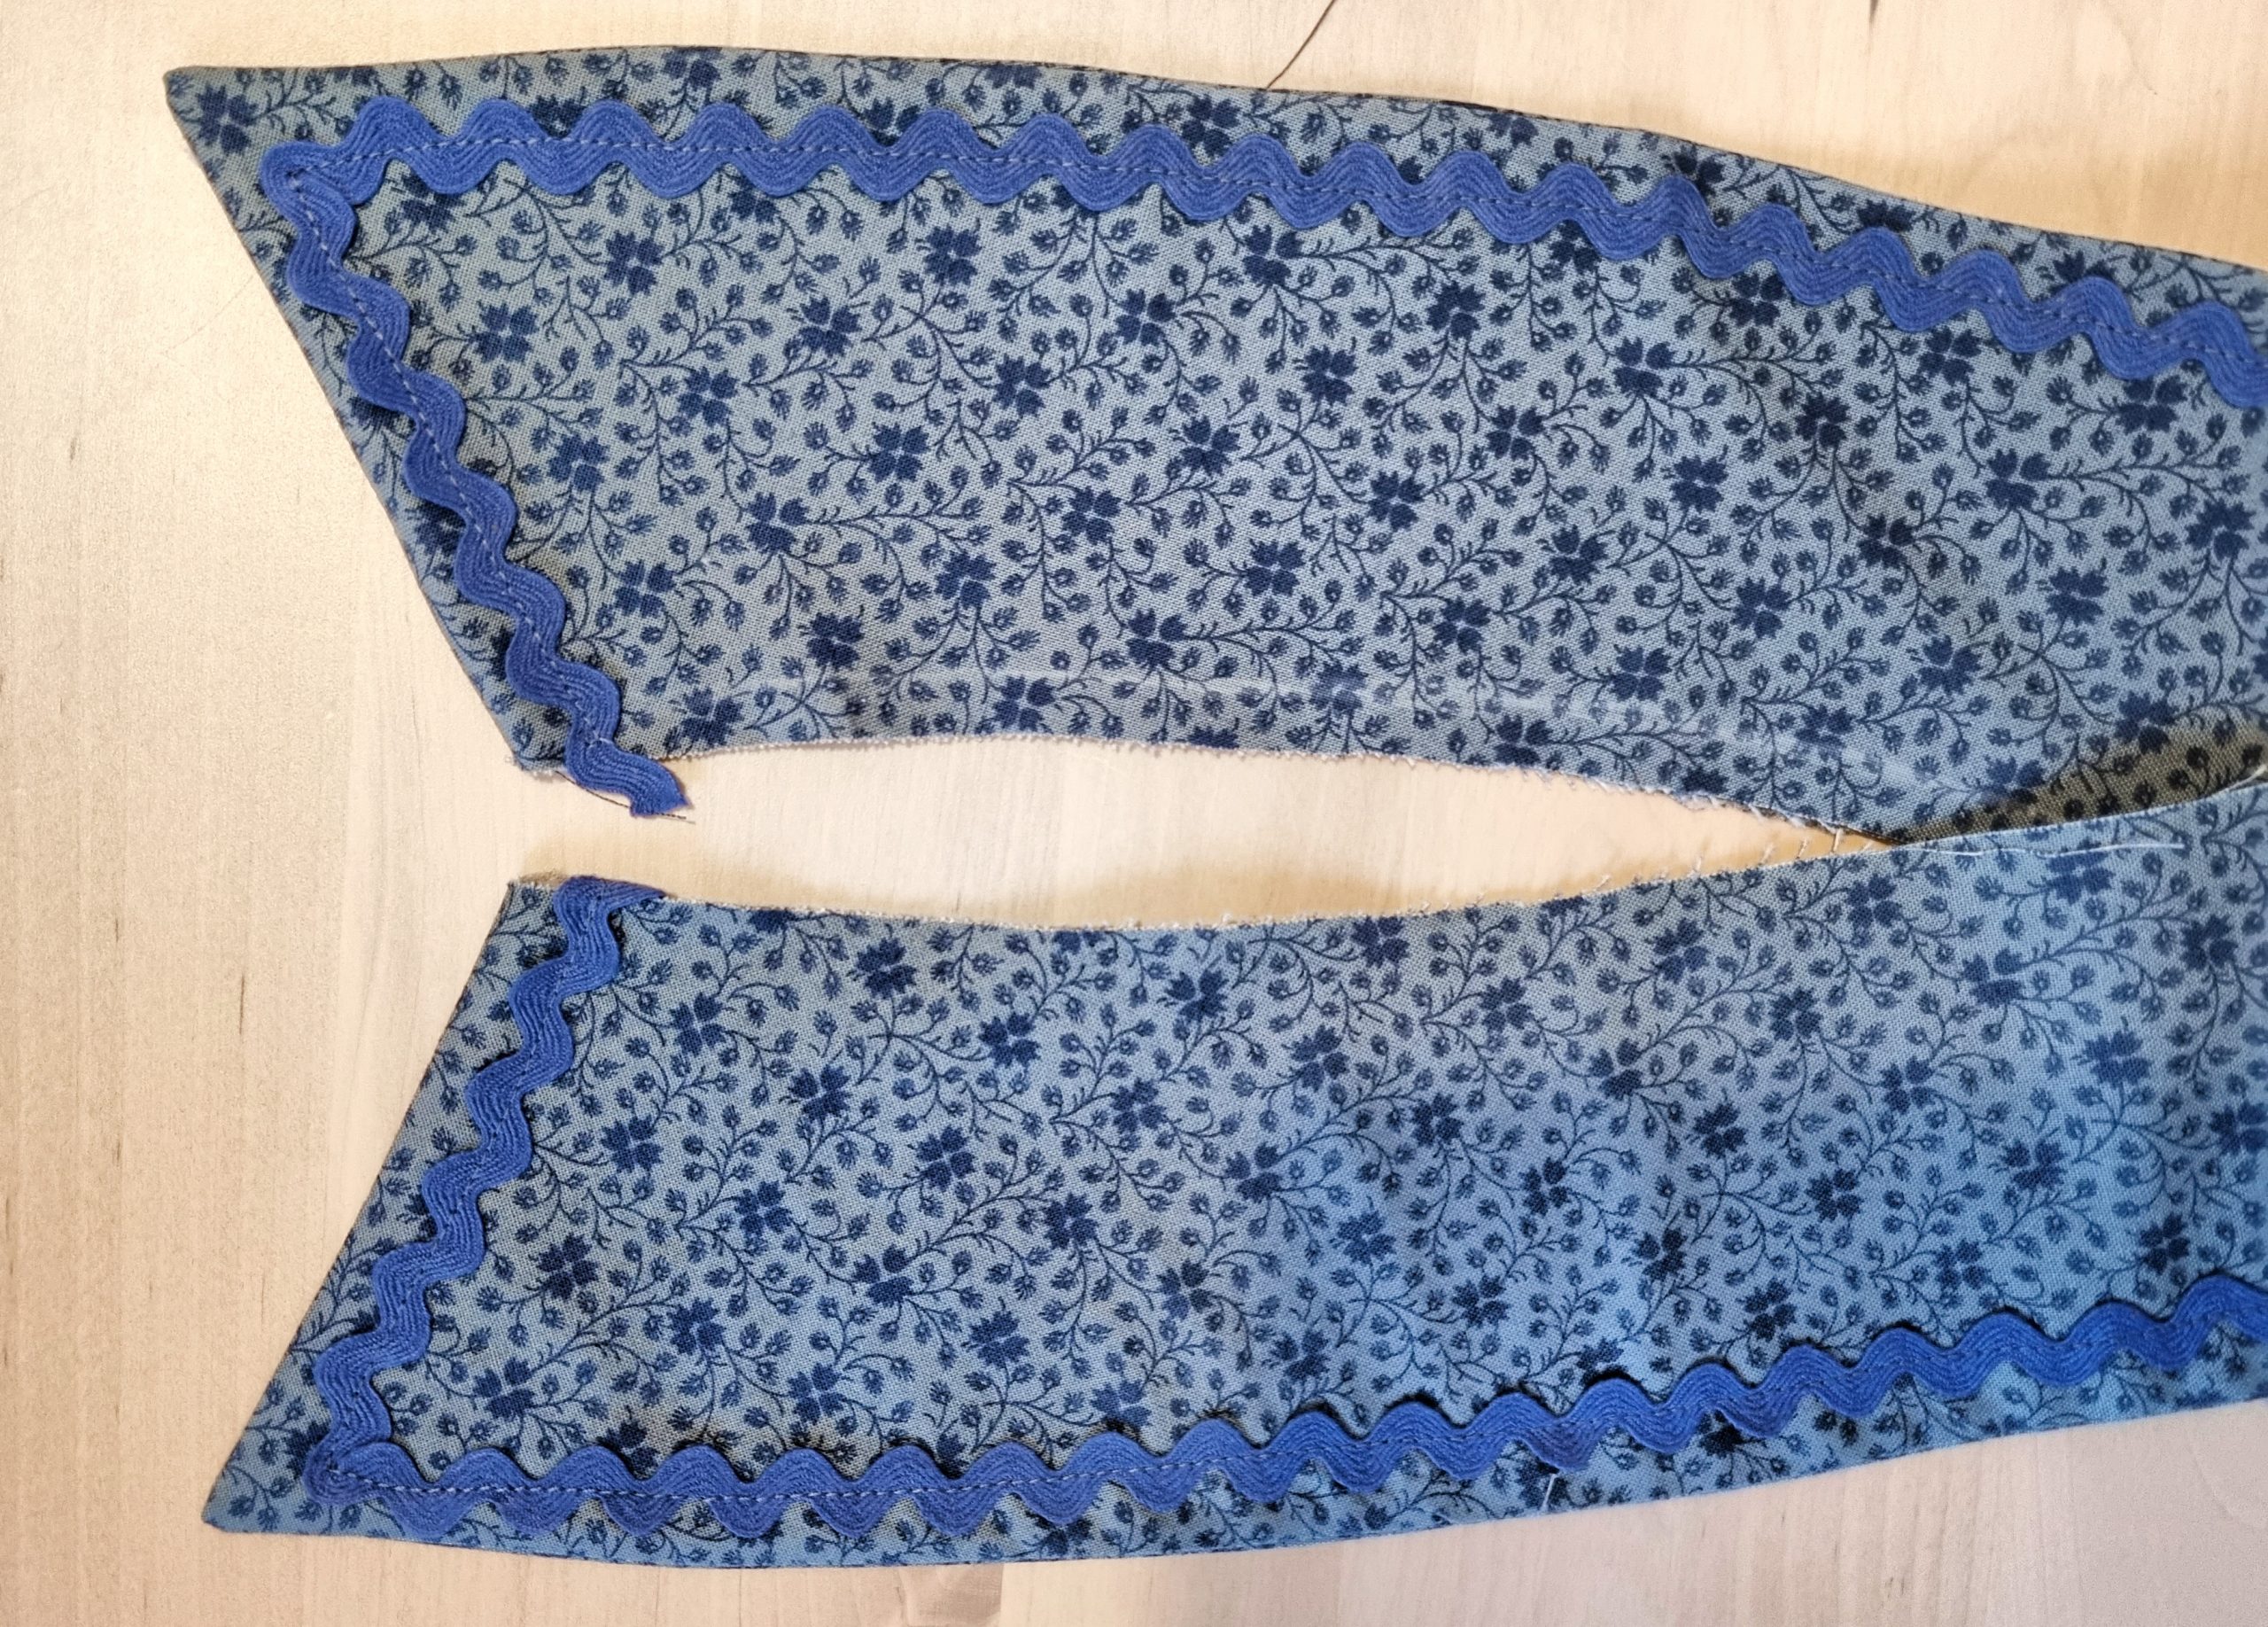
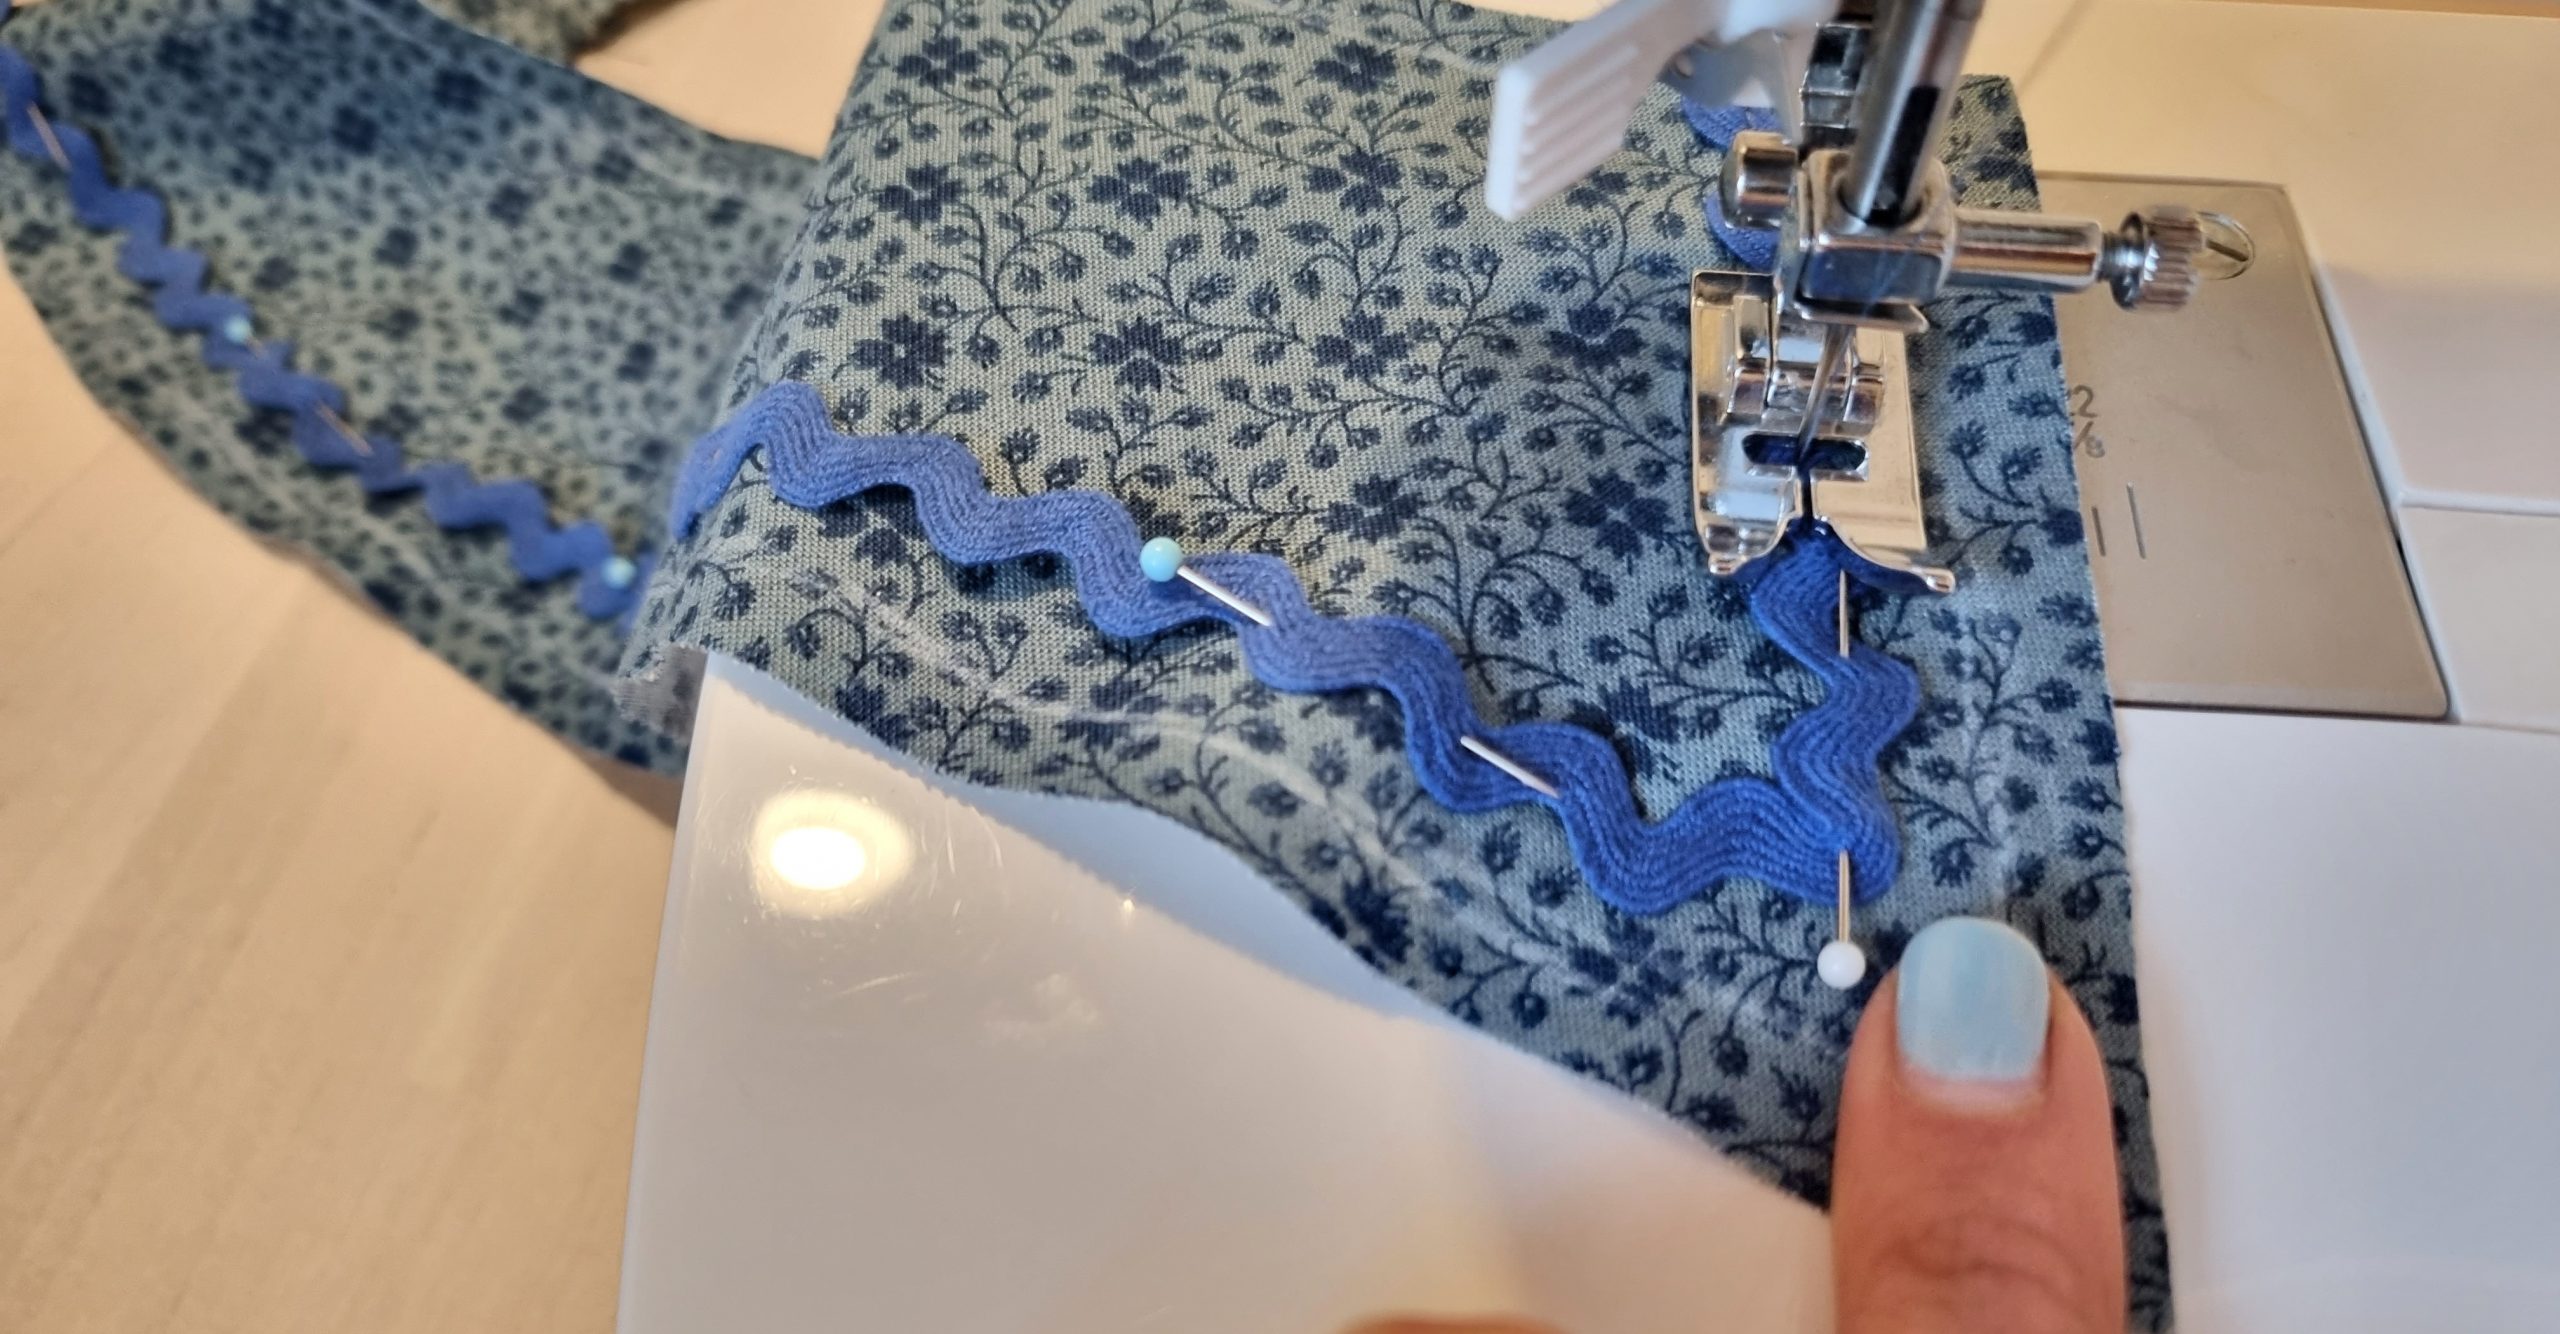 It should look like this when stitched:
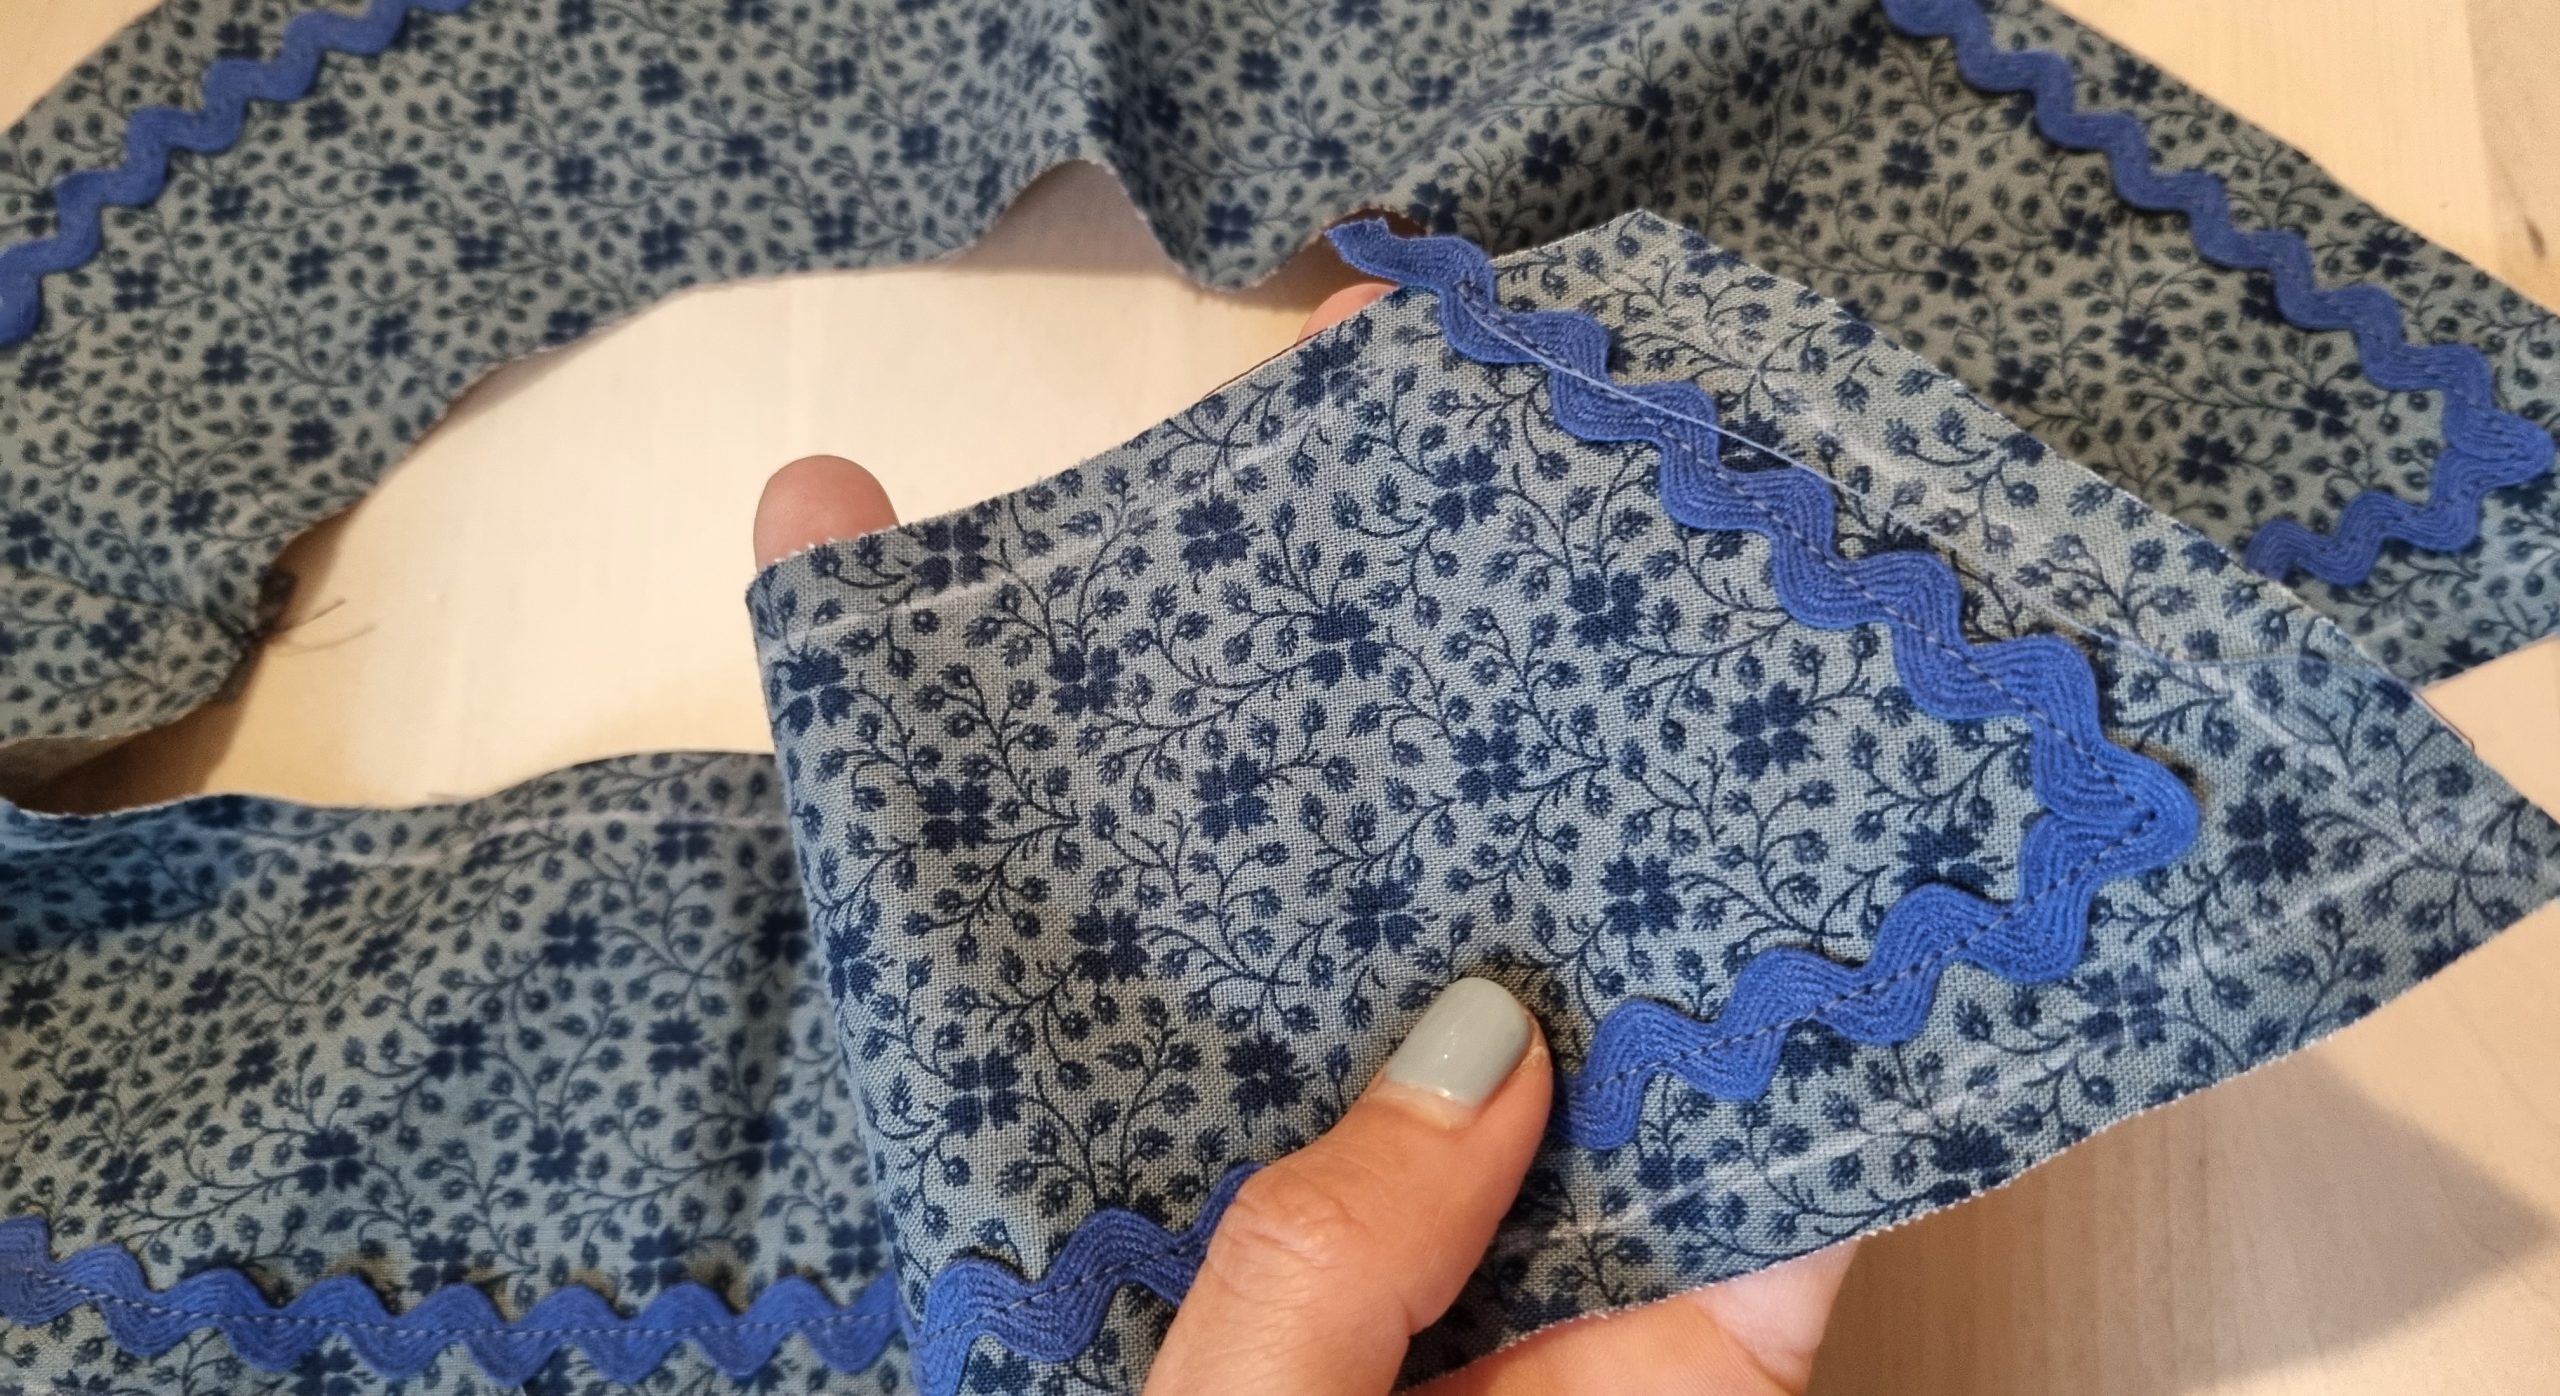
- Now follow your existing pattern instructions, being careful not to catch the ric rac in the seam. Typically, you’ll need to join the front and back of the collar right sides together. If you keep the top section above, you’ll be able to see the stitching line where you attached the ric rac.

- Turn out and follow the rest of your pattern!
Have fun with your decorating! I also added some to my sleeves.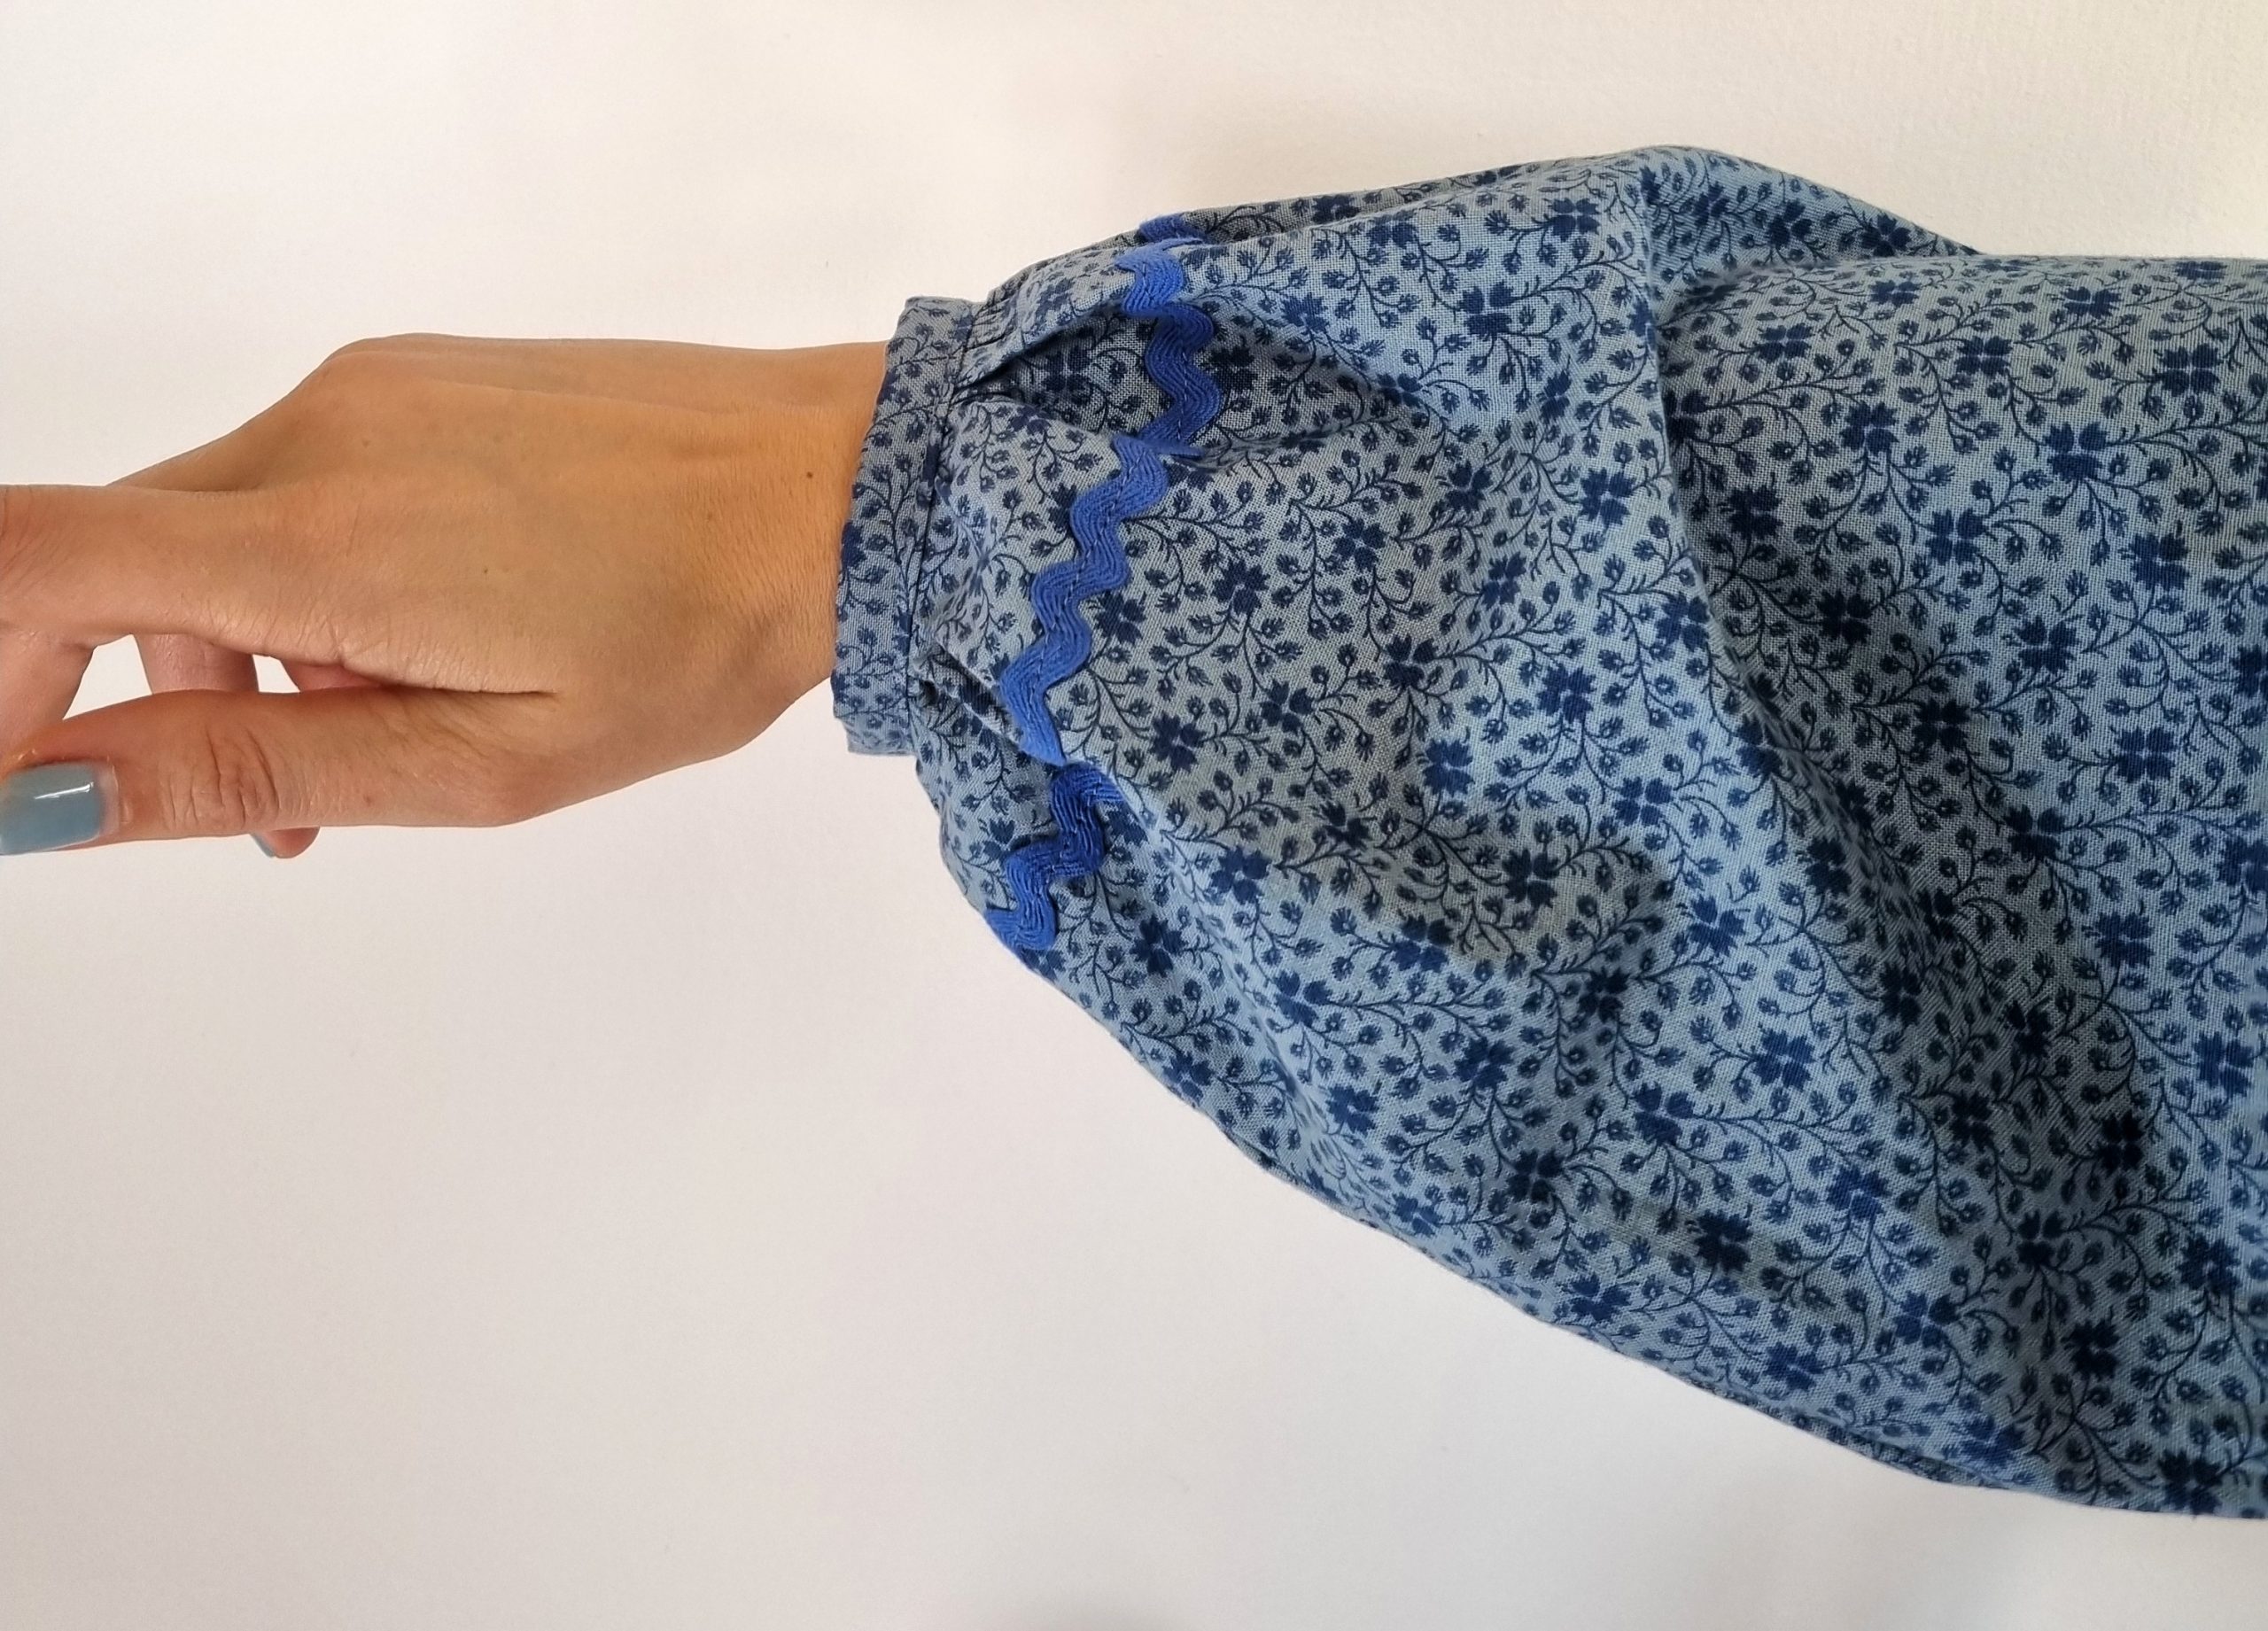
The little, extra project – ric rac coasters!
As I mentioned last time, I have far too many little bits of scraps that I don’t know what to do with. I’m planning to quilt some together to make little pot rests, but when I was playing around with the ric rac I realised they would look brilliant as coasters edged with ric rac! They took me about 15 minutes each, and could easily be hand-sewn.
- First, draw around a coaster you already have (or something a like a sellotape). I added 1/4” extra seam allowance around this. Cut out two circles.

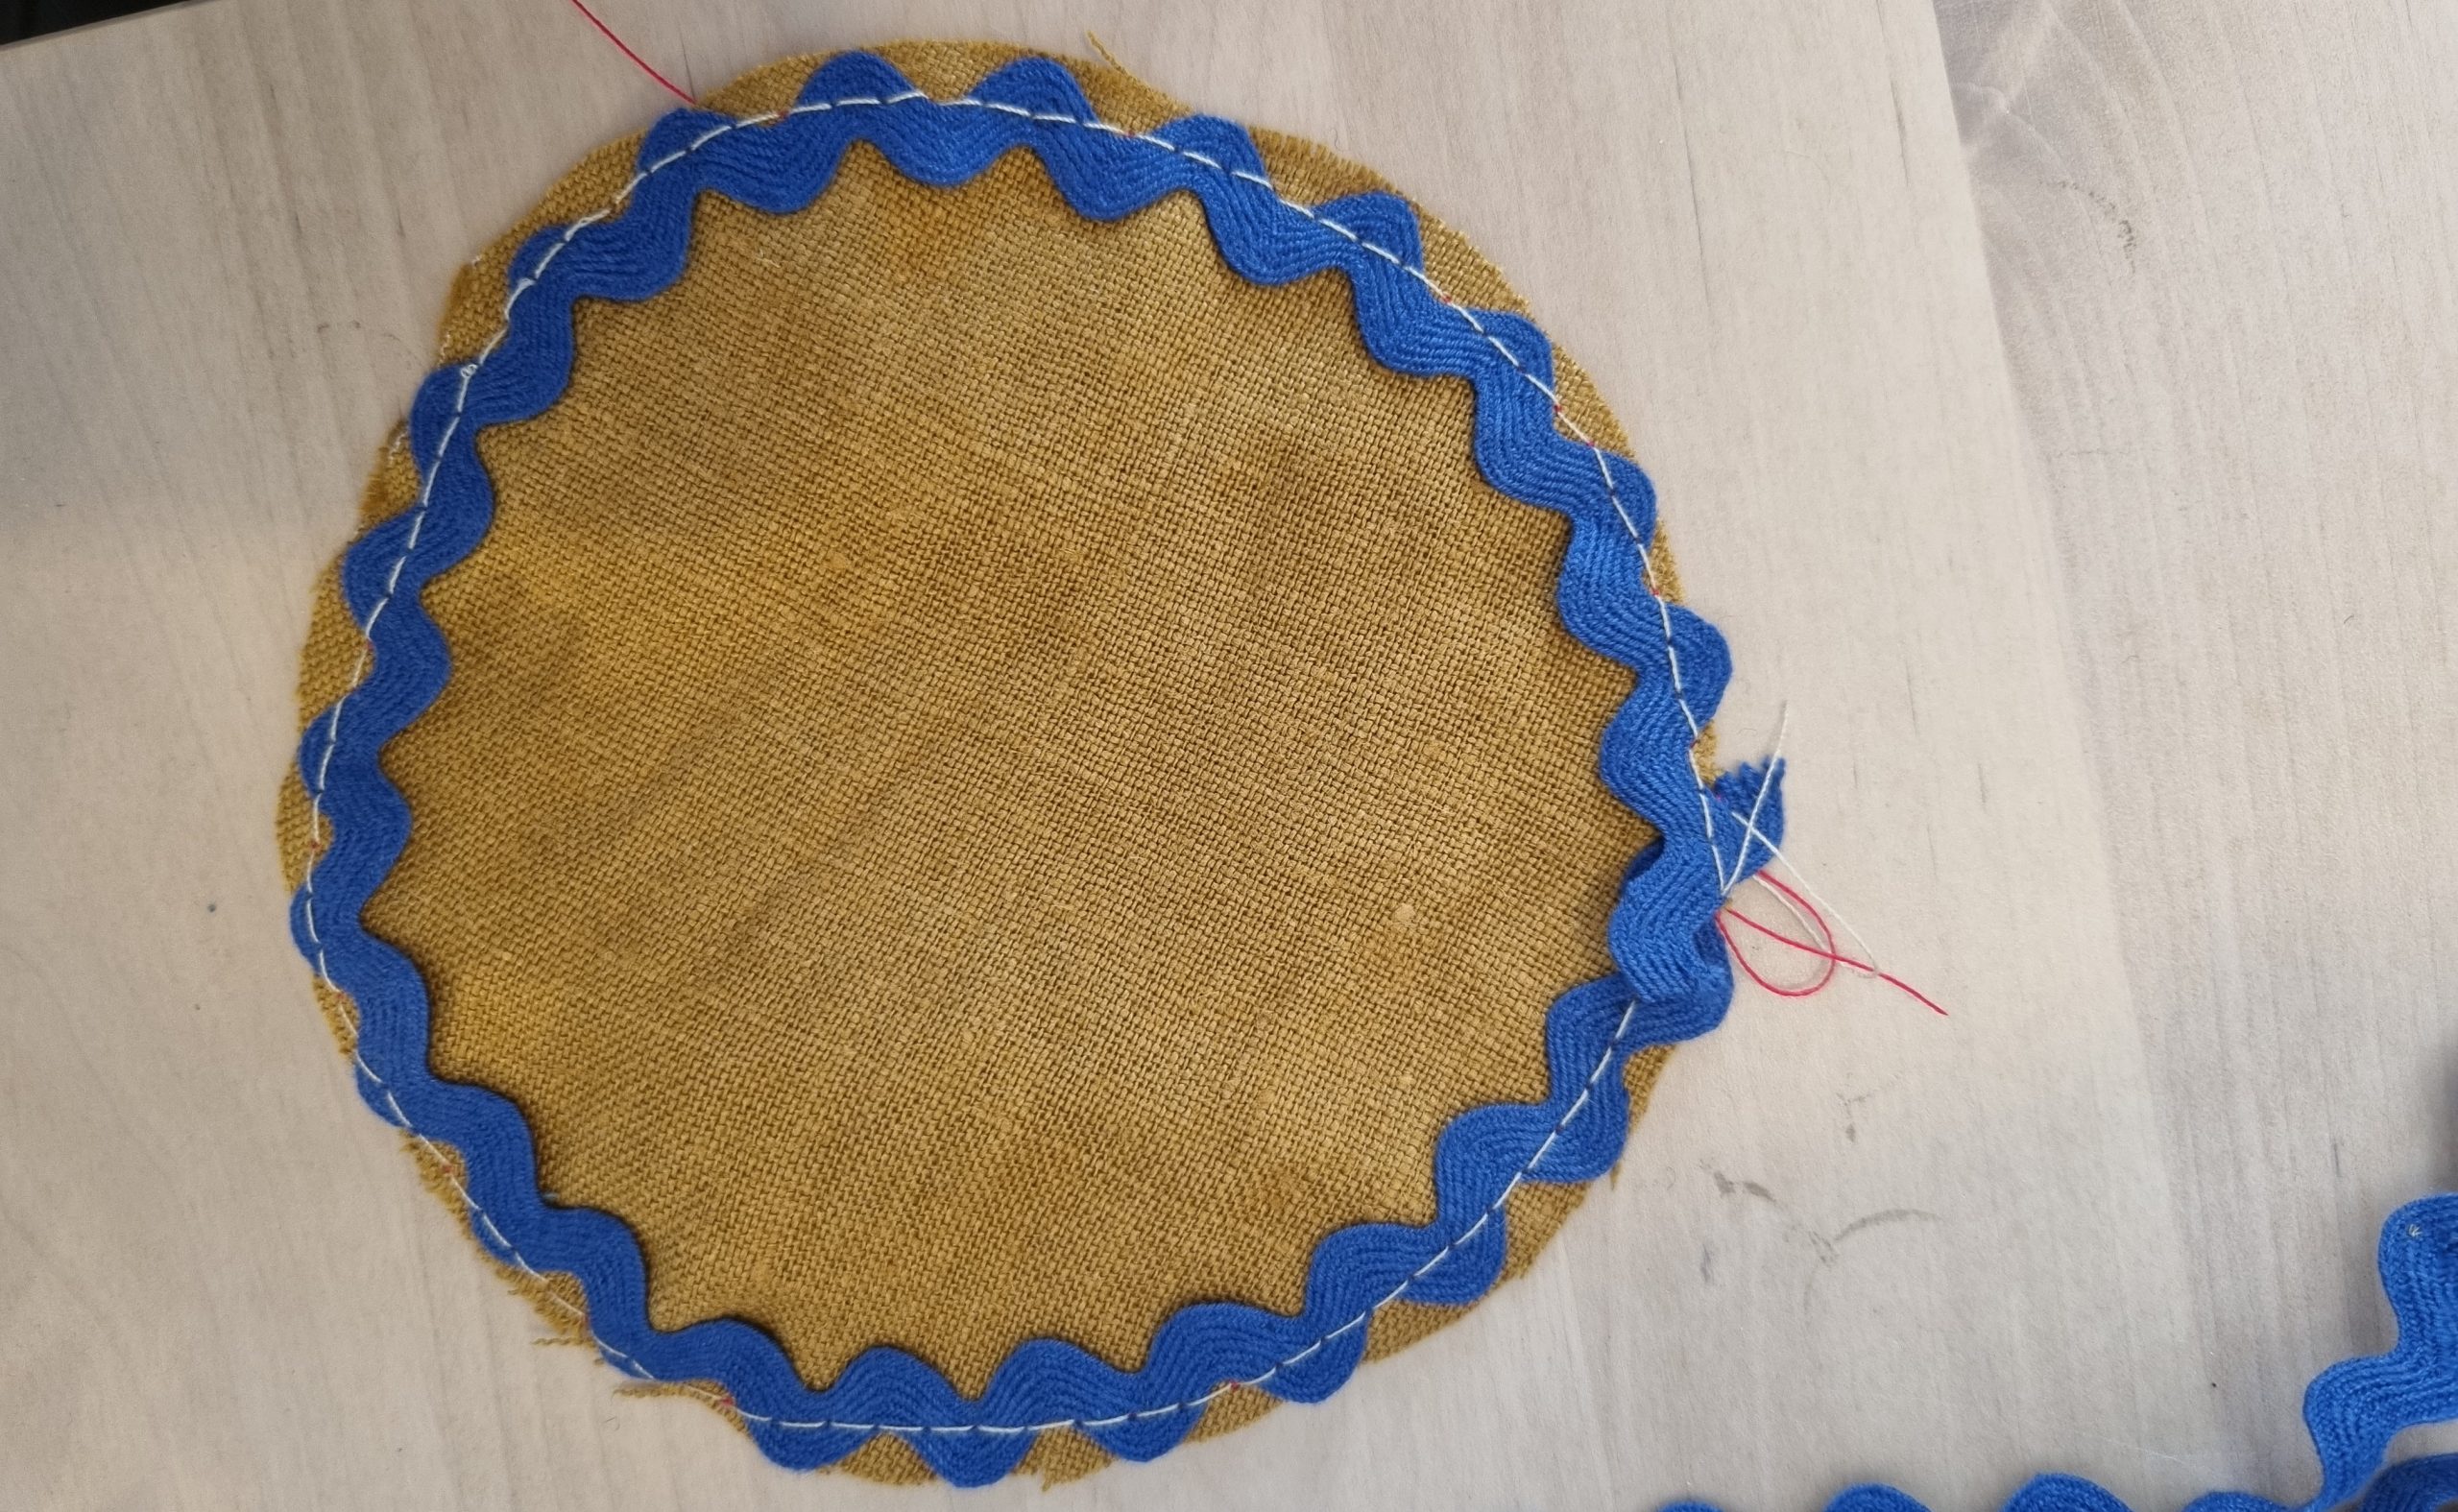
- Pin your ric rac around the edge of your circle (on the right side of the fabric), and cut it to length.
- Baste it in place using a wide stitch setting. For this bit, you’re aiming to sew slightly left of the centre of the ric rac.
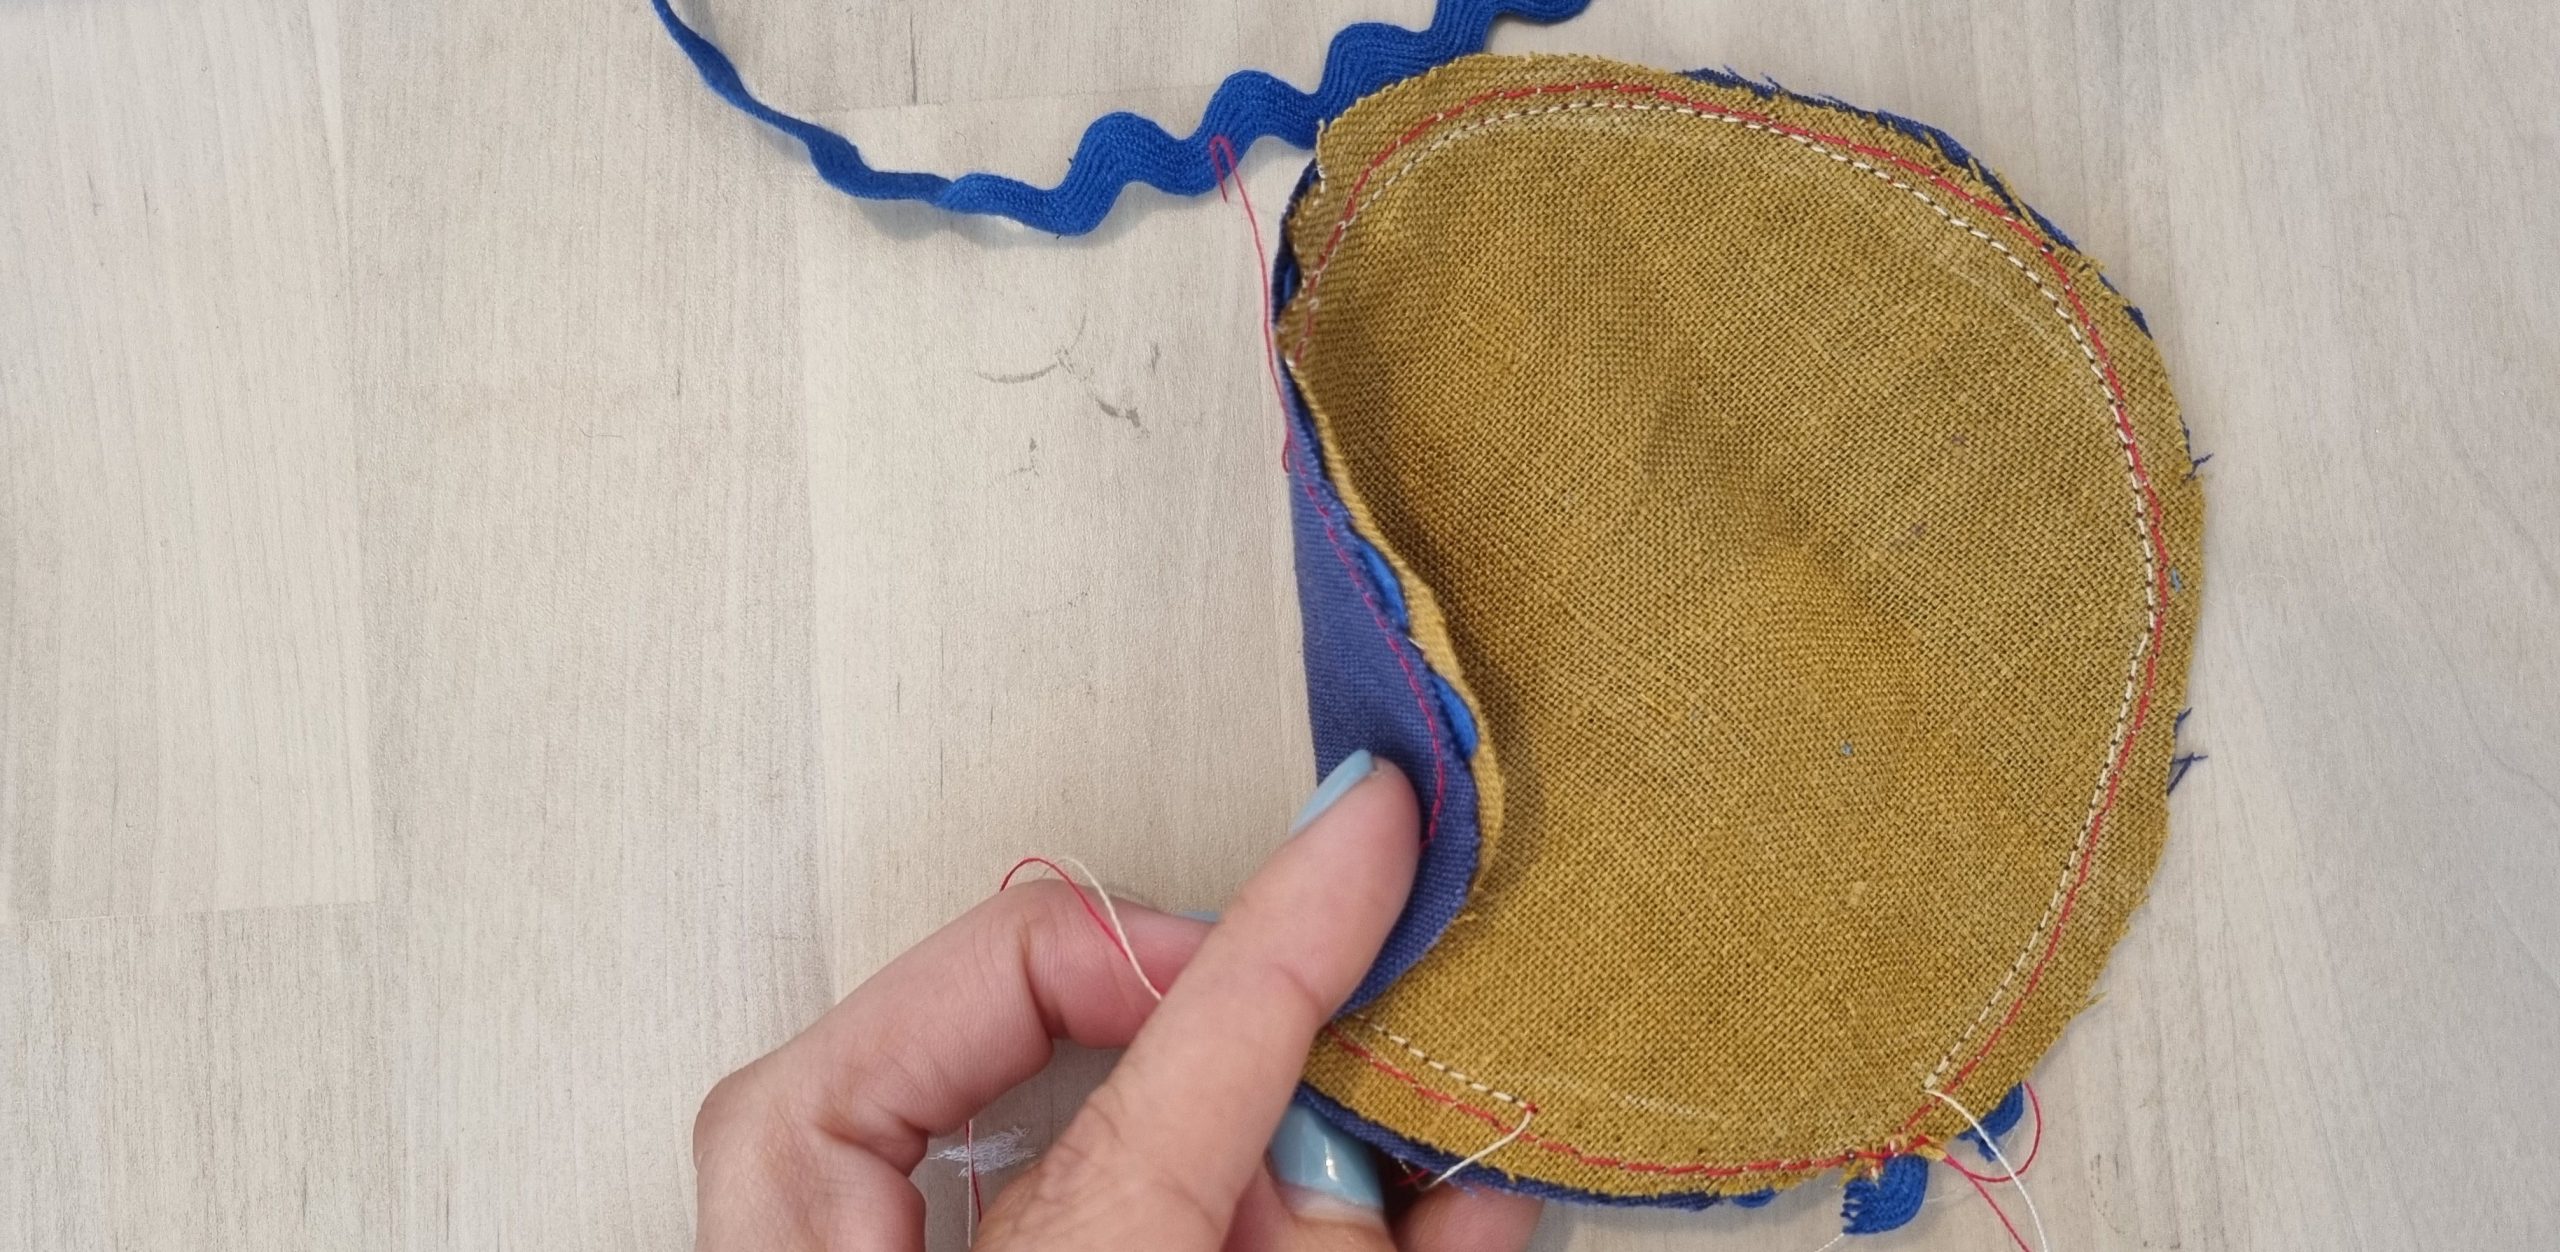
- Lay your second fabric layer on top so the right sides are facing. Pin in place. Turn over and sew inside the basting line (the white stitching below). You can use it as a guide, and it should mean you end up sewing right down the middle of the ric rac sandwiched between your layers. Leave a 1.4” gap so you can turn it out.
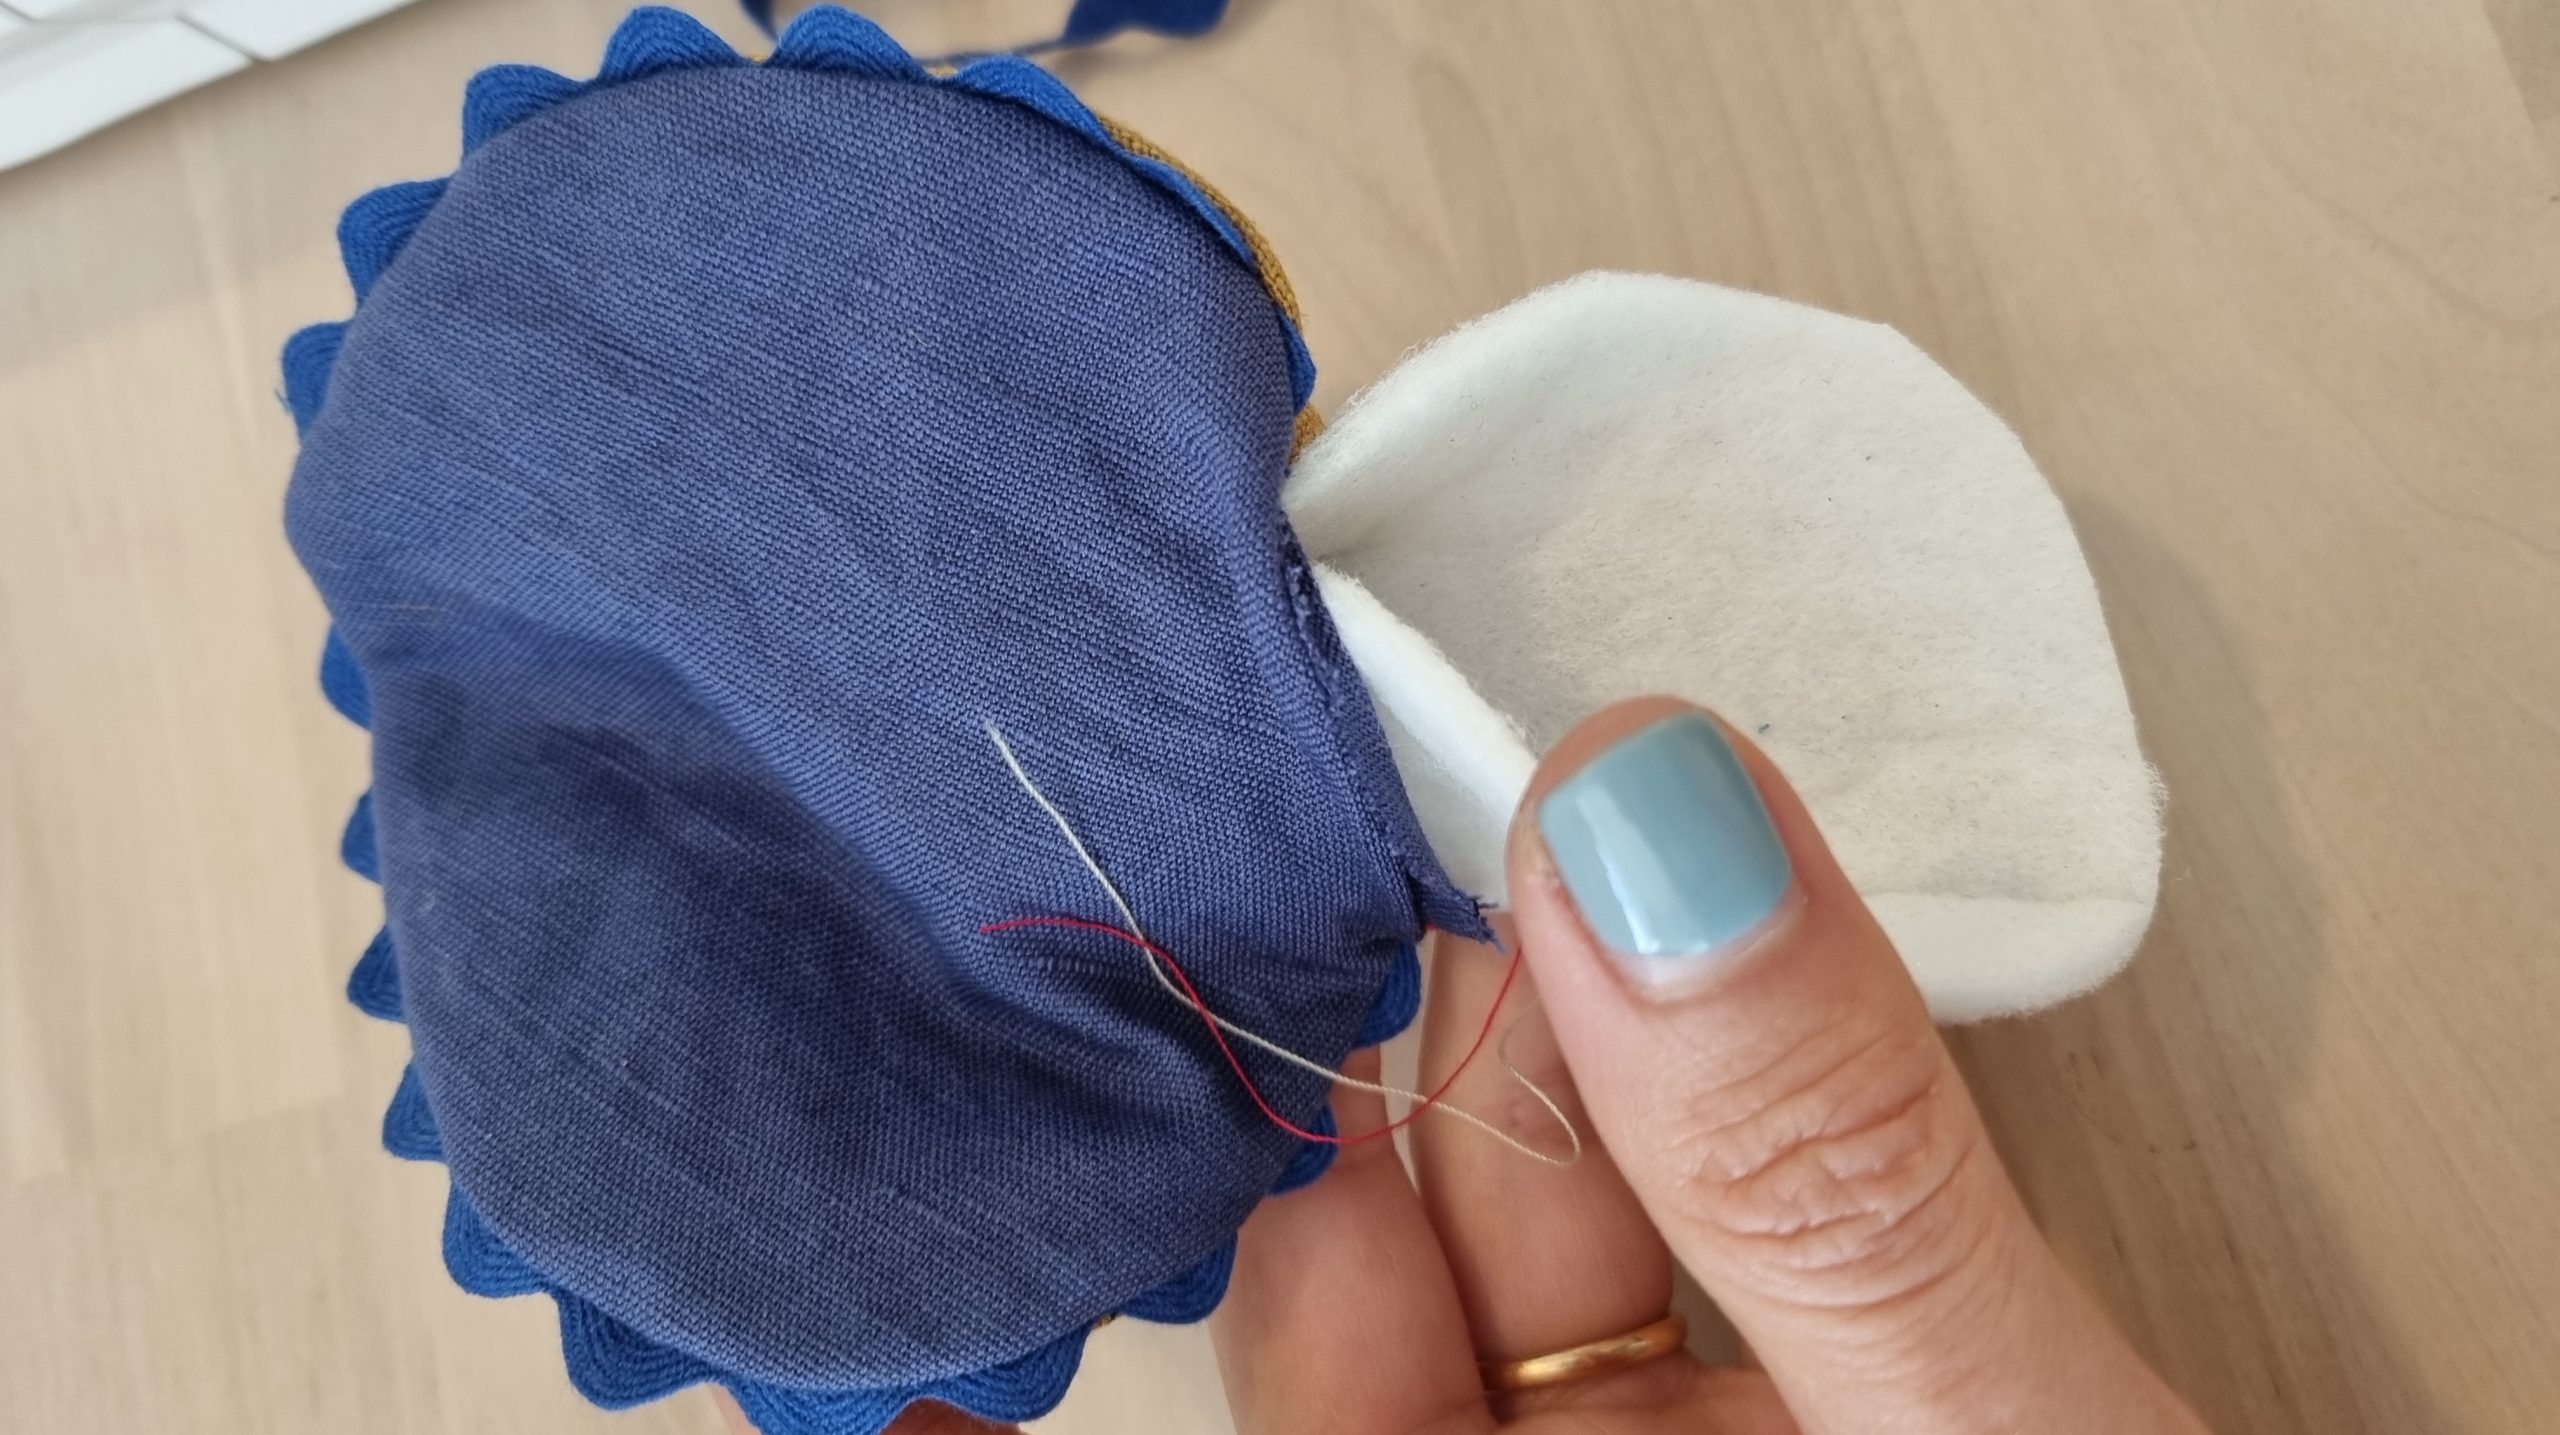
- Turn your circle out, you can now see your coaster! I used some wadding inside mine, but you could cut out some extra fabric layers to put inside, and quilt them so they lay flat. Push this inside the circle.
- Hand stitch the hole together and you’re all done!
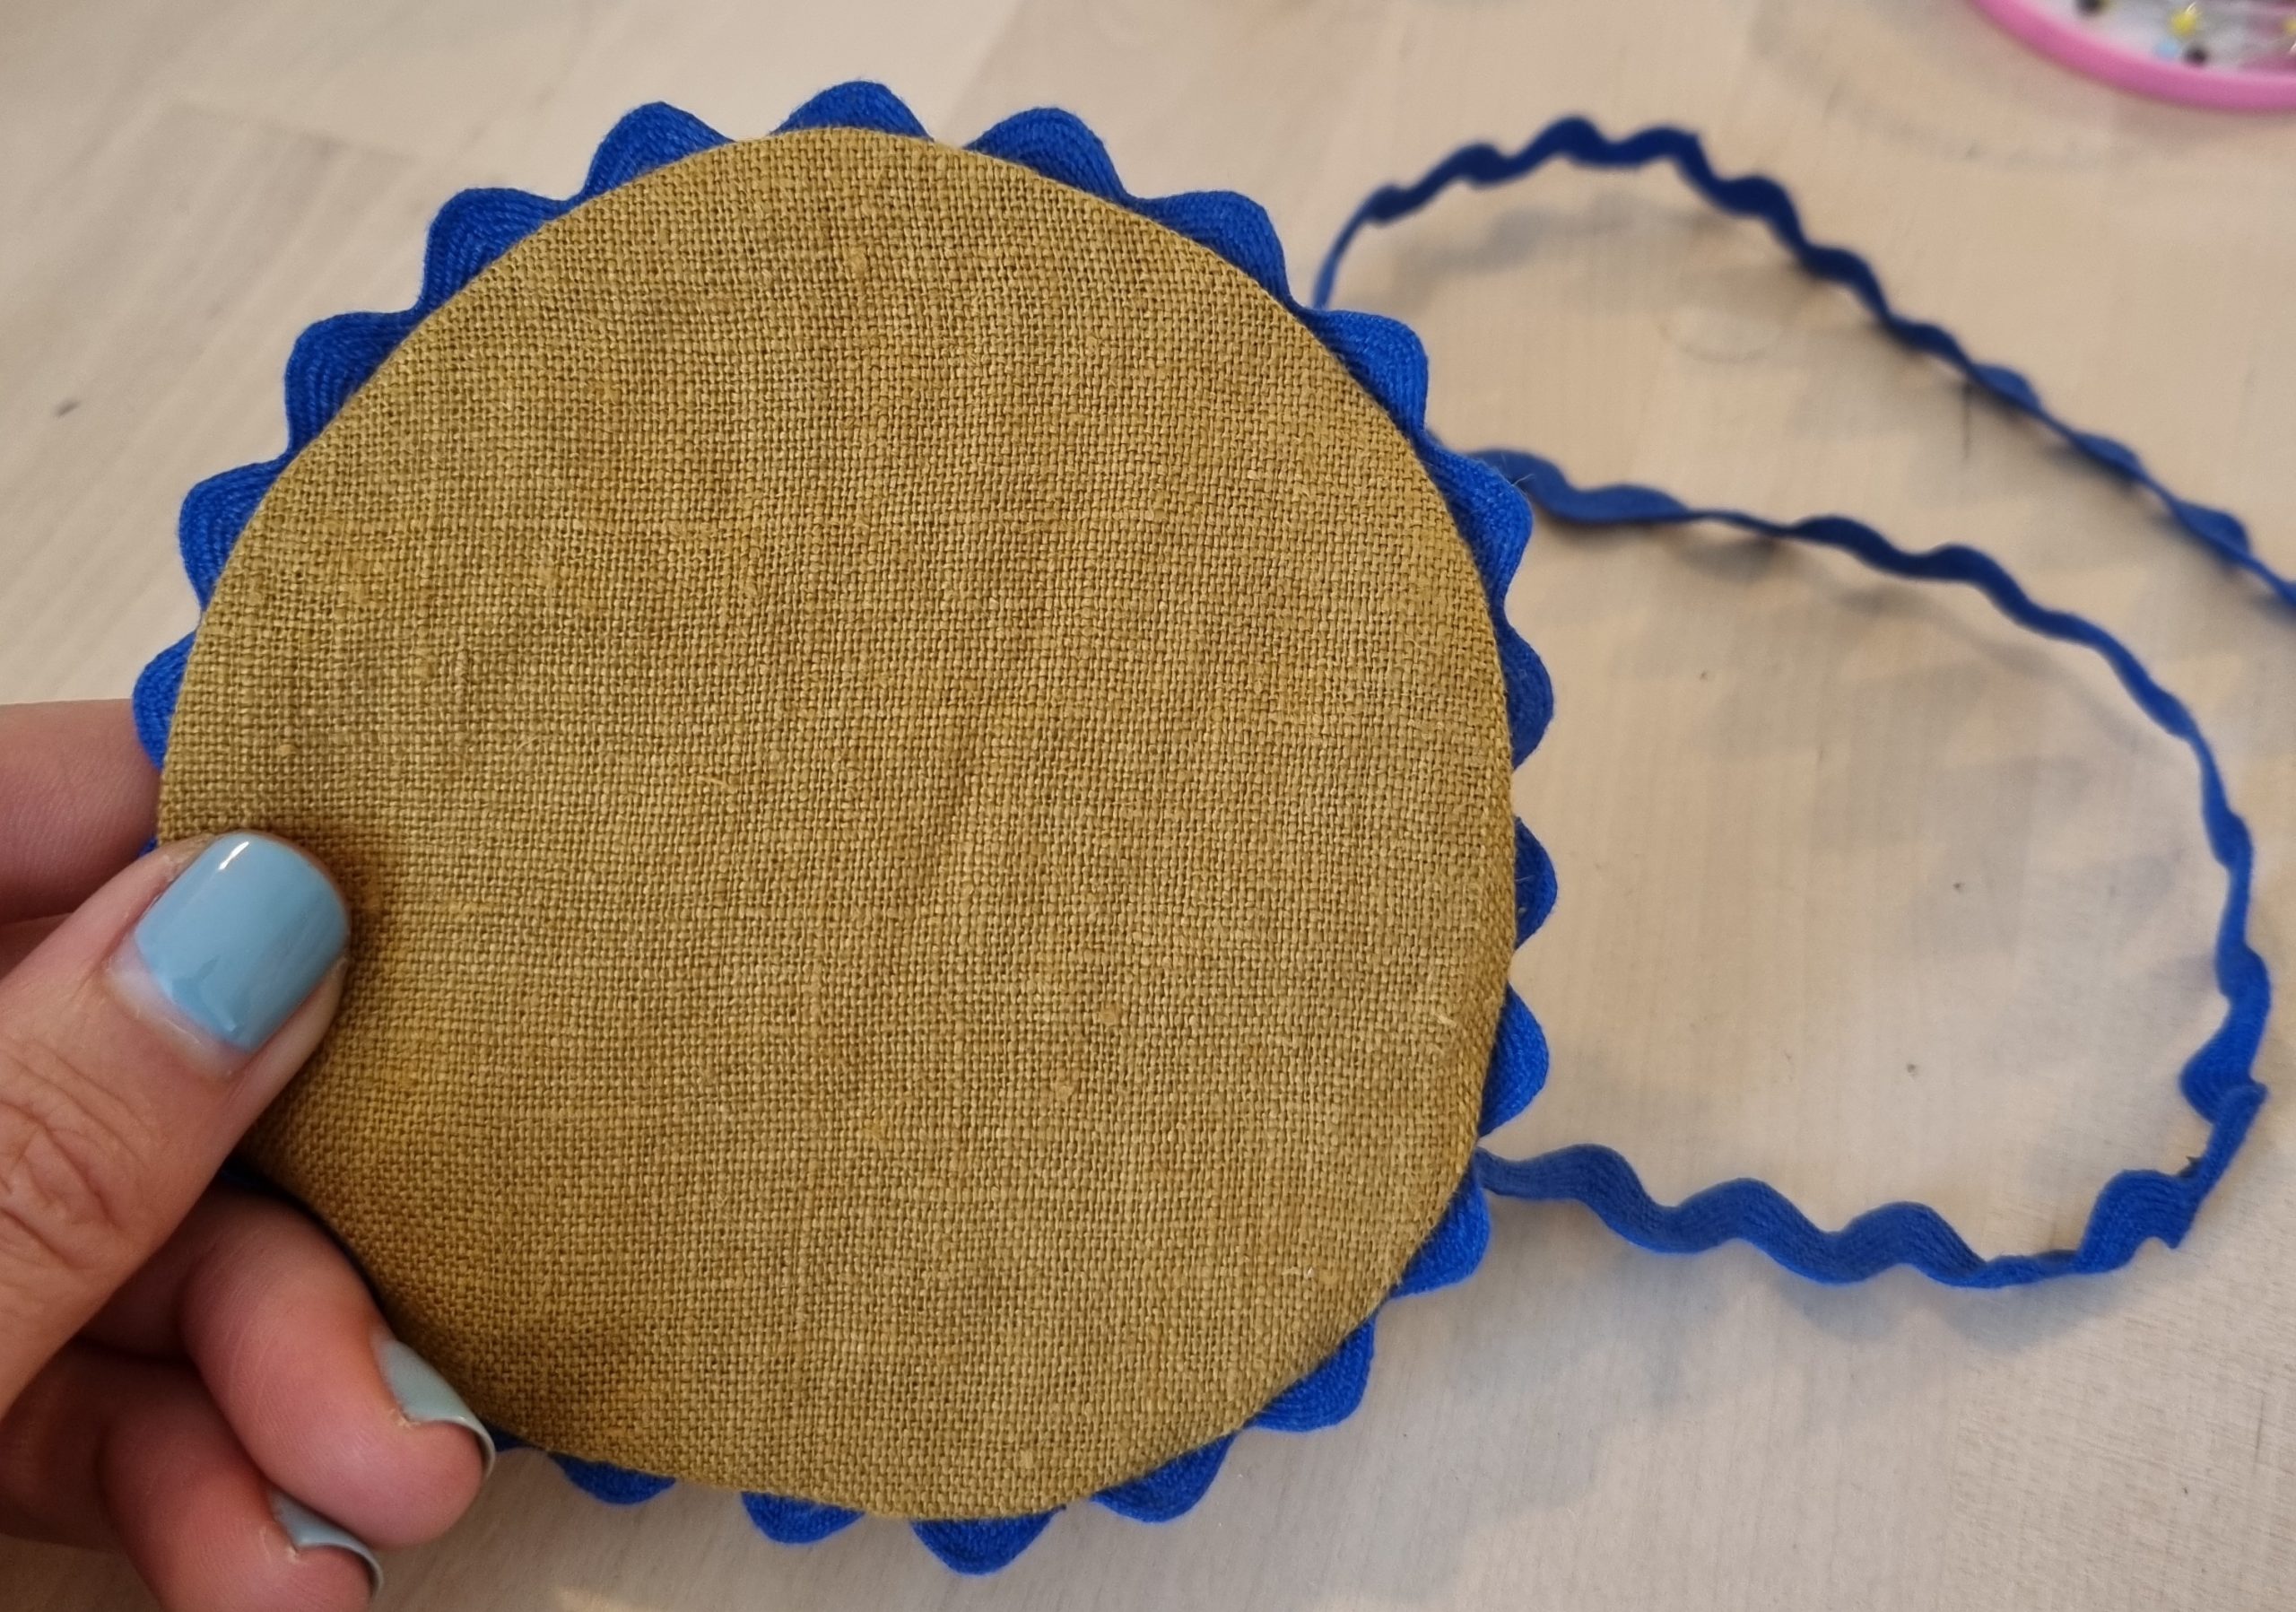
Enjoy your coasters! They’re such a fun little project and will definitely brighten up my coffee table! I think they’ll also make great gifts.

Check out the lovely colours William Gee stocks, like the blue on my blouse.
Let me know what you decide to do with your ric rac! I’d love to hear how you use it for your projects.


 We’re thrilled to announce that we’ve partnered with Tree Nation, the platform to reforest the world & fight climate change! Home to over 90 planting projects in 33 countries, Tree Nation is a non-profit organisation that helps people & companies offset their CO2 emissions.