When I used to look at buying a new sewing machine, the number of stitches per minute was always important to me – well, the quicker the machine stitched, the faster I could make stuff. Or so I thought.
I have upgraded my sewing machine twice in the last 3 years and have only just got a machine that has a type of speed limiter on it. Pah! Why would I ever user that? And then I realised – slower stitching makes more accurate stitching, particularly on curves.
Curves can make or break a garment – wonky necklines, wobbly seams – I’ve done them all.
So how best to tackle a curved seam? If you want to follow along, grab 2 pieces of scrap fabric and cut out a curve – use the neckline pattern piece from a paper pattern, that way you’ll be mimicking an actual curve.

Place the 2 pieces of fabric right sides together and pin. Or don’t pin if you don’t usually or are feeling brave. Pinning helps stop the pieces from shifting. Place the edge of the fabric at the 5/8 inch line on your sewing machine bed and lower the machine foot.
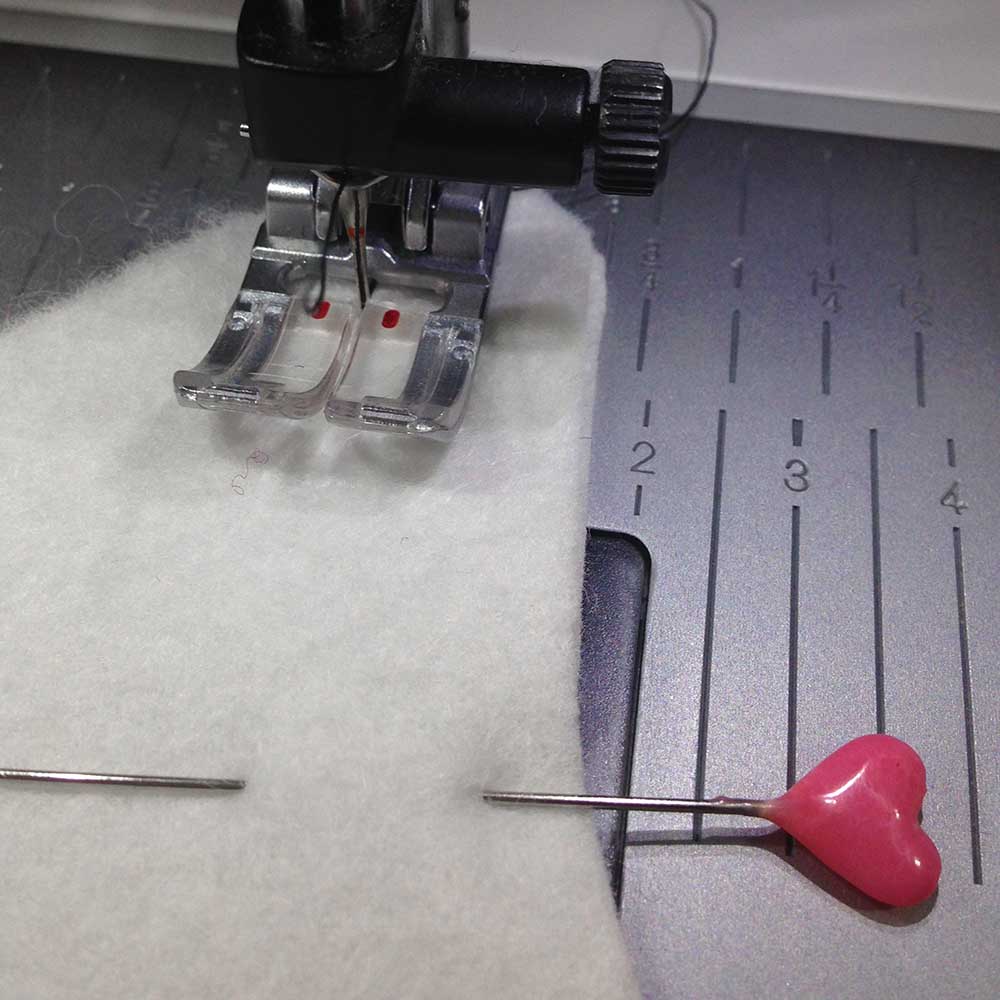
Begin stitching at your normal speed, ensuring the edge of the fabric remains against the 5/8 inch line. How is it going? Are you stopping every so often and going slowly to check progress?
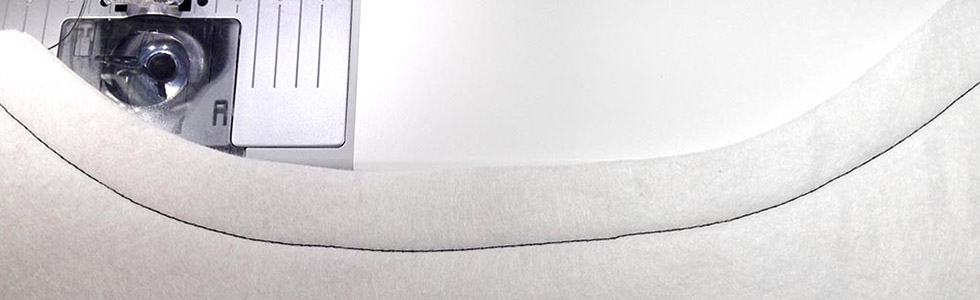
Try putting your foot down and seeing how well it goes – that used to be me! Here is the result of mine:
More experienced sewers will be able to sew at a constant speed with great accuracy but I now slow down and sew, stopping every 5 or 6 stitches on the curve to check accuracy. If it is a tight curve, I stop every 2 or 3 stitches and, with the needle still in the fabric, lift the foot and pivot the fabric so I remain accurately along the correct sewing line.
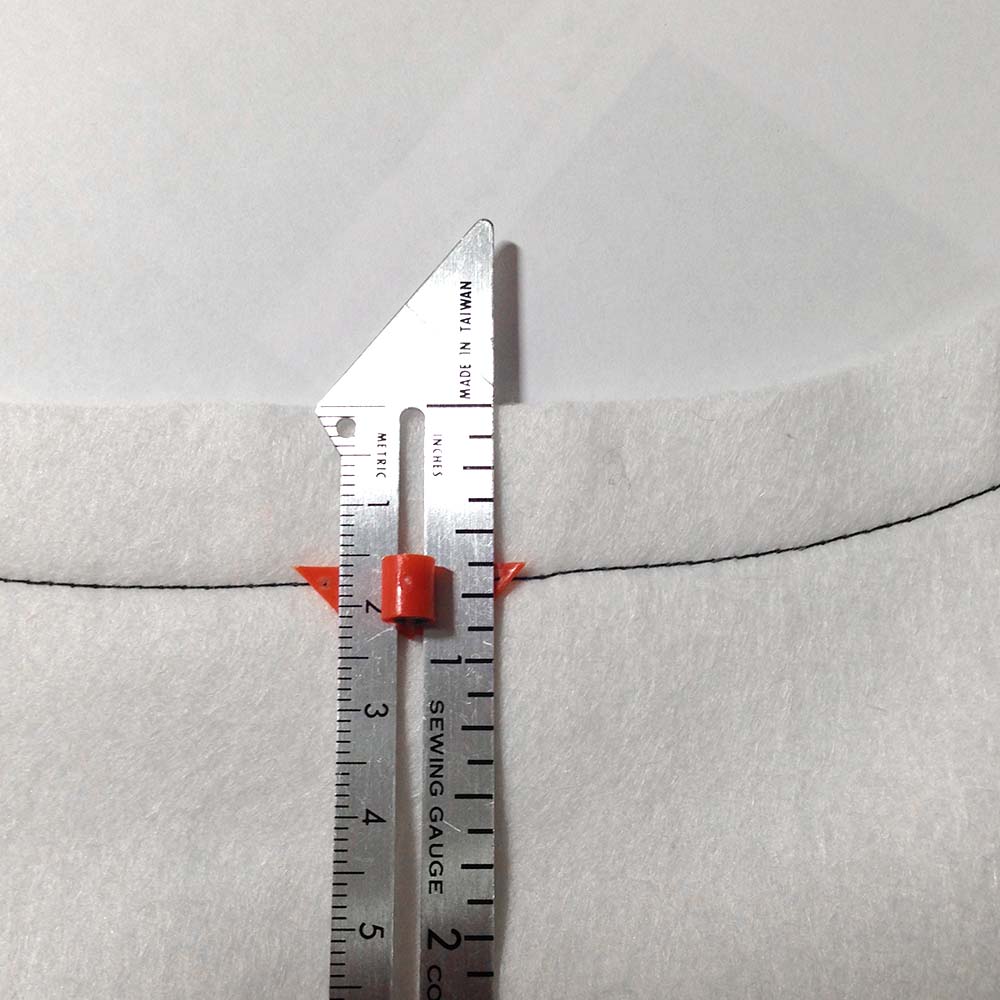
Here is a slightly better result, to show the difference in stitching slowly against what I did before.


 We’re thrilled to announce that we’ve partnered with Tree Nation, the platform to reforest the world & fight climate change! Home to over 90 planting projects in 33 countries, Tree Nation is a non-profit organisation that helps people & companies offset their CO2 emissions.