
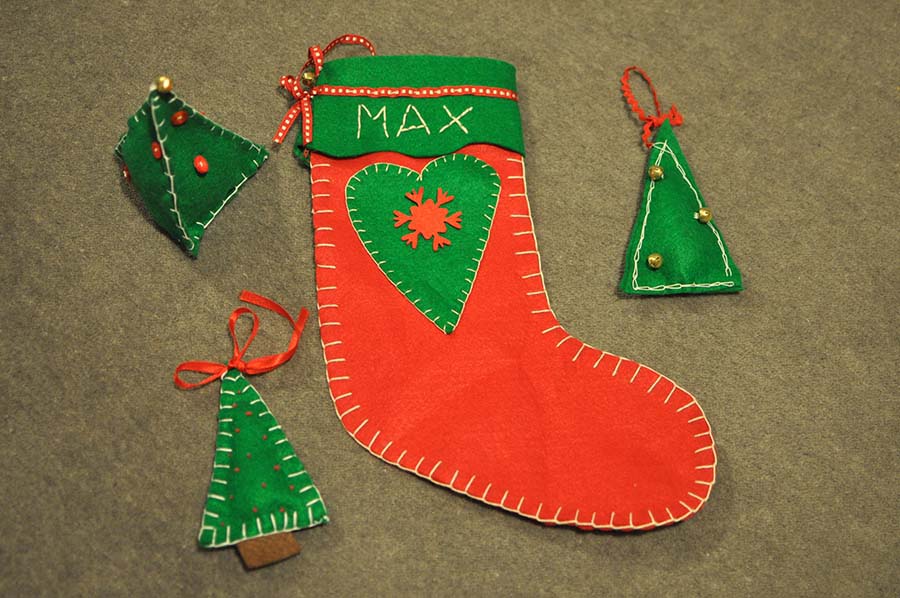
Make your own personalised Christmas stocking, an ideal gift or an heirloom to treasure for years to come! This is an easy festive project suitable for adults and children, and a perfect way to boost your sewing skills.
What materials do you need?
– 50 x 50cm red felt & 30 x 30cm green felt
– Christmas ribbon – 70cm long
– Pins and Needles
– Embroidery thread
– Scissors
– Additional decoration
– Download the template and print easy-to-use templates to help you
Instructions
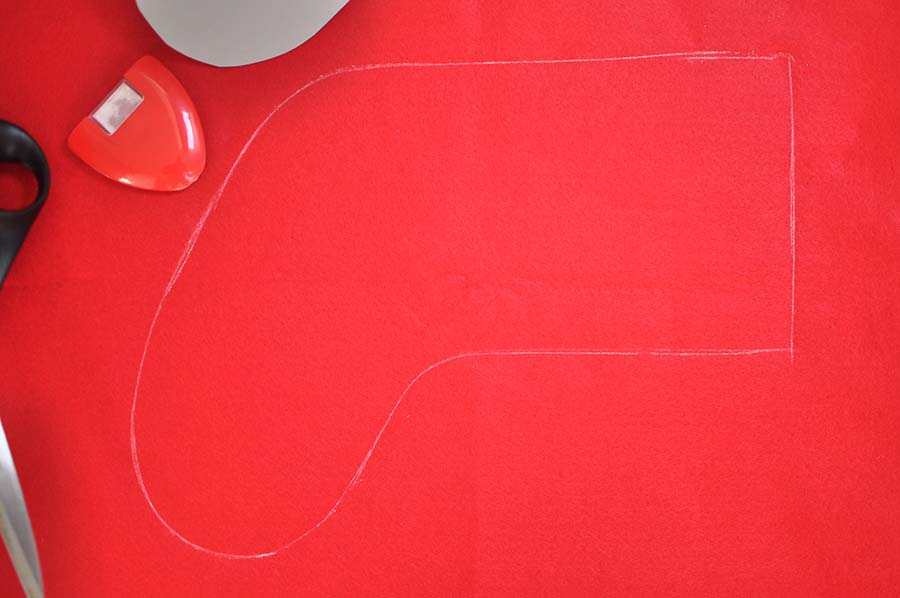
Step 1 – Marking out the shapes
Start by folding the red felt material in half. Mark out a “J” shaped stocking on one side of the felt. You can draw free hand shape OR download and print our template to draw around. The “J” stocking should measure around 15cm at the top and be around 35 cm in length.

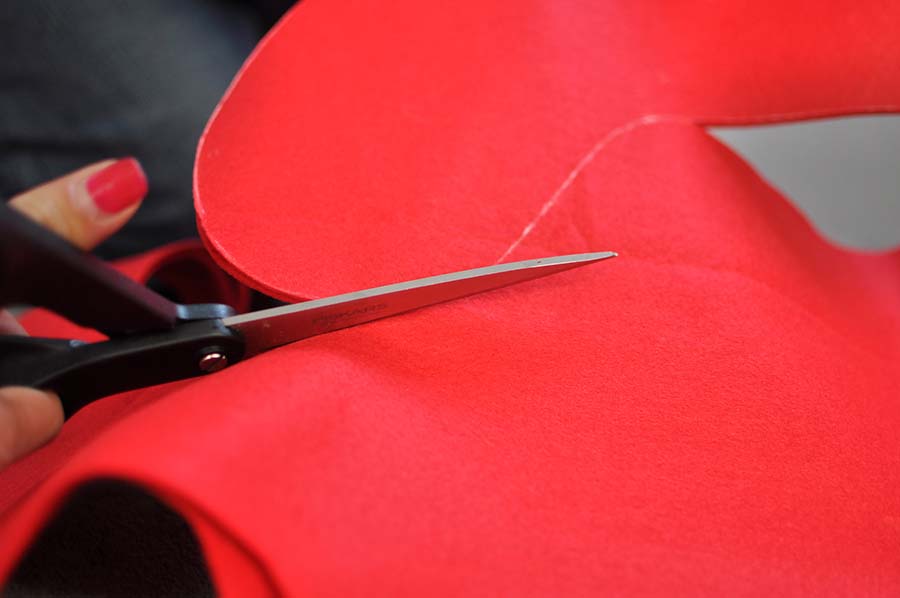
Step 2 – Cutting the fabric
The next step is to cut out all the marked shapes so that you are left with two red stocking shapes, green “top trim” shape and a green heart shape.
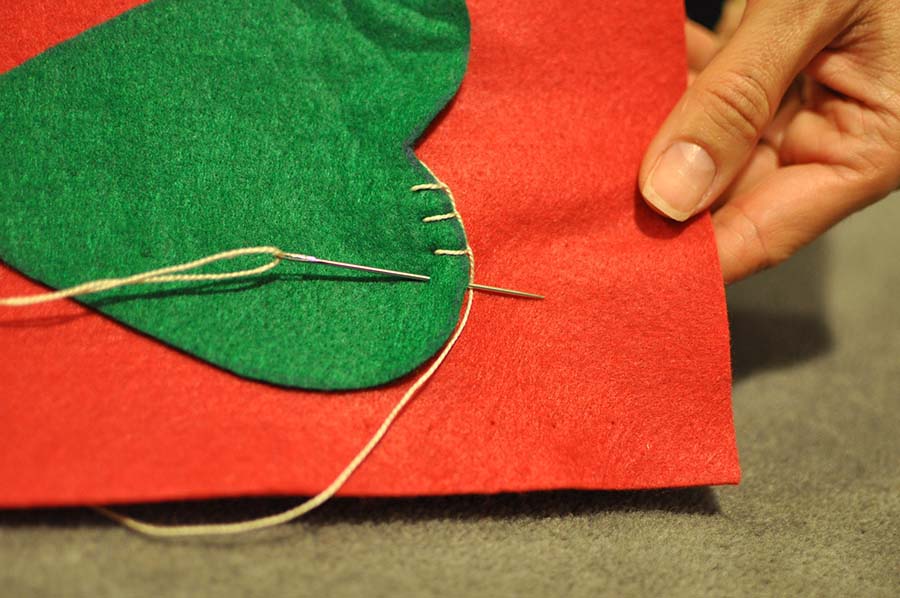
Step 3 – Sewing the heart
Take the green felt heart and one of the stocking shapes and place and pin the heart in the desired position on the stocking. Next get the needle and the thread and begin sewing the heart on the red stocking using a blanket stitch (as shown on the image below). Once you have gone all the way round make a knot on the reverse side.
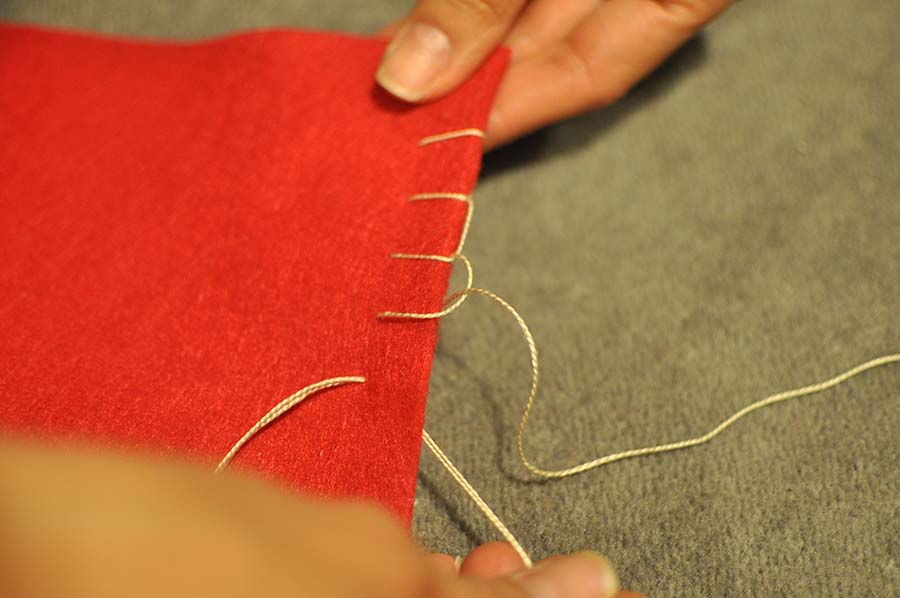
Step 4 – Blanket stitch the stocking
Grab the remaining “J” shaped stocking and line it up with the piece you just stitched the heart to. Then pin the two parts together to stop them from moving. Get your threaded needle and, beginning at that top, blanket stitch all around the edge. (TOP TIP: If you find that you run out of thread, carefully tie a new length of embroidery thread to the old one with a small knot)
Step 5 – Creating the “top trim”
Take your green “top trim” felt and fold it in half. On the open end sew both short sides of the green strip with 1cm distance from the edge using a back stitch.

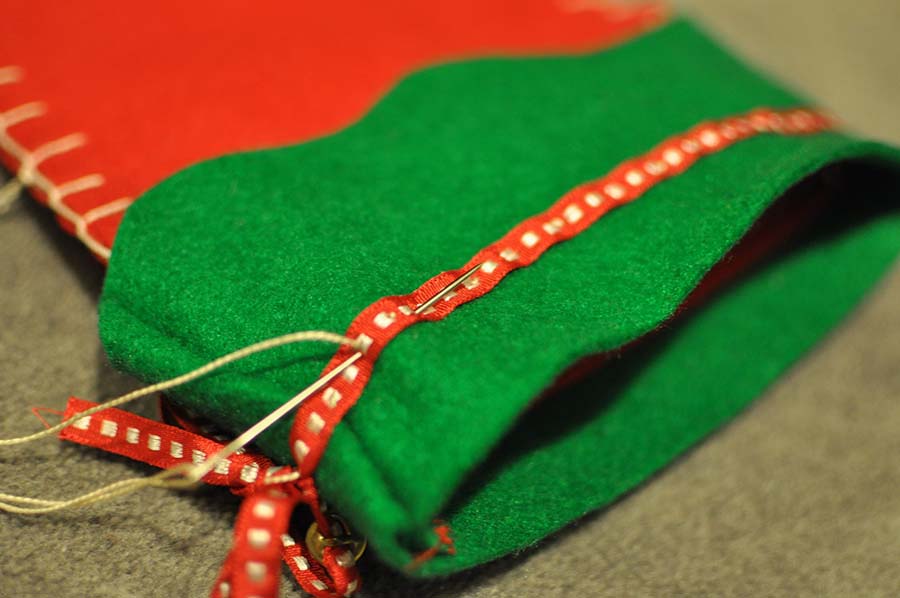
Step 6 – Putting the stocking together
Pin the ribbon onto the trim (2-3cm from the top edge of the trim) and attach them using a back stitch to the top of the stocking (red felt). Leave the two long ends of the ribbon at the back of the stocking to make a bow.
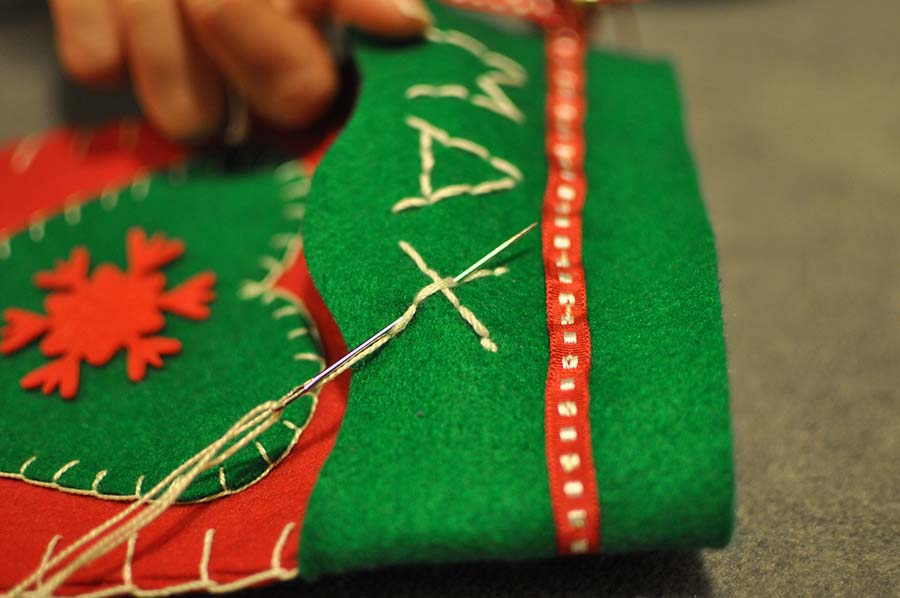
Step 7 – Optional finishing touches
You may wish to decorate the stocking further by adding Christmas bell, buttons, and snowflakes or personalise it by adding a name to it using a back stitch.


 We’re thrilled to announce that we’ve partnered with Tree Nation, the platform to reforest the world & fight climate change! Home to over 90 planting projects in 33 countries, Tree Nation is a non-profit organisation that helps people & companies offset their CO2 emissions.