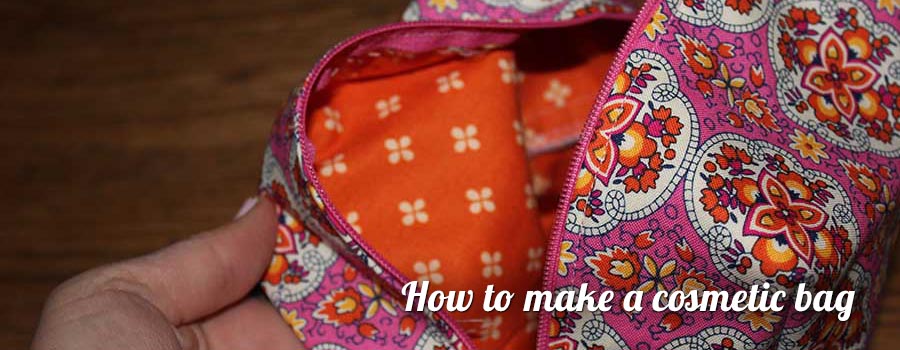
This tutorial is perfect for someone looking to add a personal touch to a cosmetic bag, wash bag or travel bag! It’ll make for a beautiful yet durable bag, and you can create your own design based on whatever lining you use. Good luck!
Materials:
– 1/2m cut of exterior fabric
– 1/2m cut of lining fabric
– 1/2m cut of interfacing
– 1 x 30cm zip
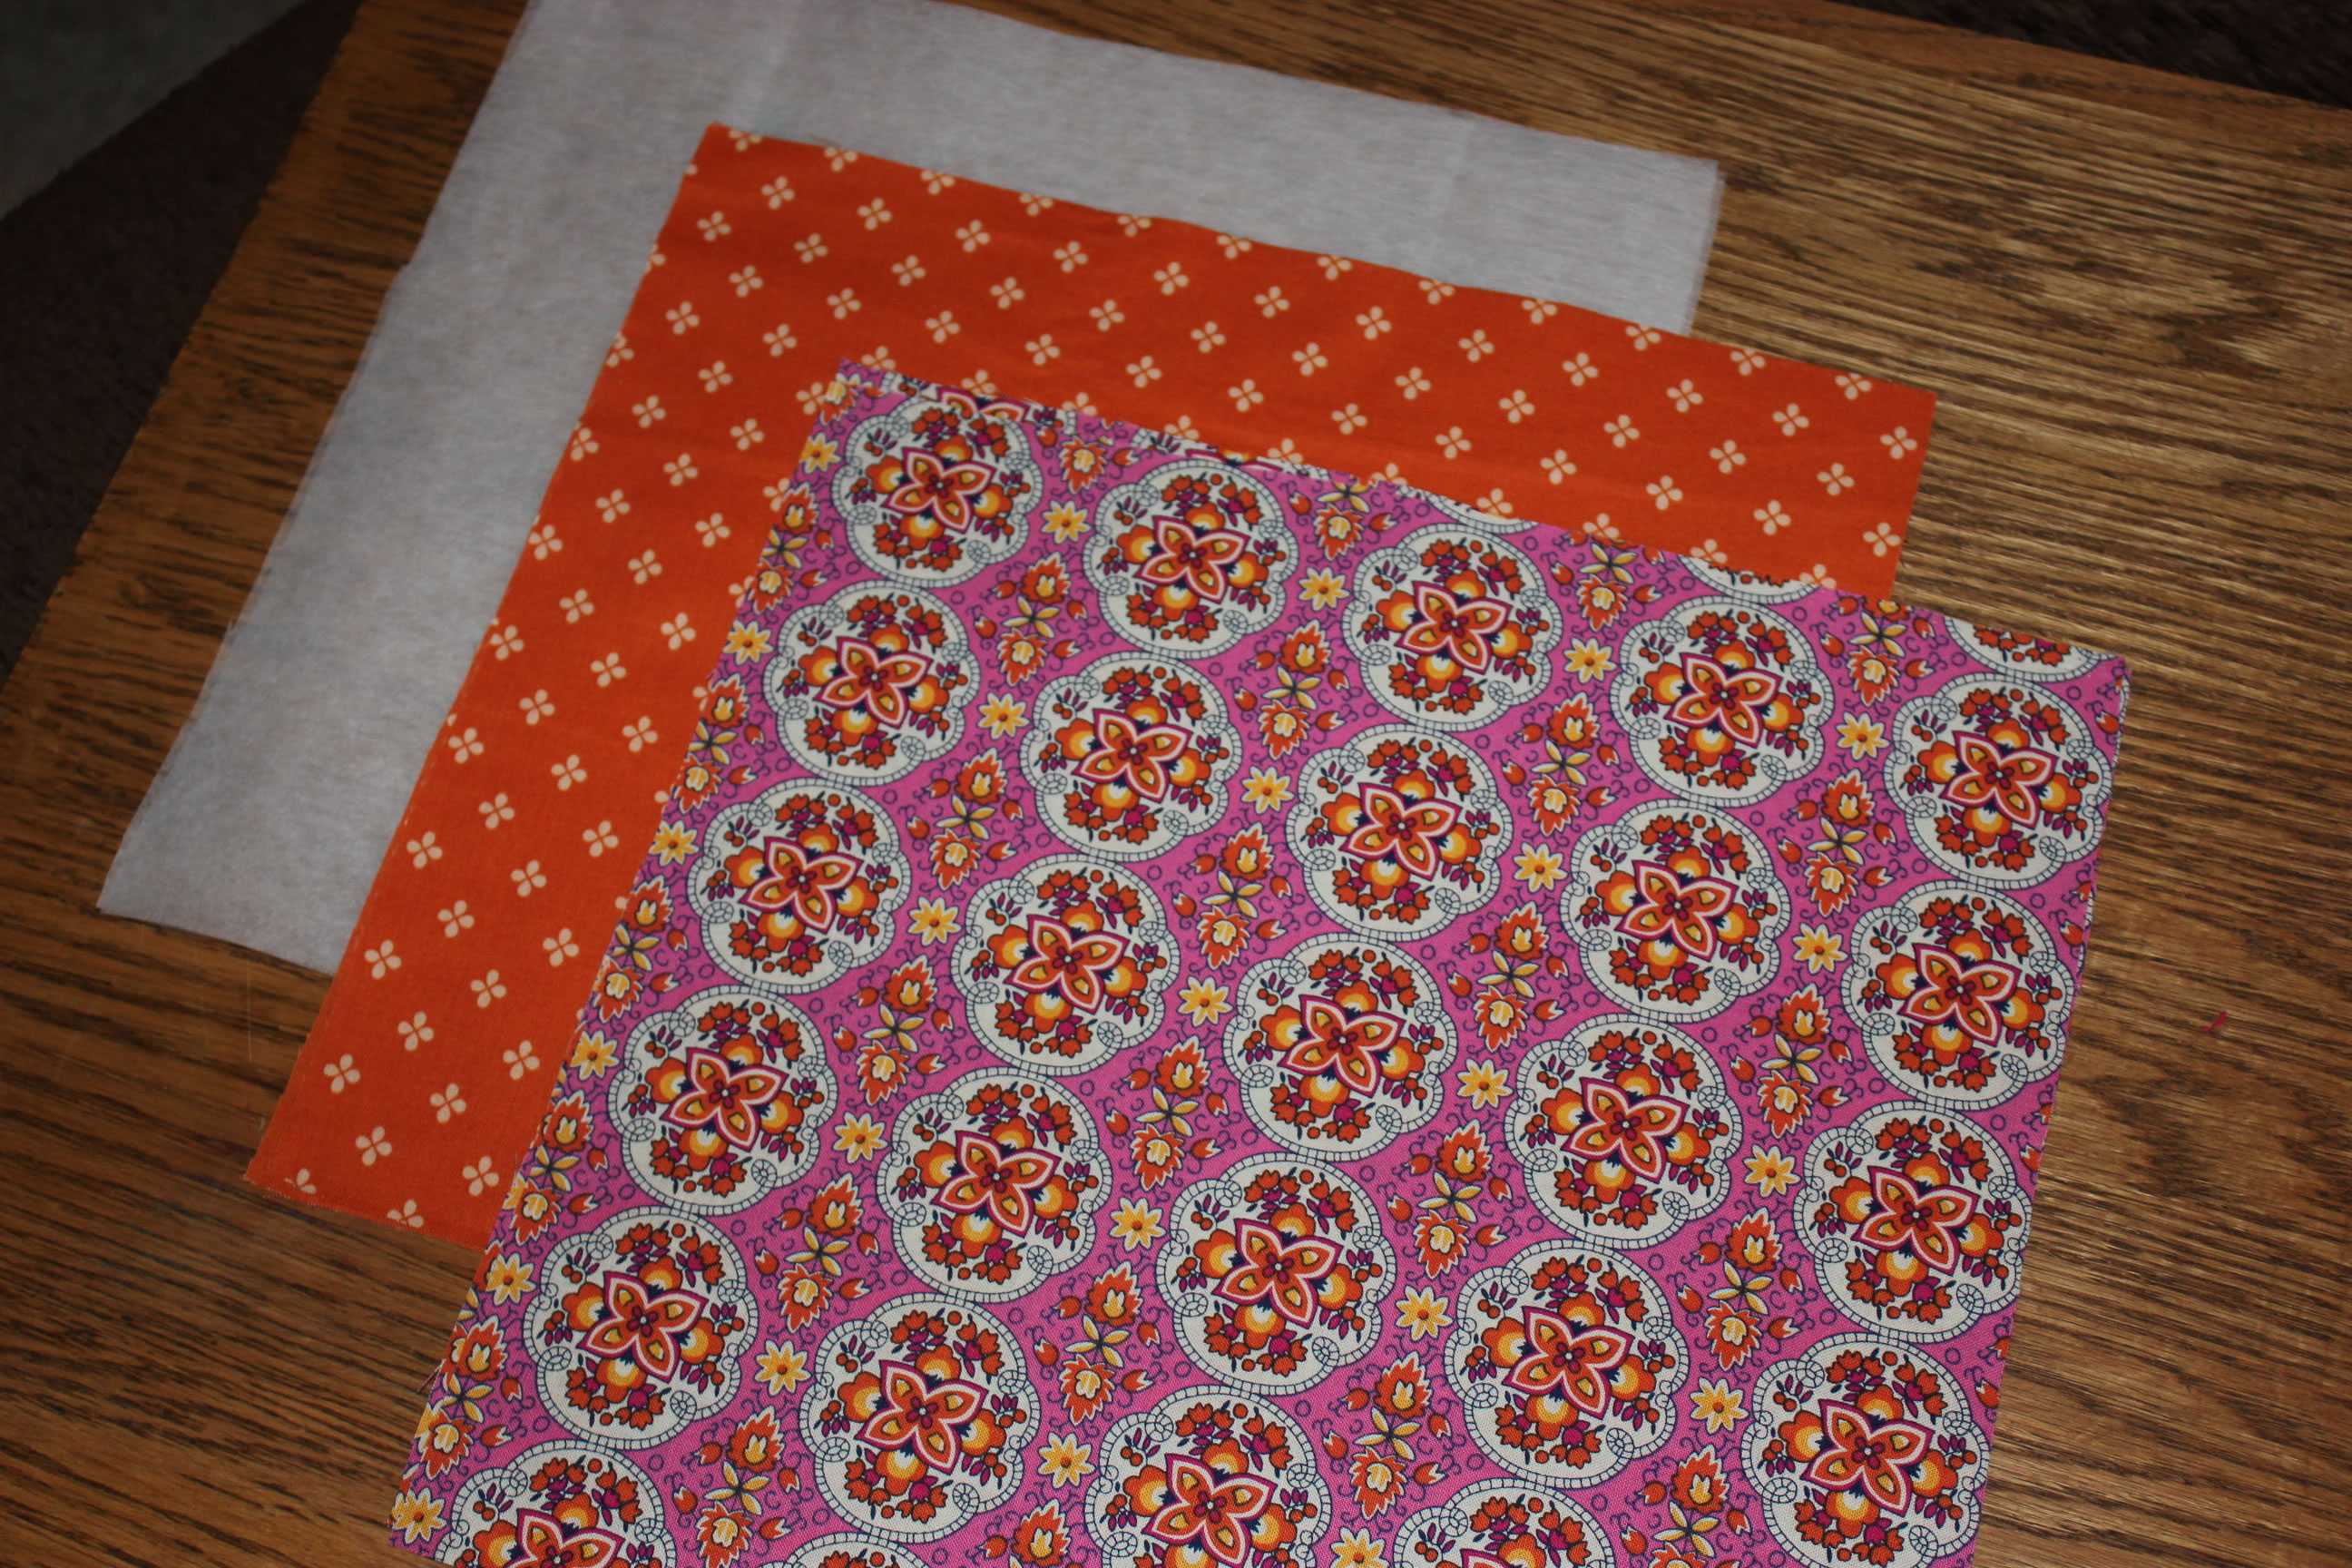
Cut two 11 x 12 inch pieces of each fabric (exterior, lining, and interfacing). Match up and pin one: exterior, interfacing and lining cut. Fabric should be right-side out with interfacing sandwiched in the middle. Do the same thing with the remaining three pieces.

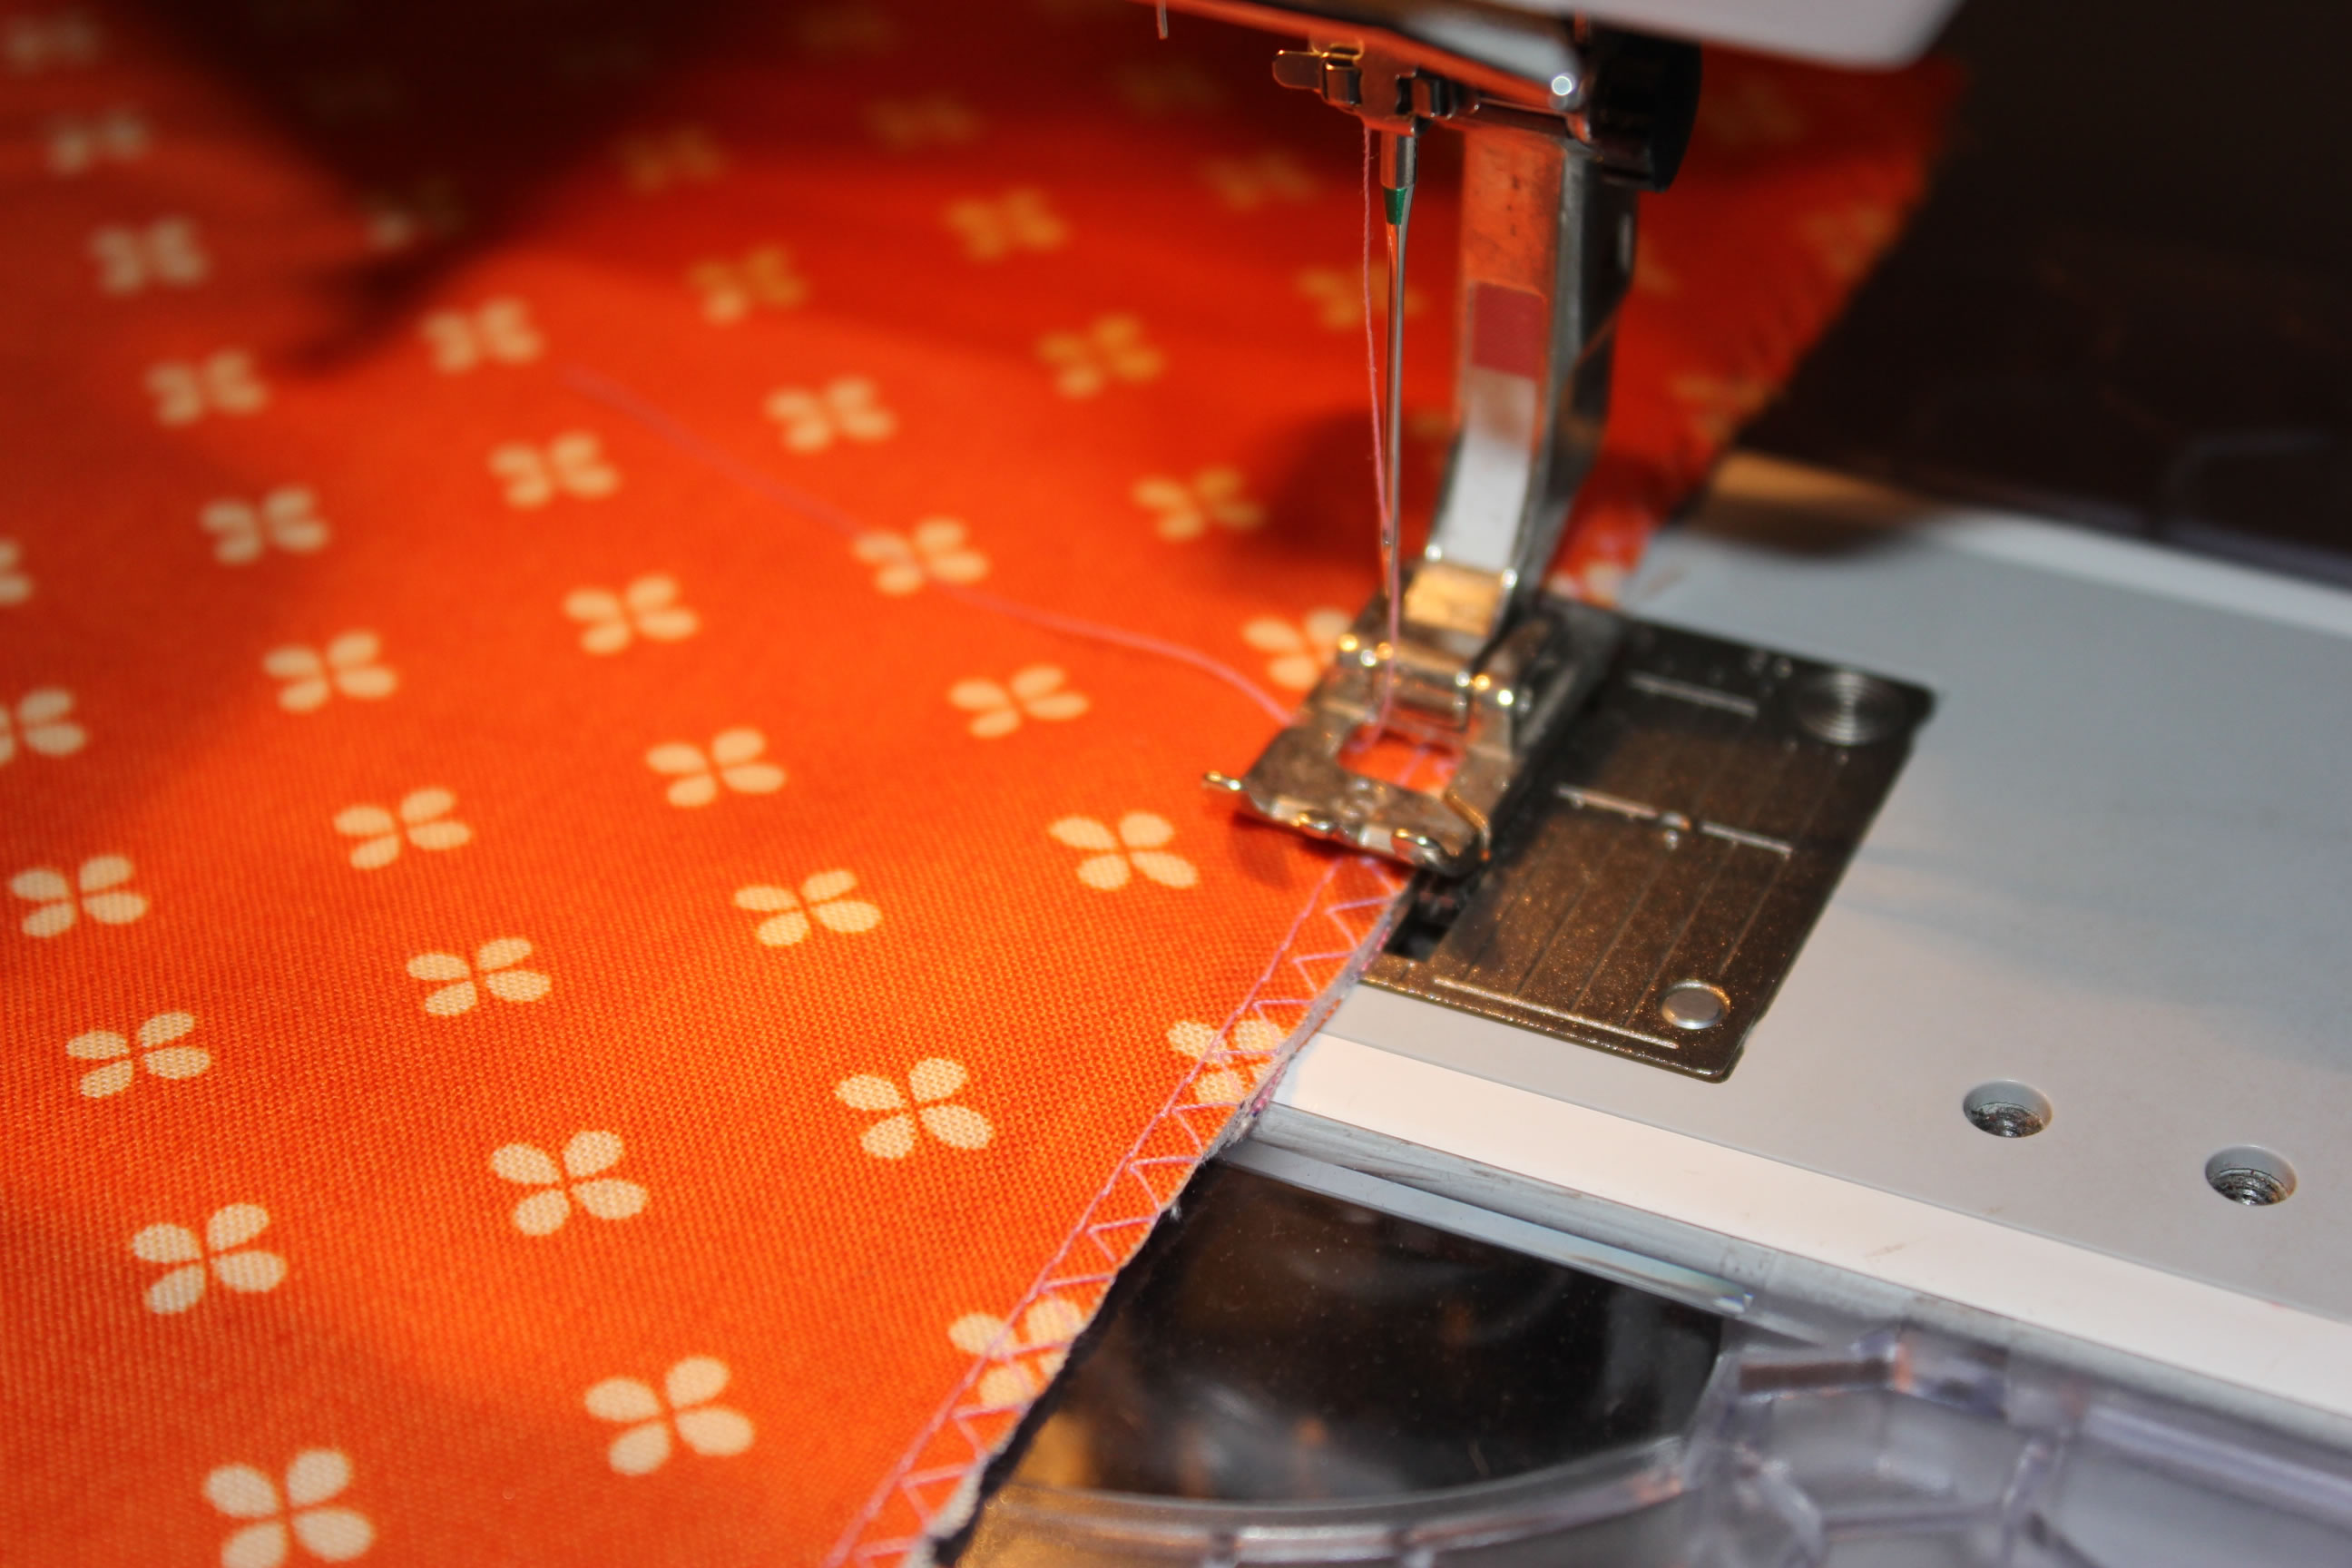
Stitch all the way around both pinned squares. Don’t take too much of a seam allowance (I sewed at presser foot edge). Be sure you use the same seam allowance for both squares. Zig-zag stitch or serge all edges to prevent fraying. If you are using cotton, be warned – it will fray.
Fold over top edge of fabric one half inch and iron press.
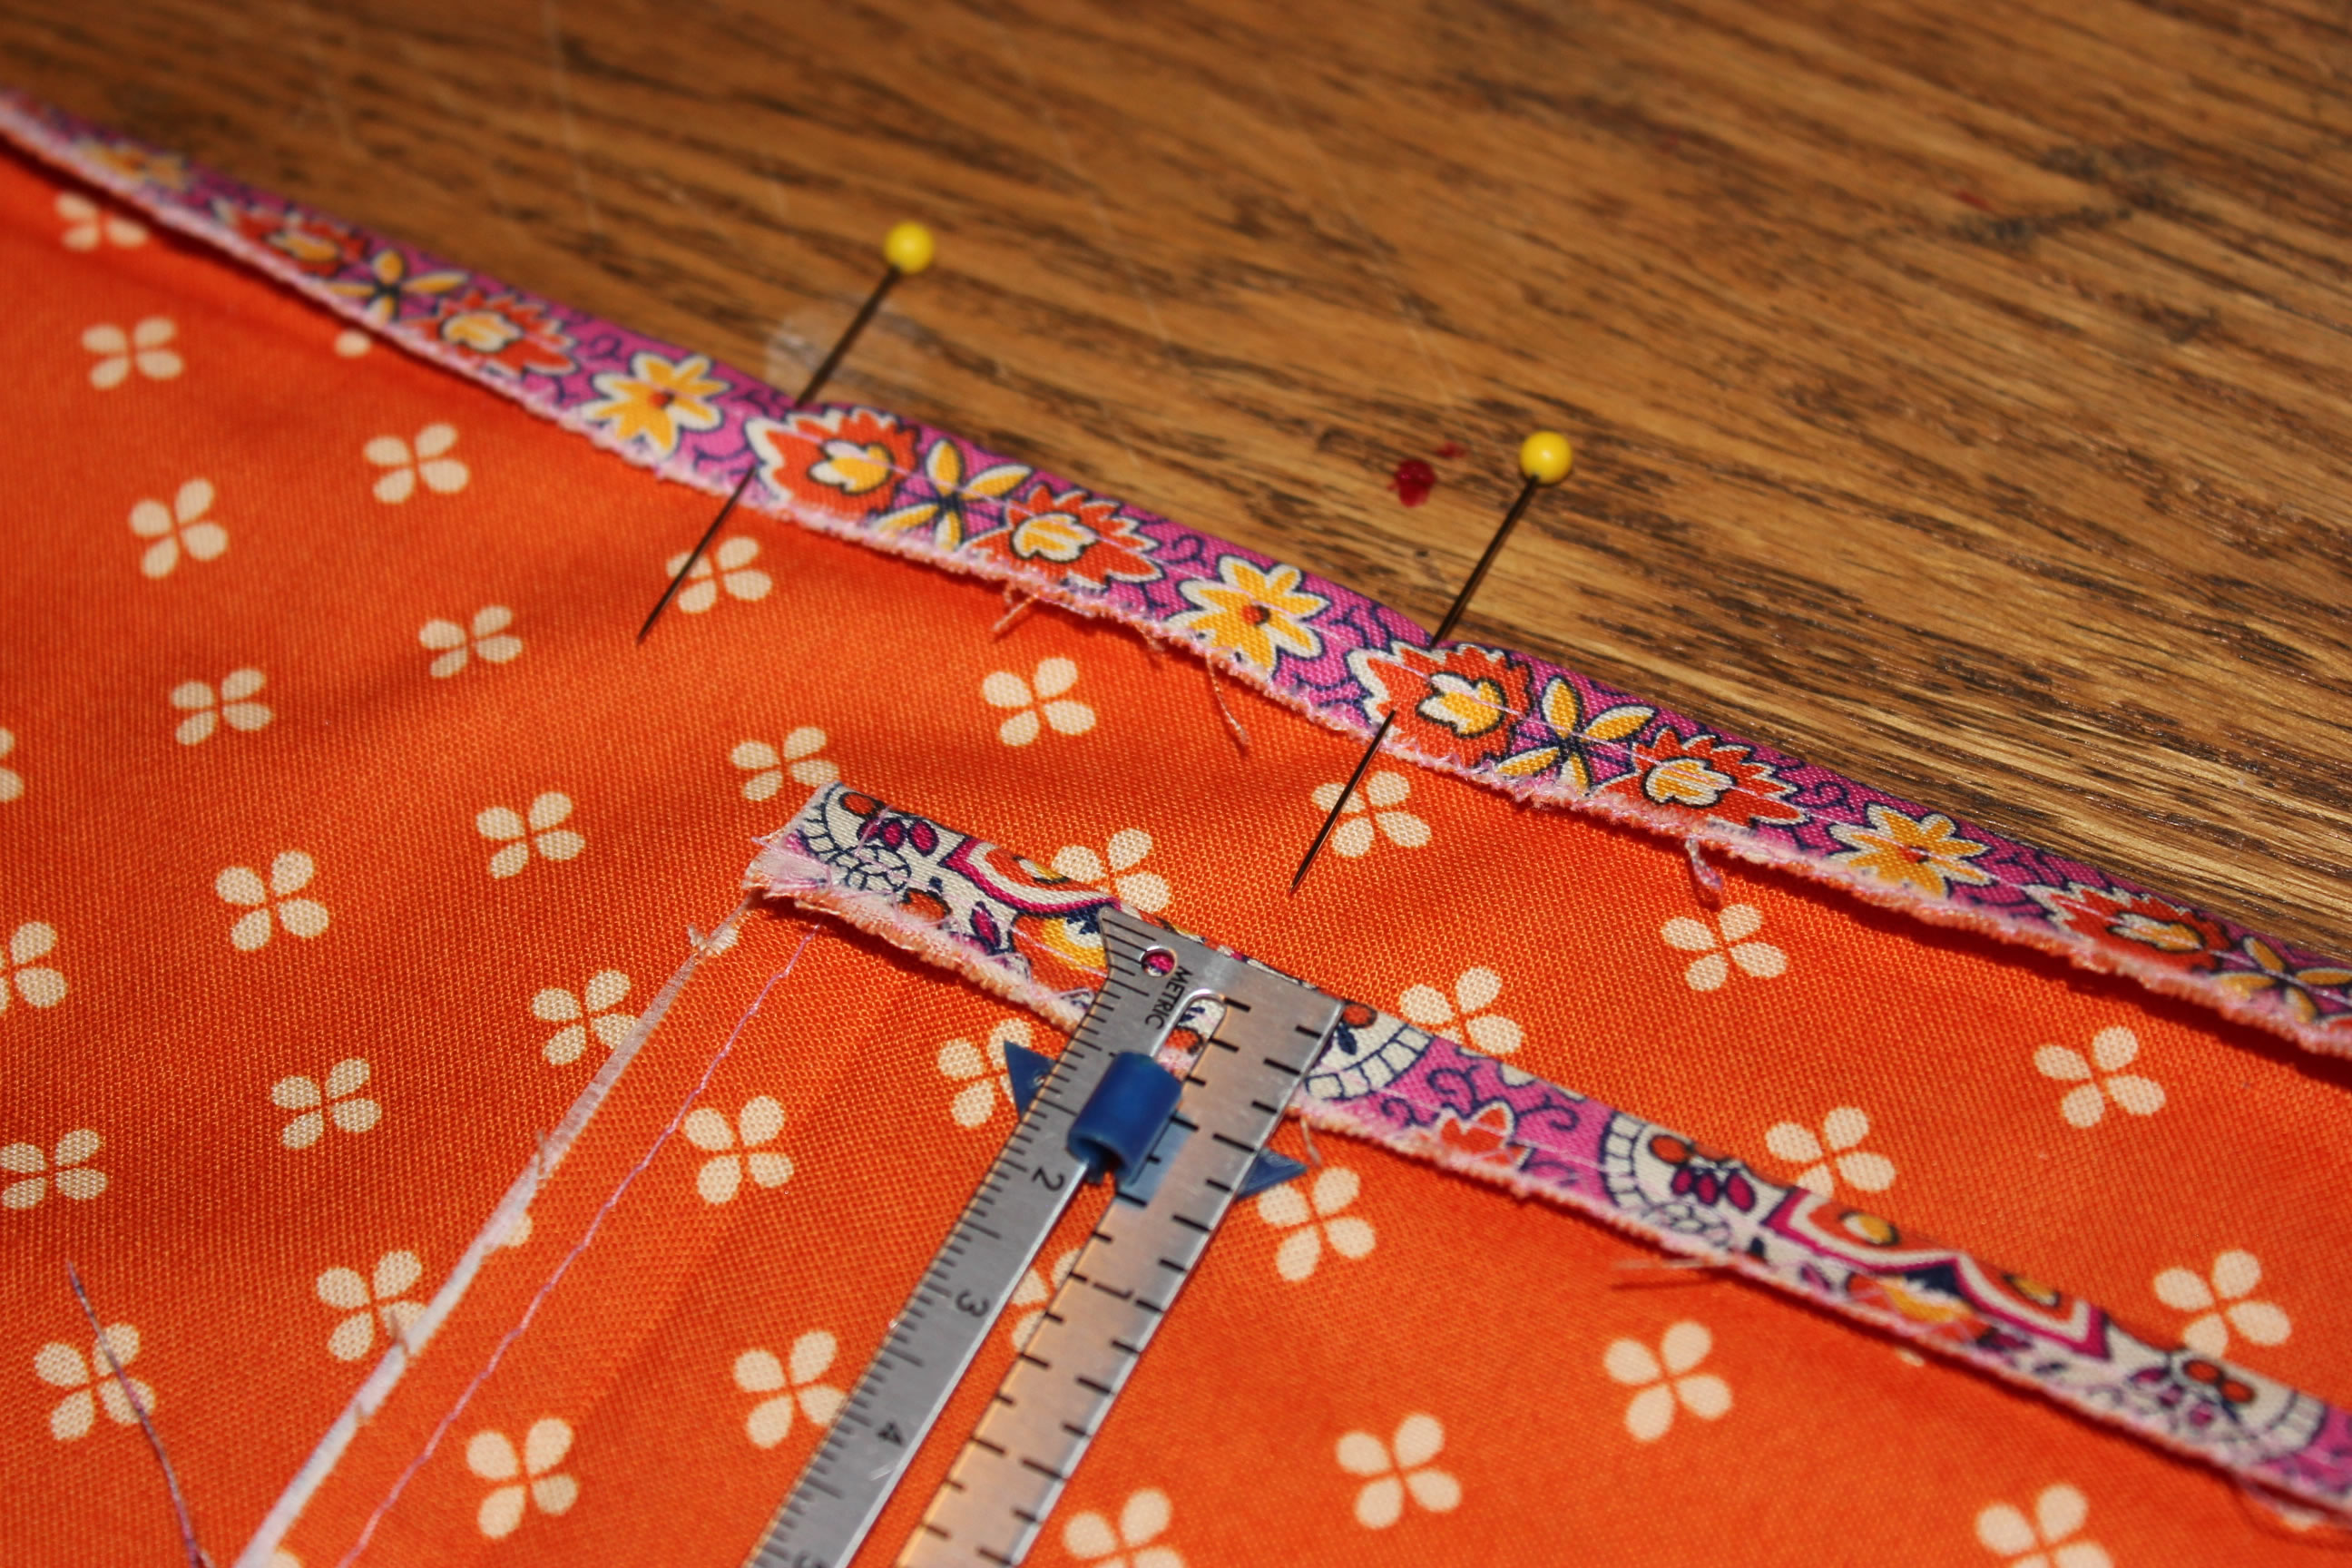
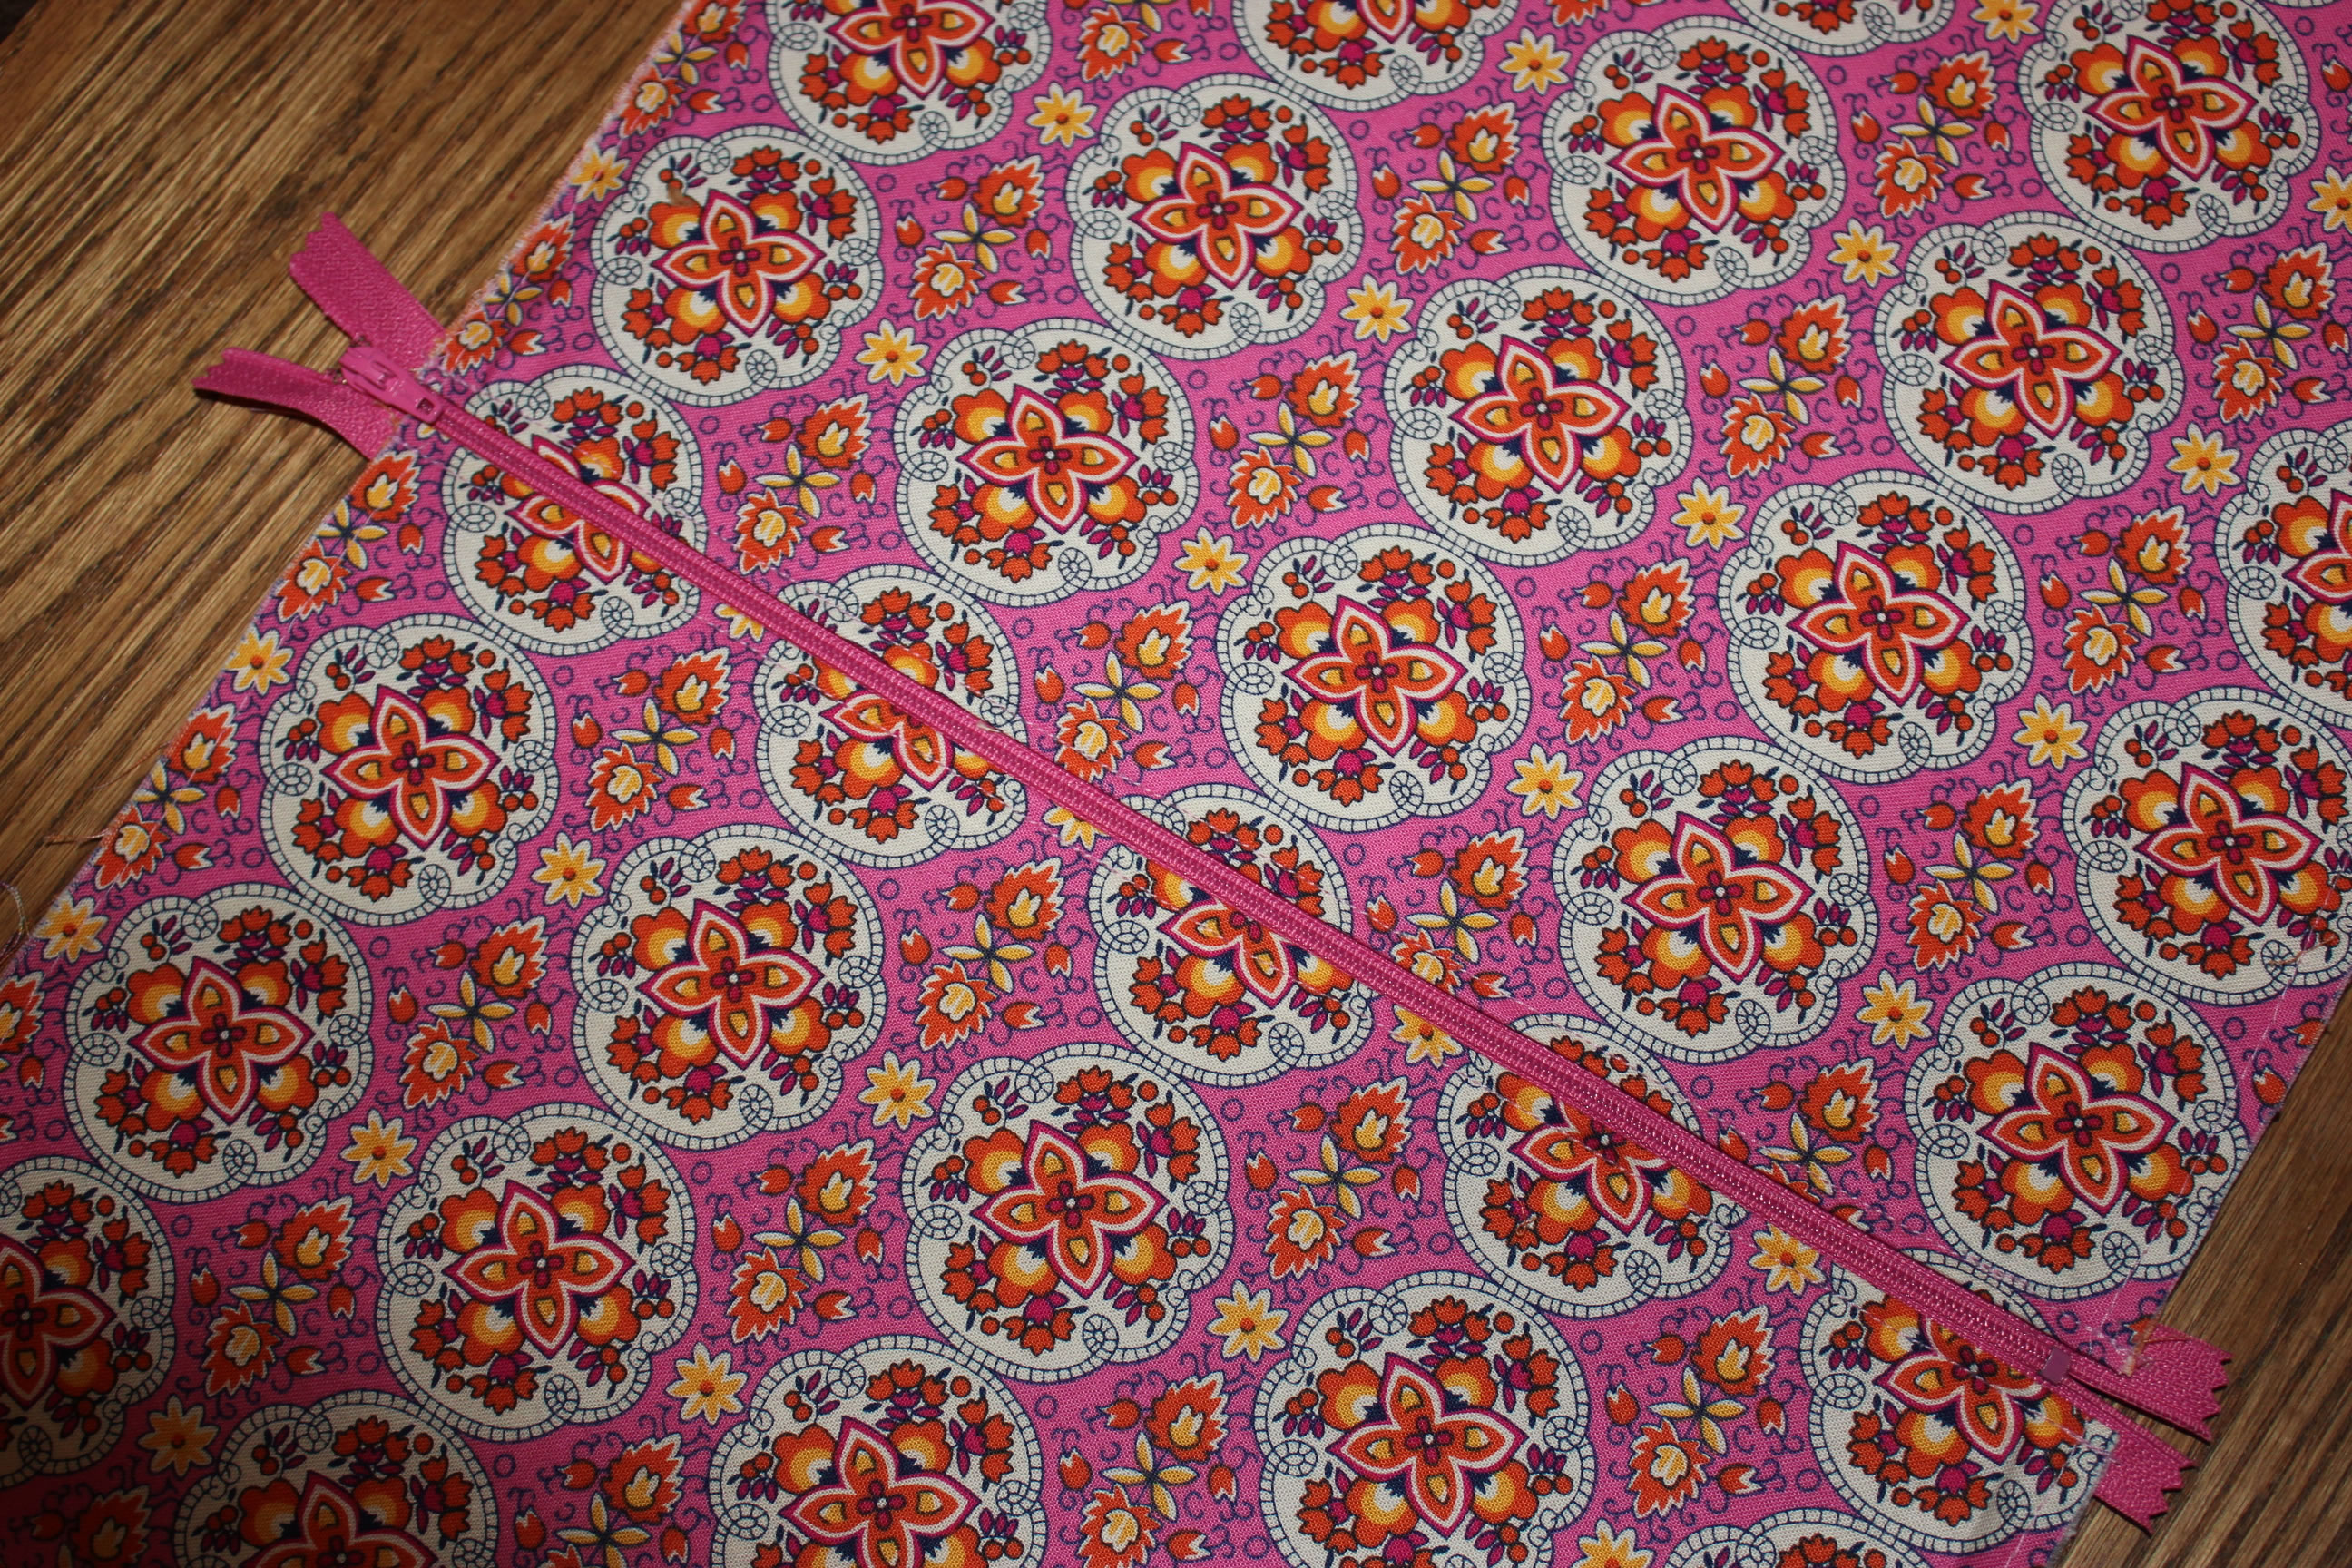
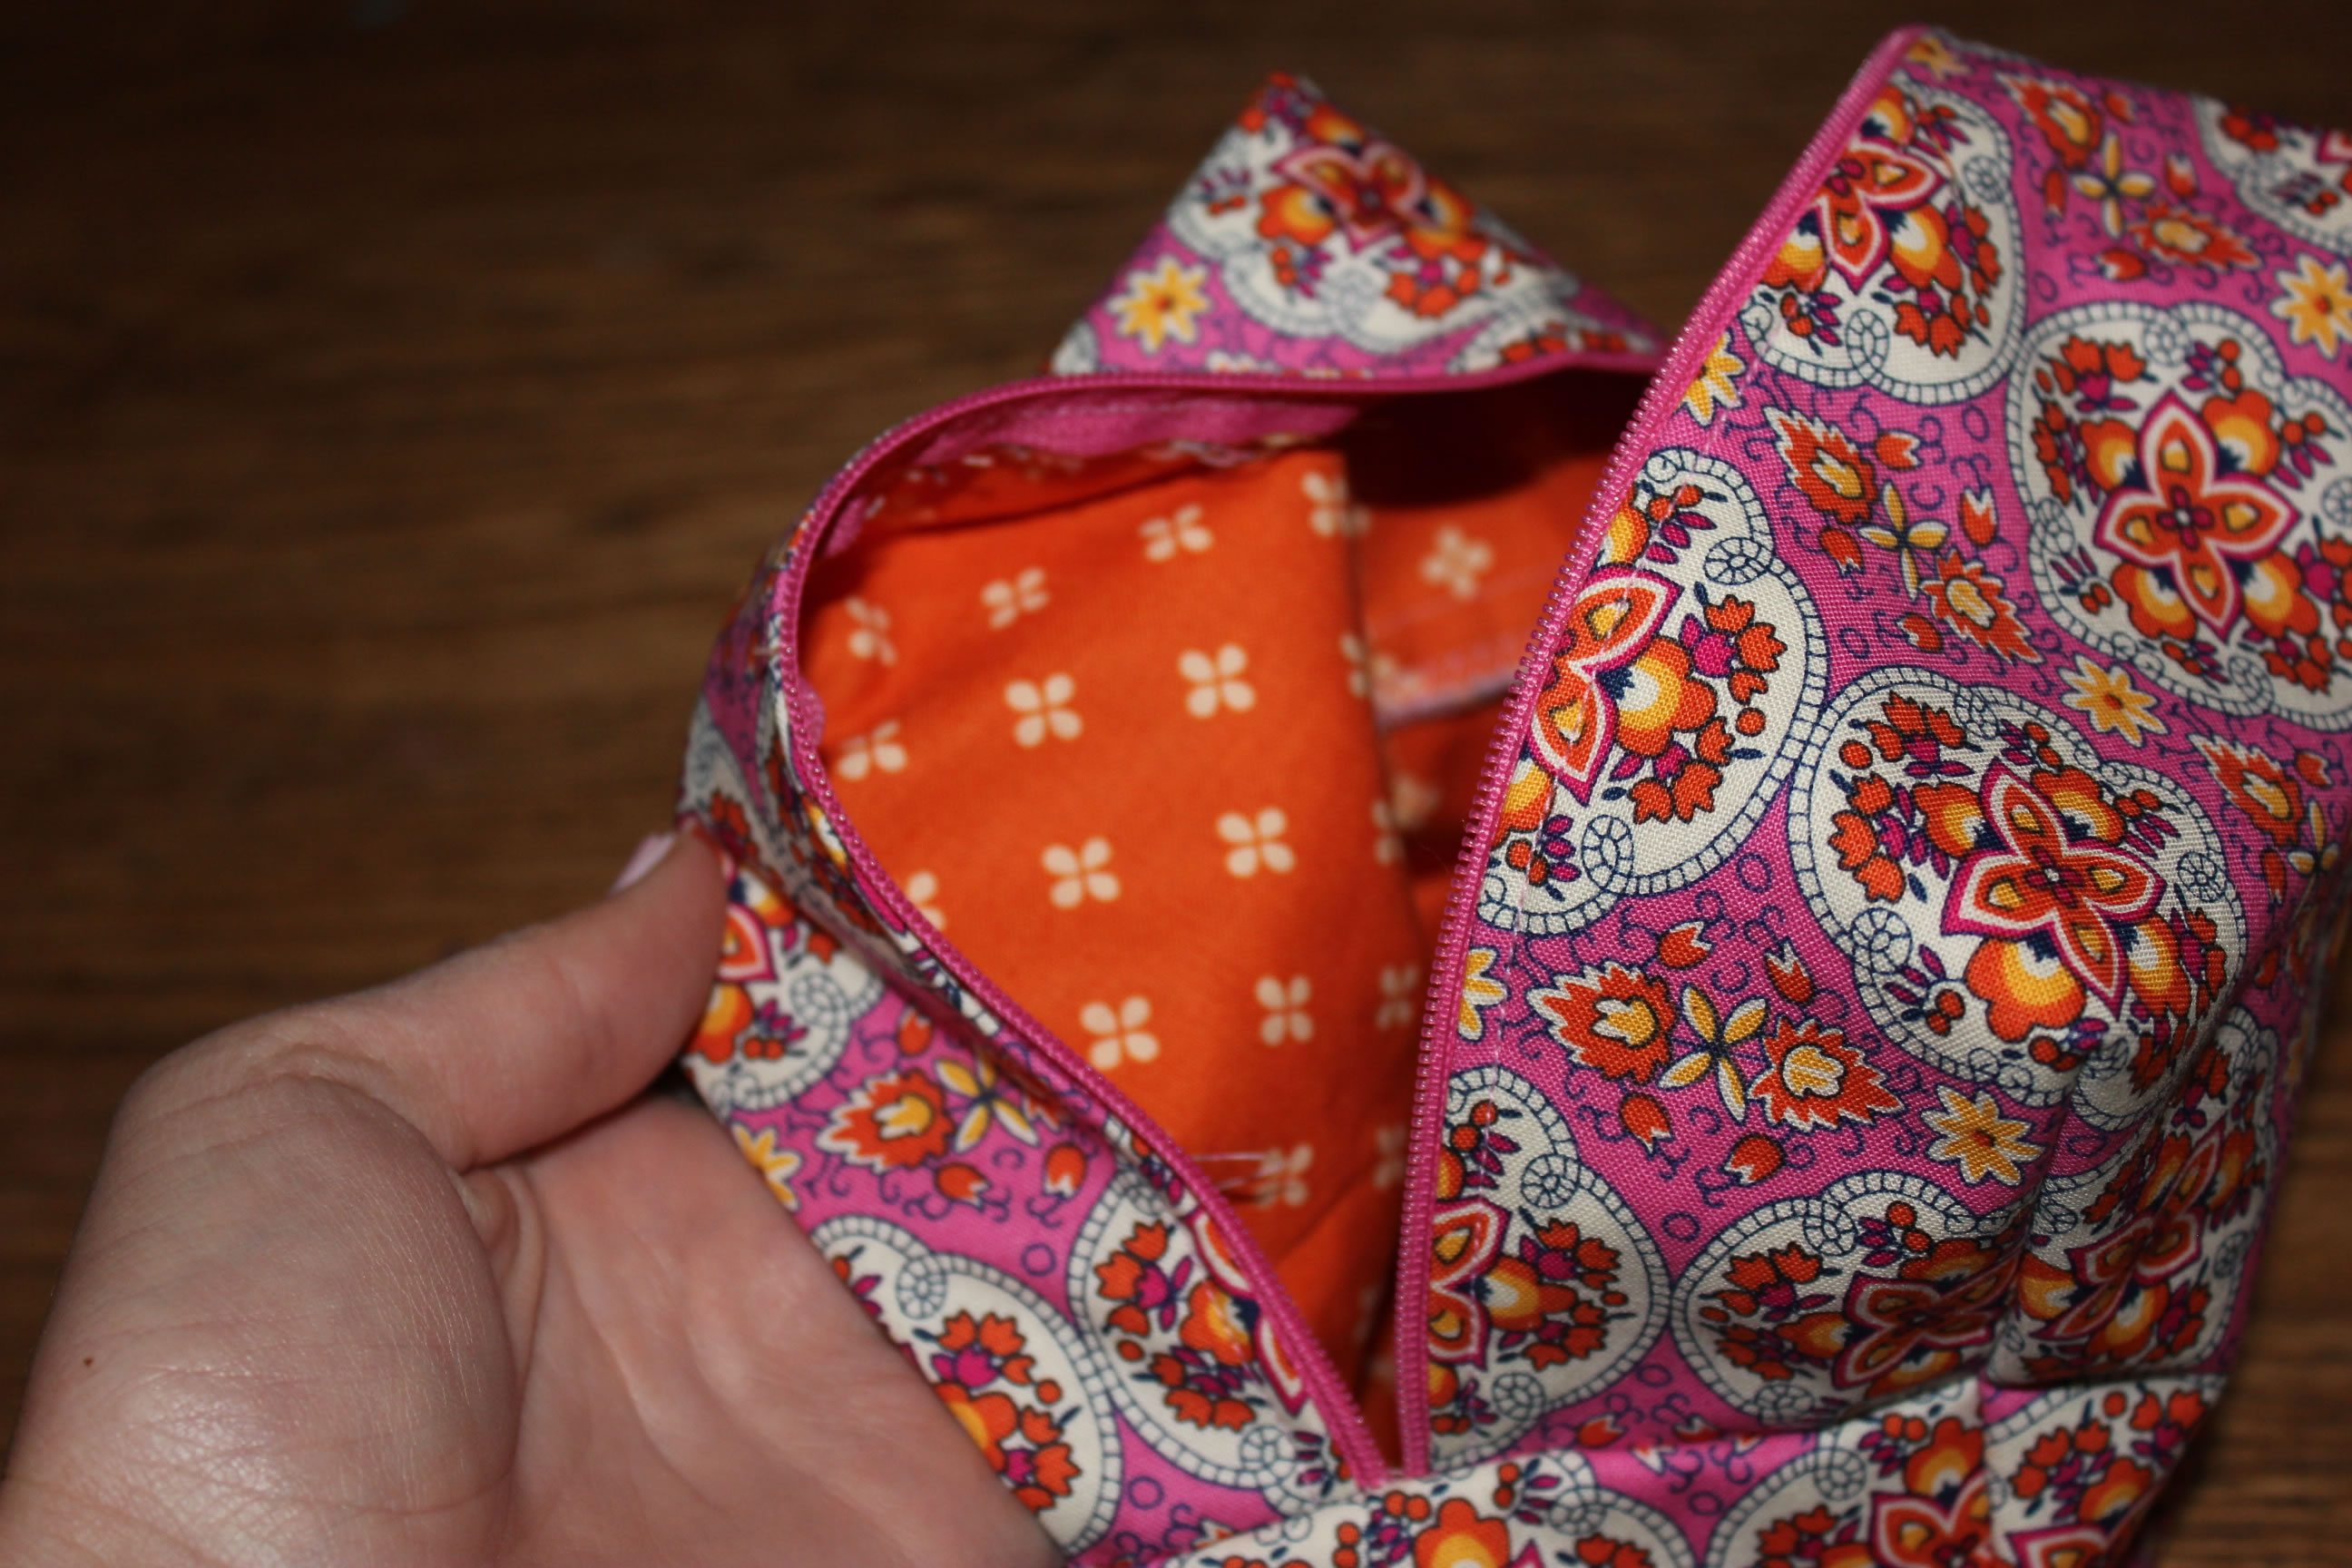
Pin and sew the folded edges you just pressed to the zip. It is okay that your zip is longer than the width of the fabric. Simply center the fabric leaving about an equal amount of excess zip on both ends.
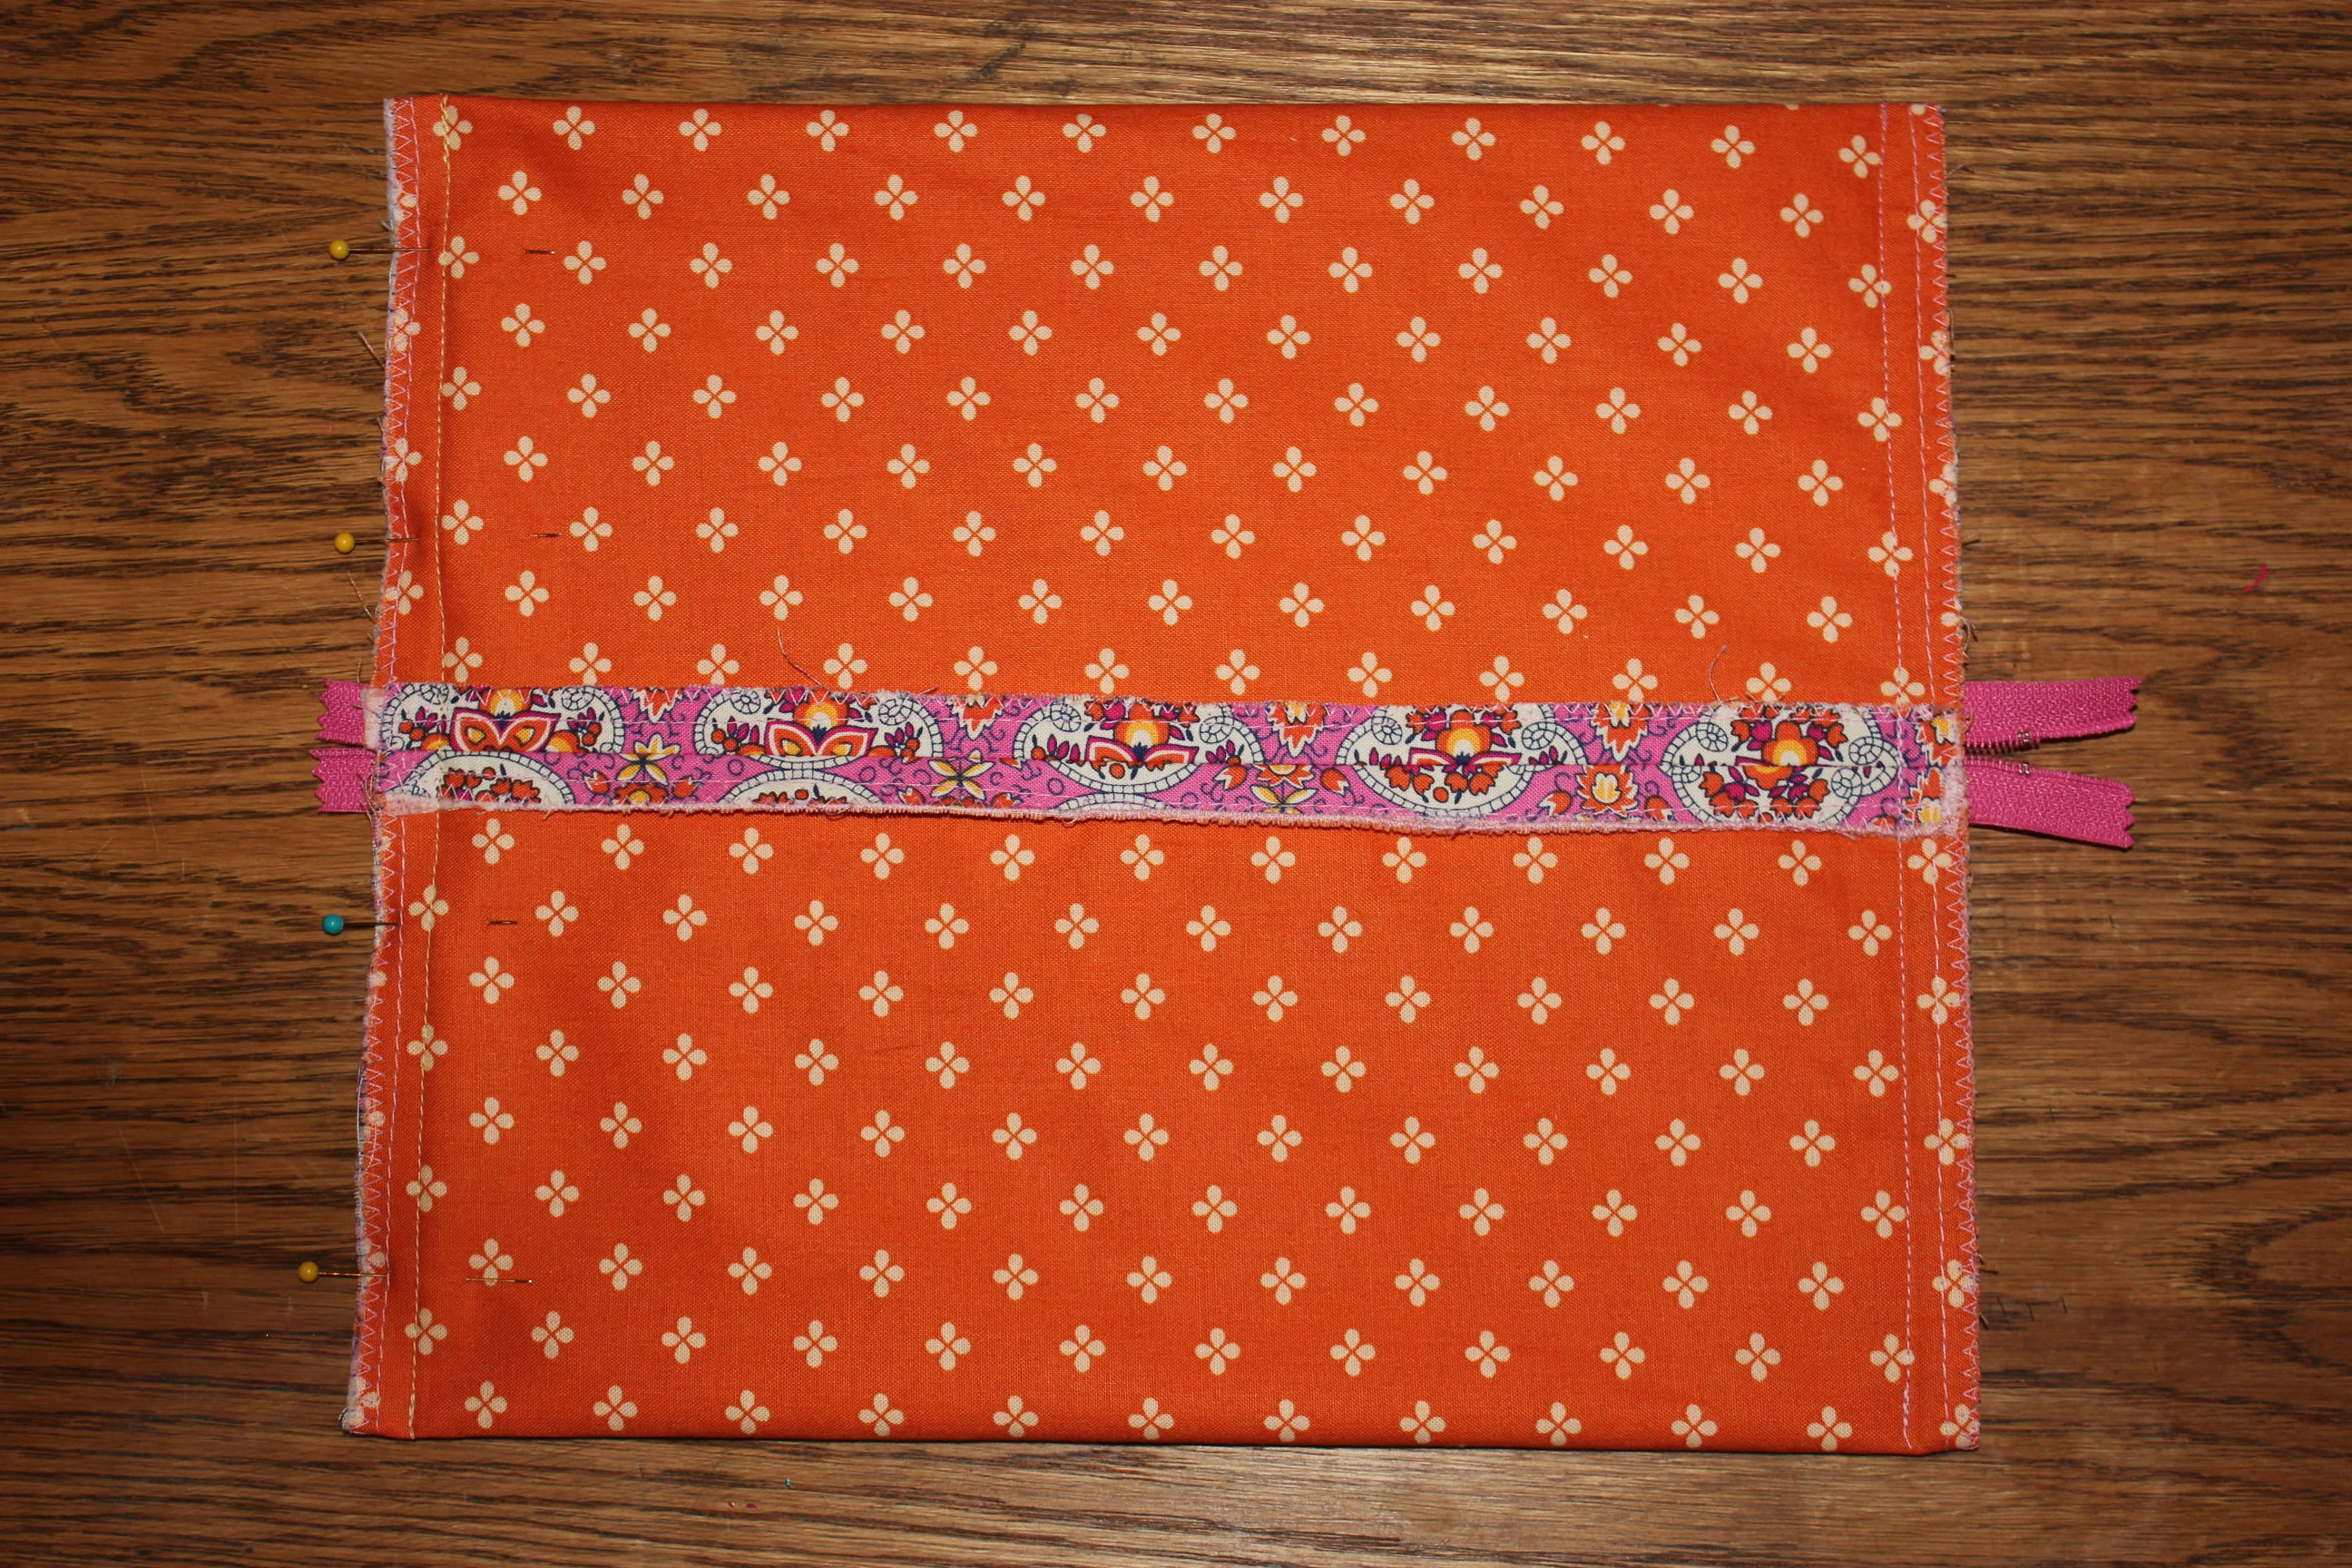
With the fabric facing right-side up, grab the ends of both sides and pull them up and together over the zip so that the right sides of the fabric are touching each other. Pin and stitch these edges together then iron press the seam flat. You should now have something that looks like this…


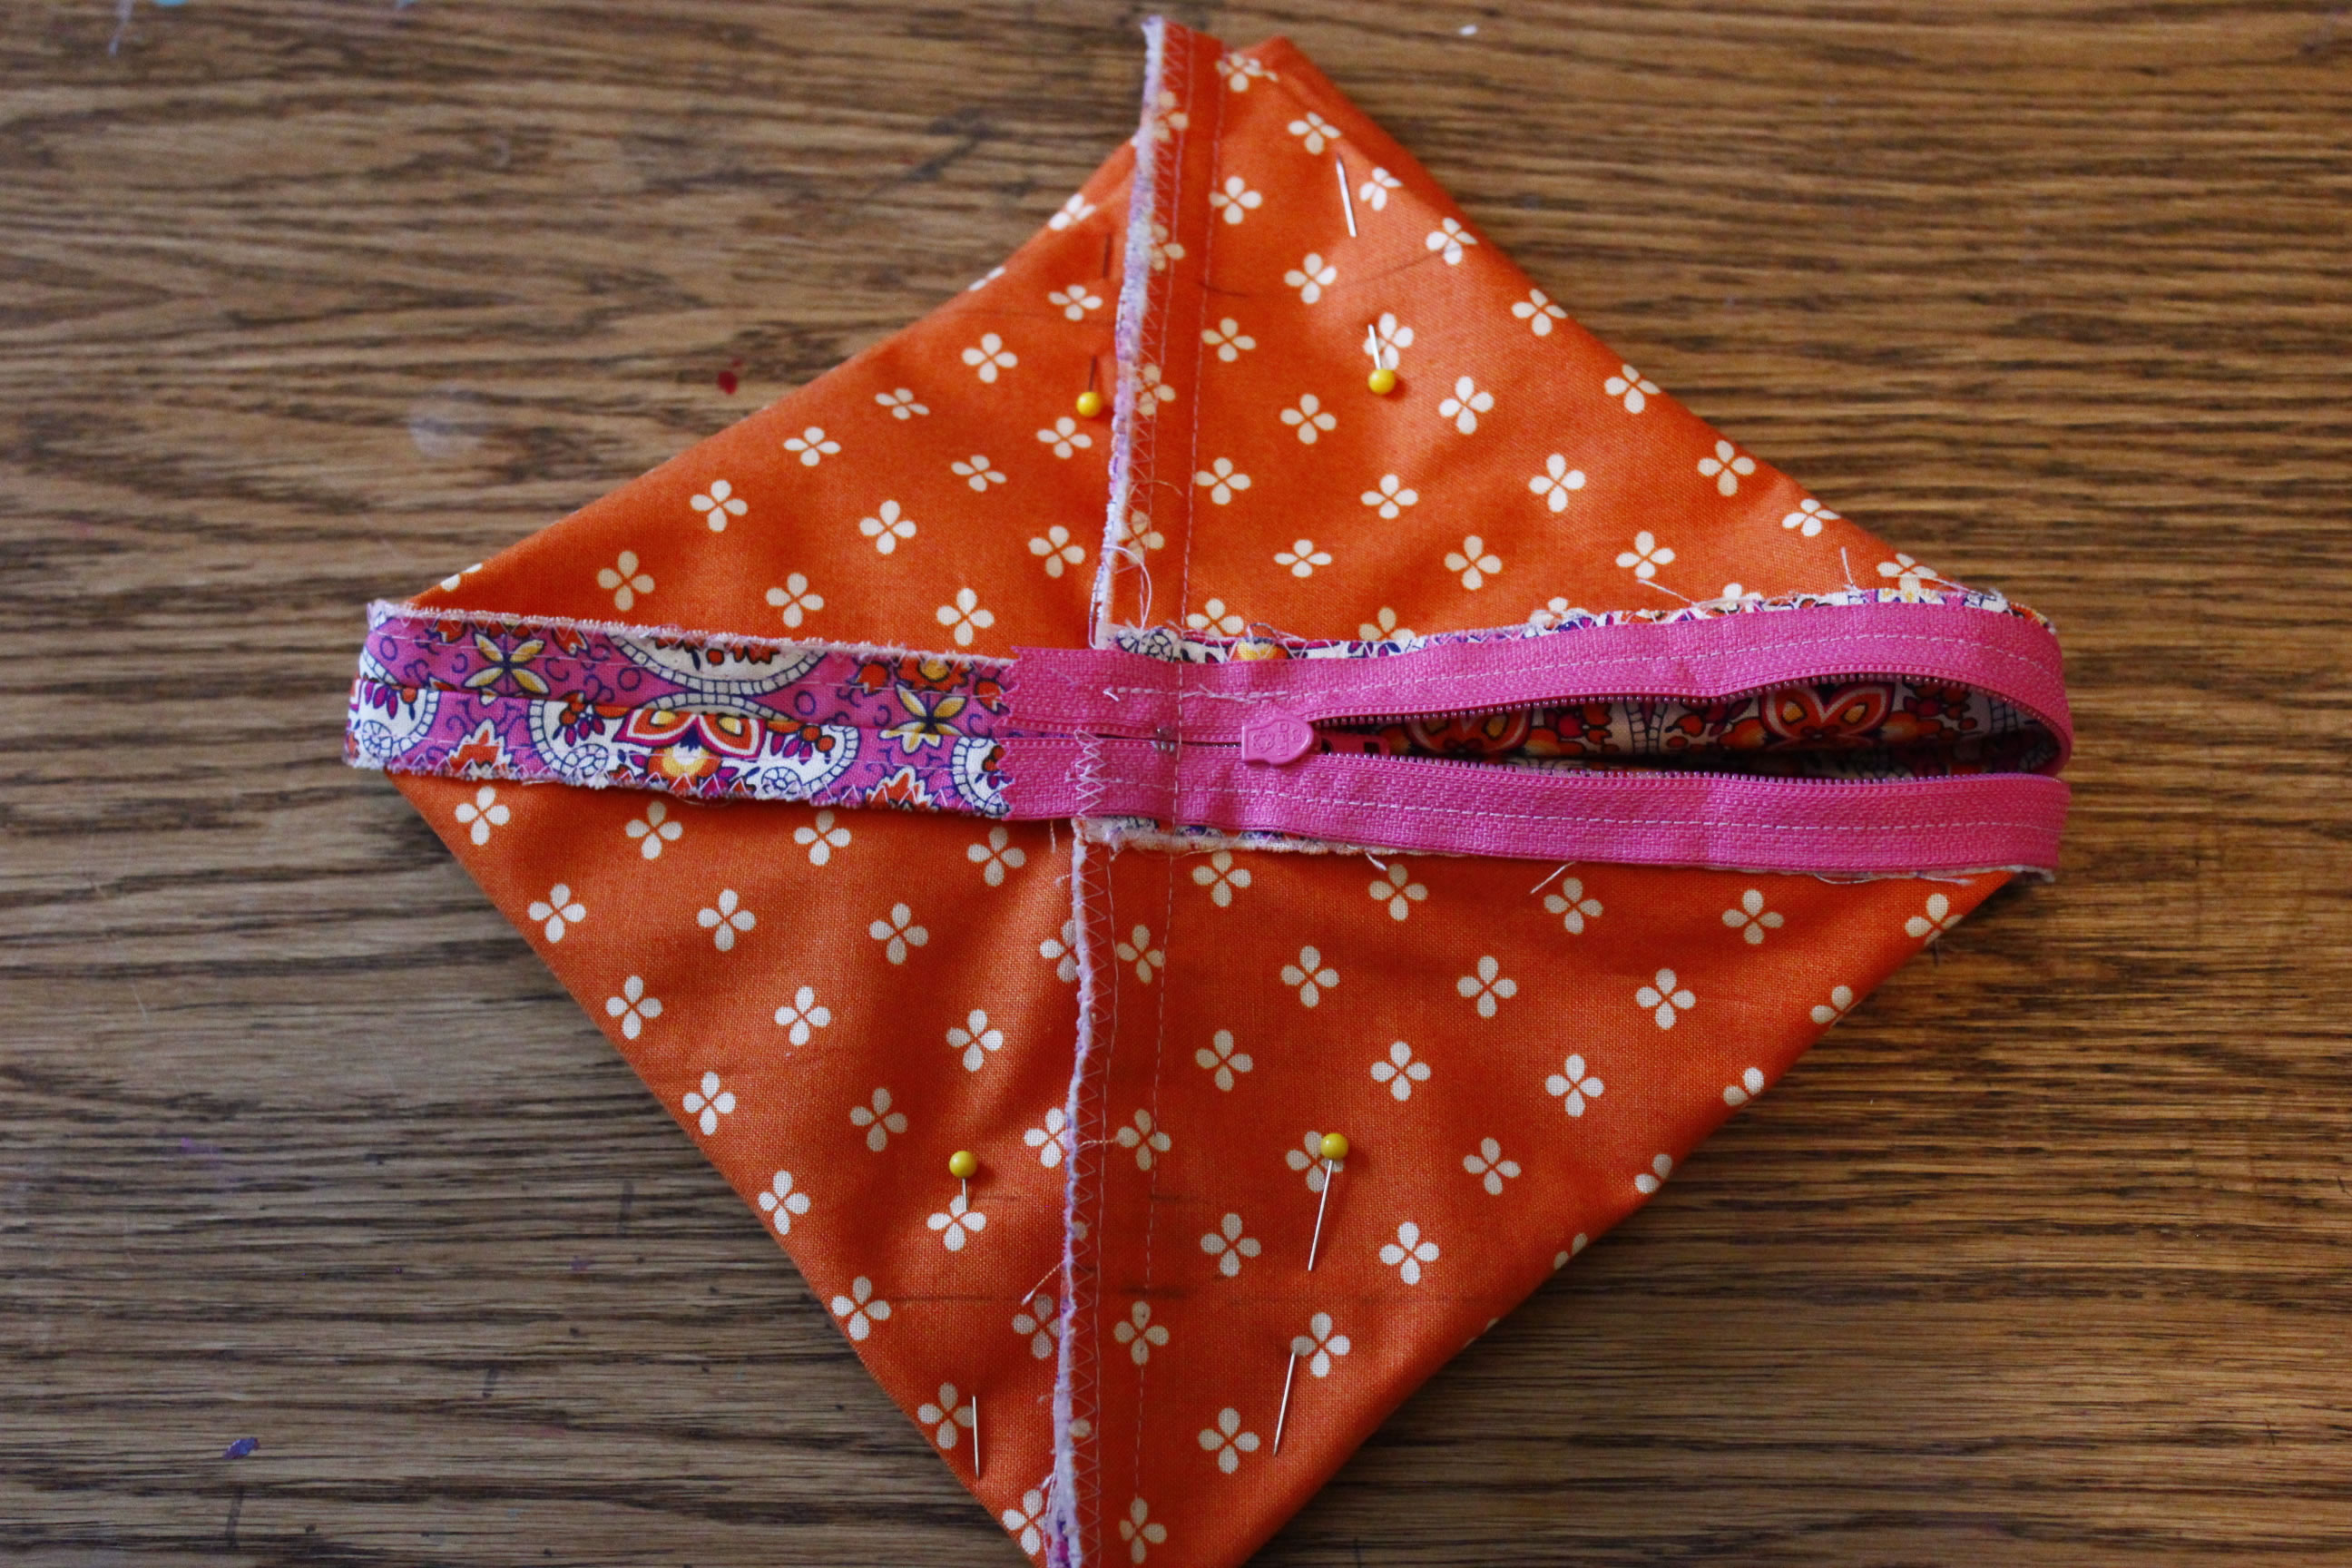
Lay the open-pressed bottom seam directly over the zip so that each side measures equally. Move the zip pull to the middle. This step is important! You are now going to stitch the sides closed. Be sure to sew slowly over the zipper. It is important to have the zip pull in the middle because if it is on the edge and ends up outside of the seams you are making you’re going to have to unpick it and do it all over again.
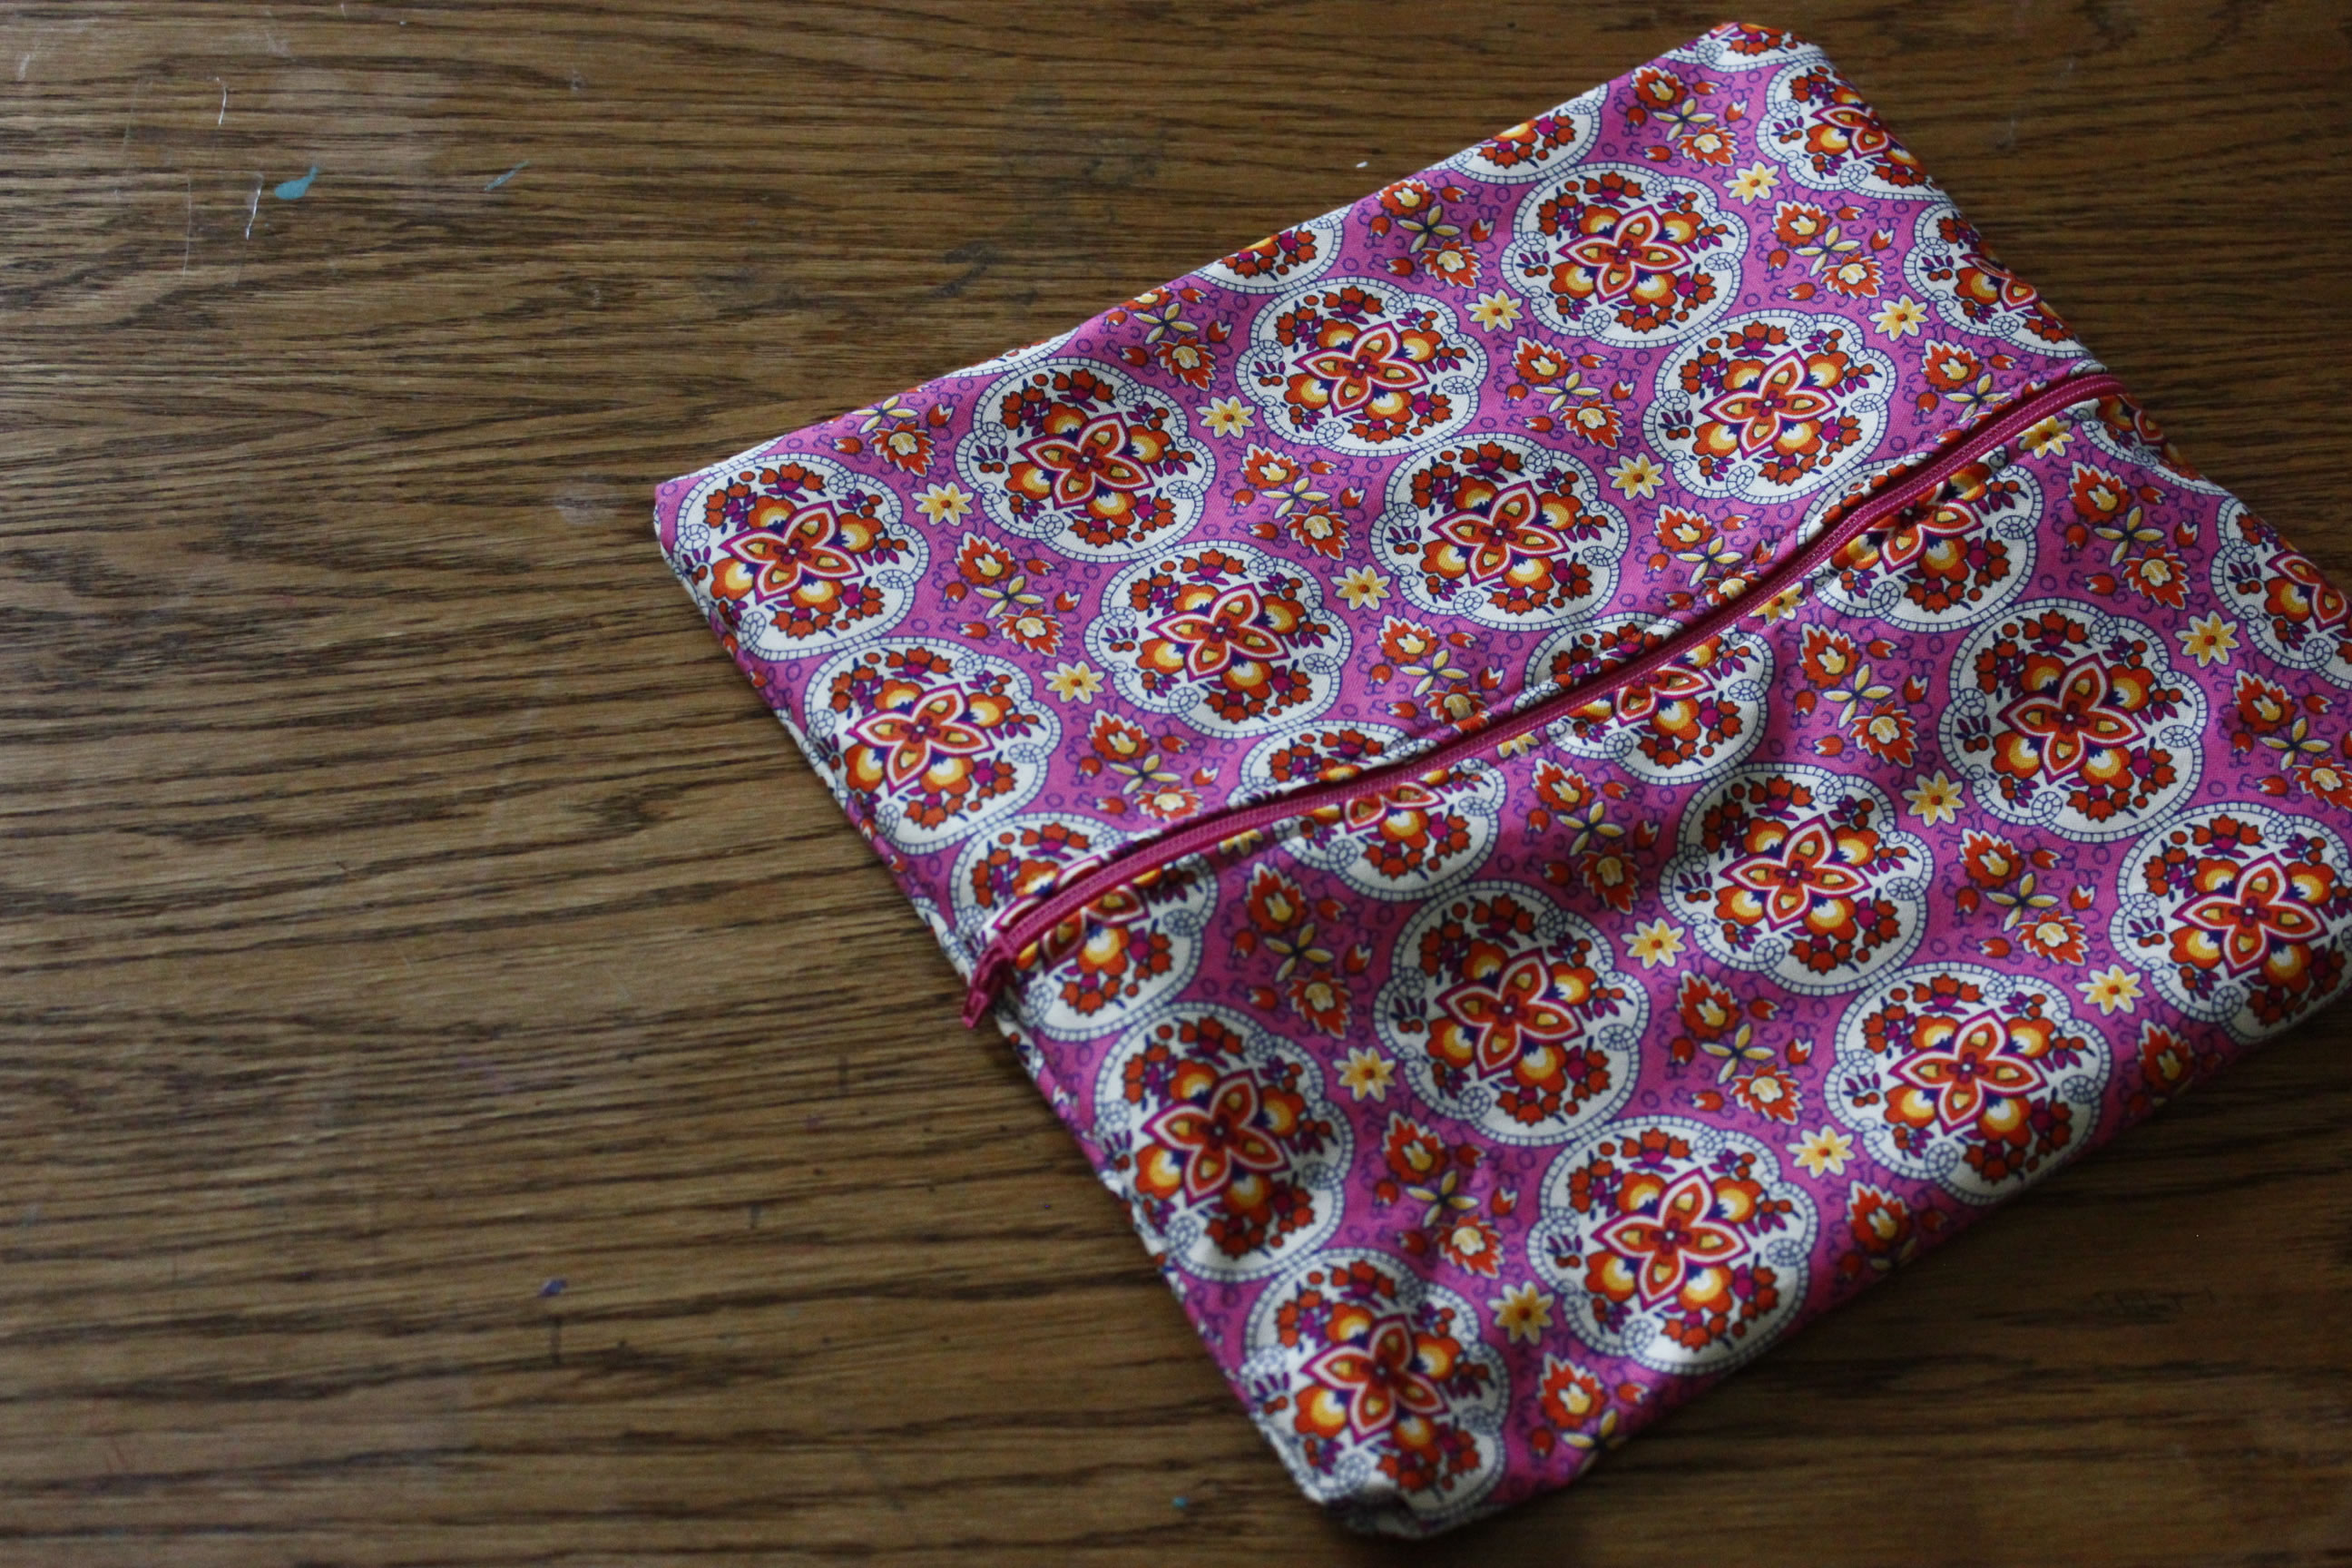
After you have sewed up the sides, if you were to turn your project around (right-side out) it should now look like this…
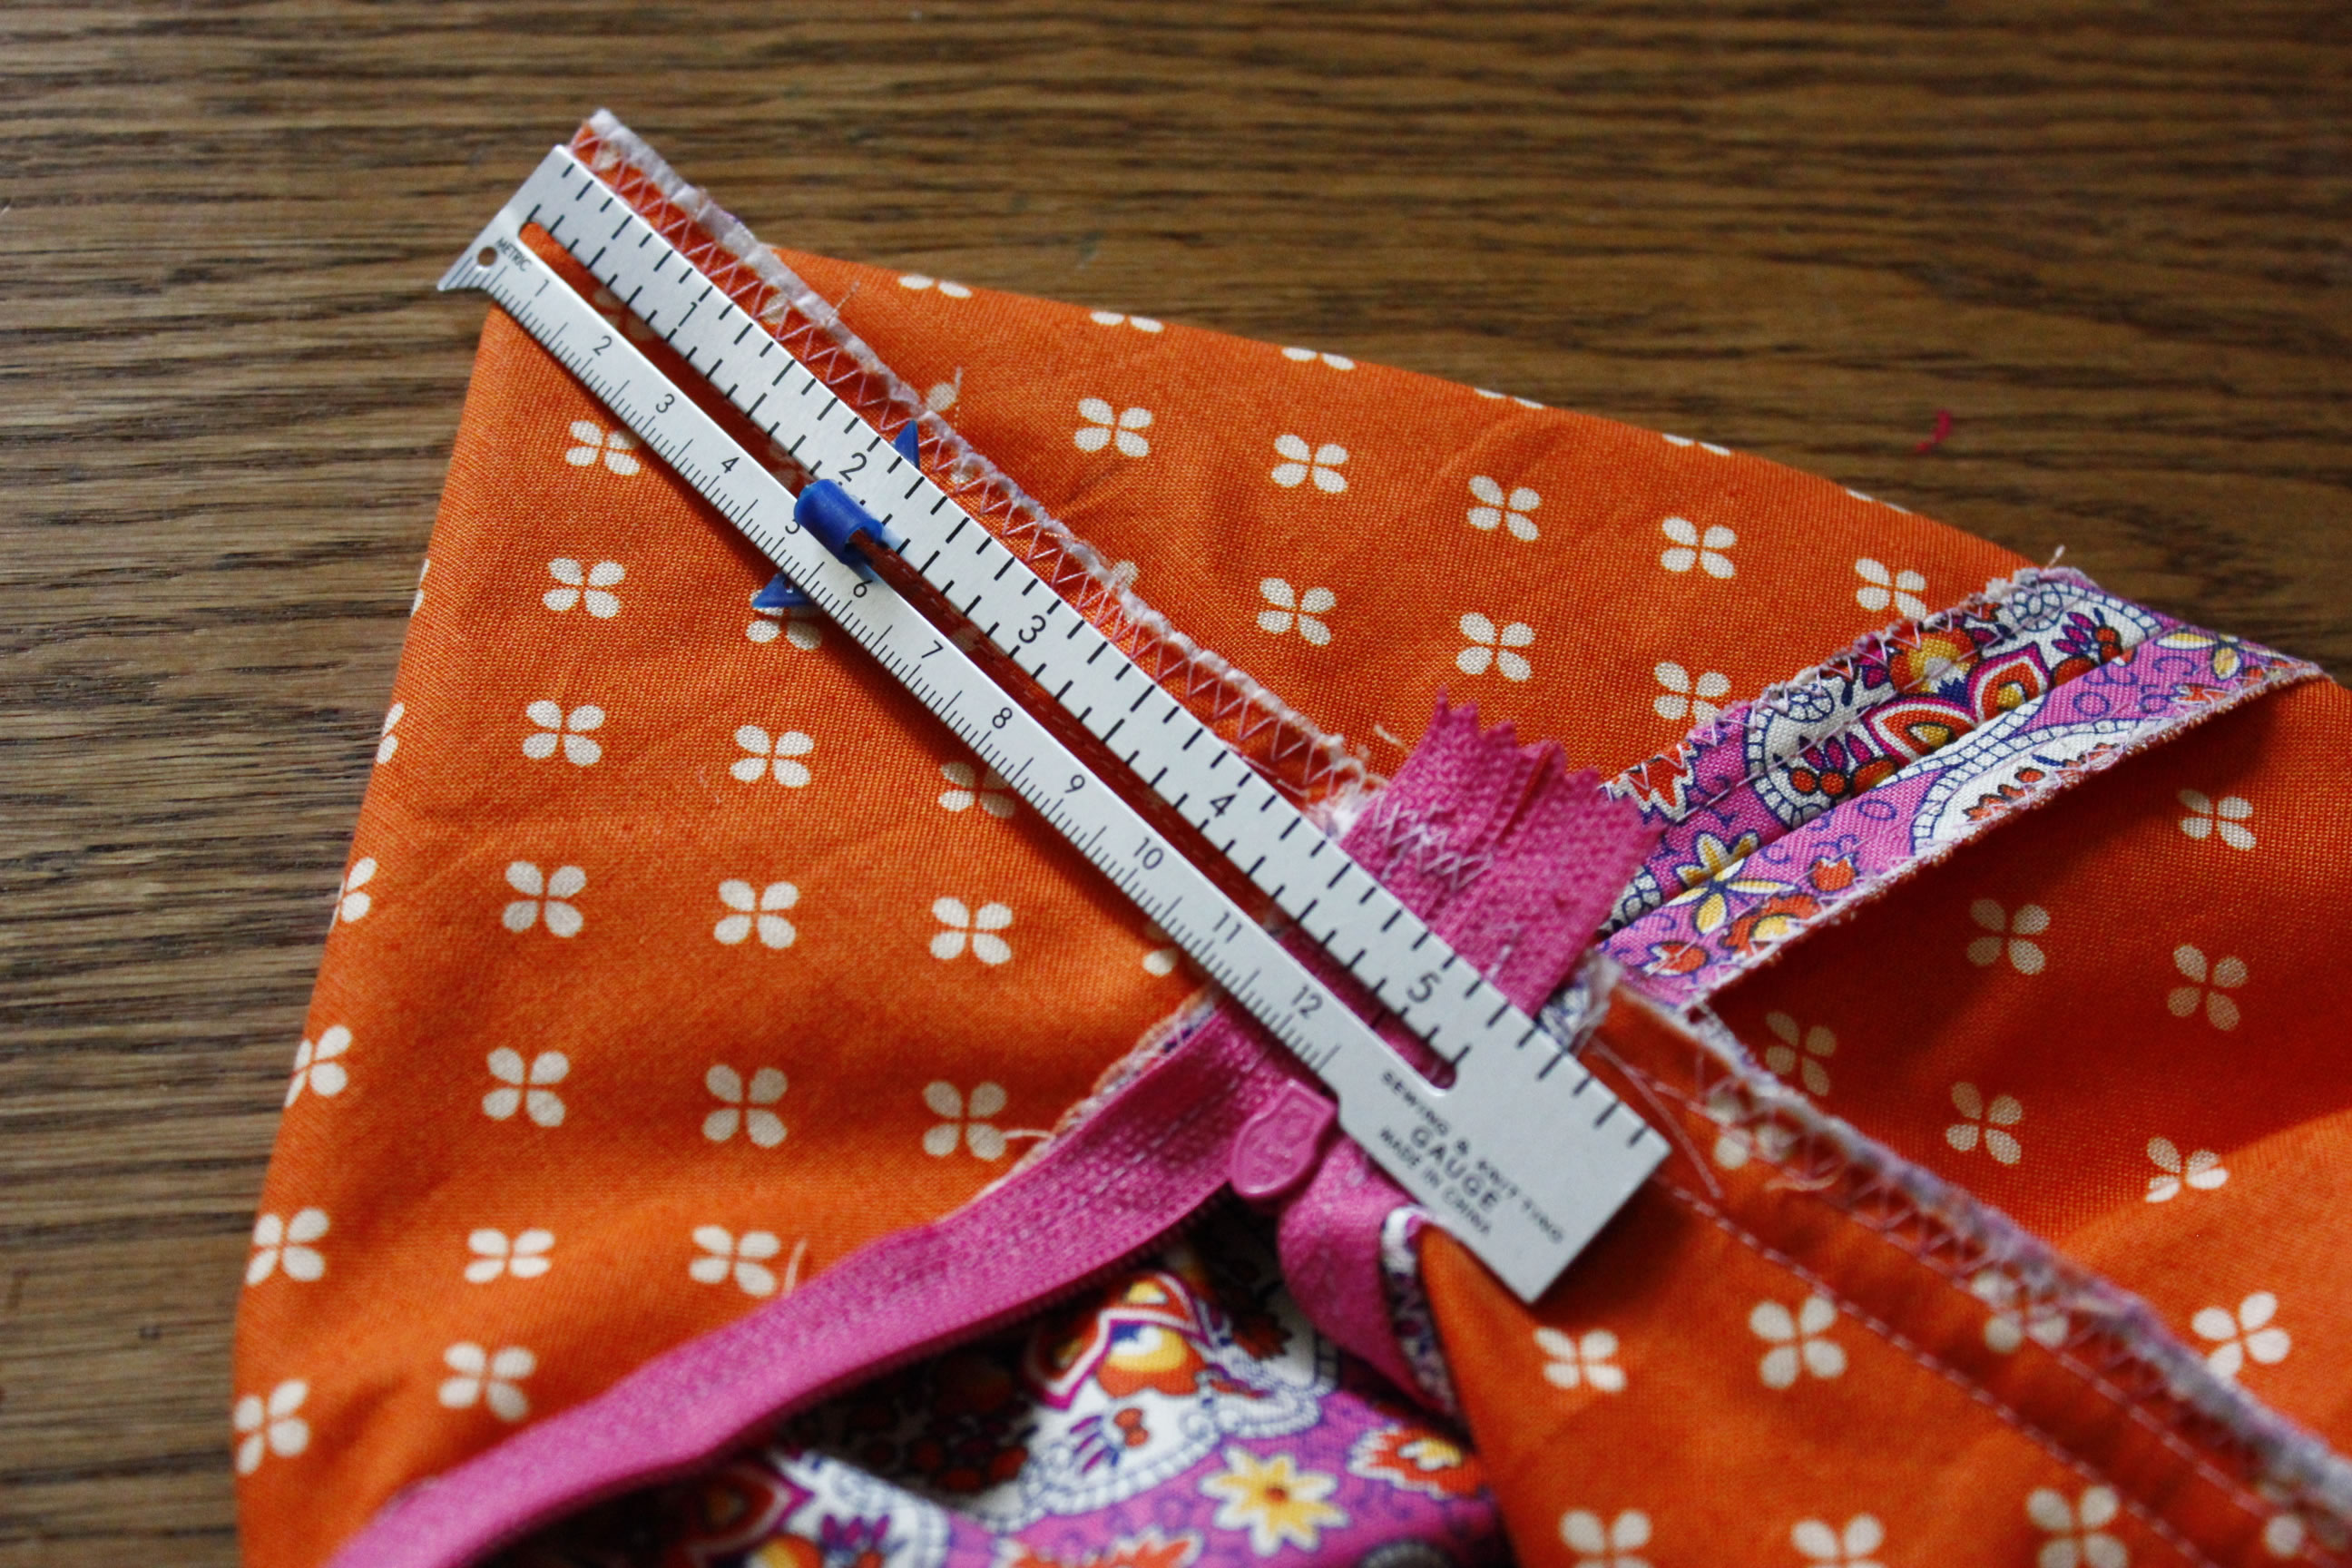
With your project turned inside-out put you hand inside and poke upwards at a corner so you create a fold then pinch it so it looks like the picture below.
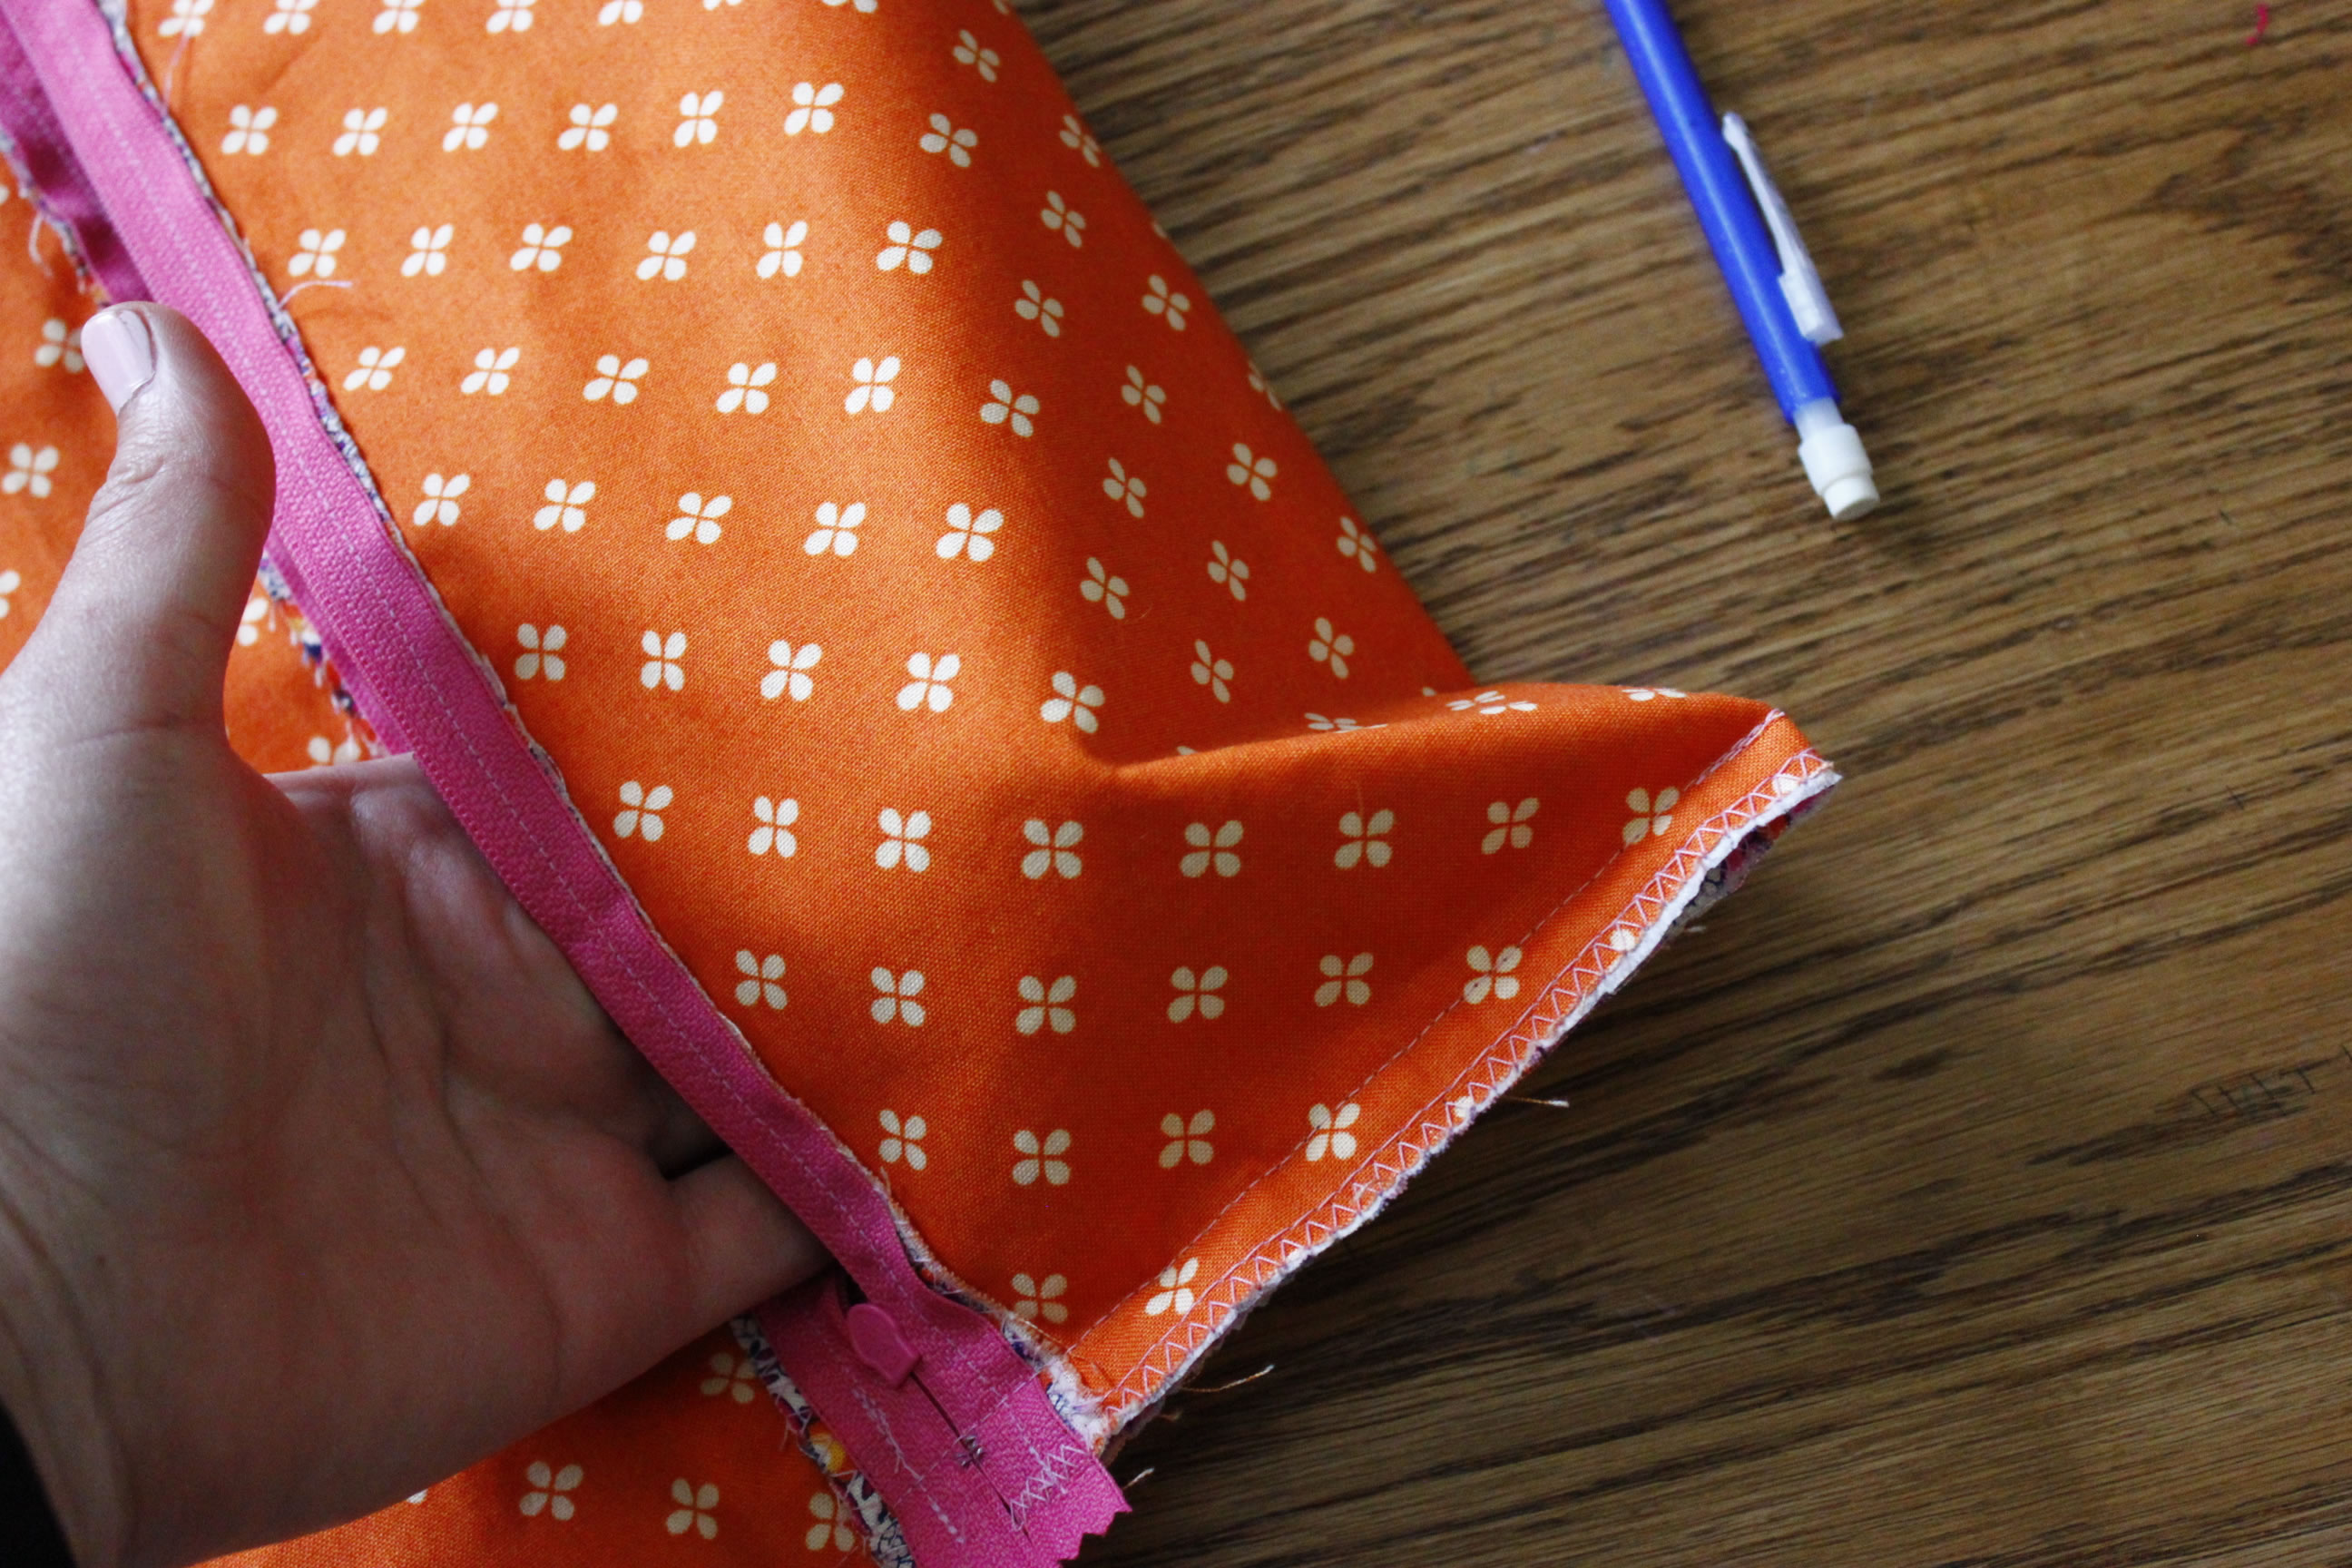

Lay your pinched corner flat. Measure 3″ down from the top of the seam and draw a straight line across. Then measure each side from seam to the edge and ensure both sides are equal.
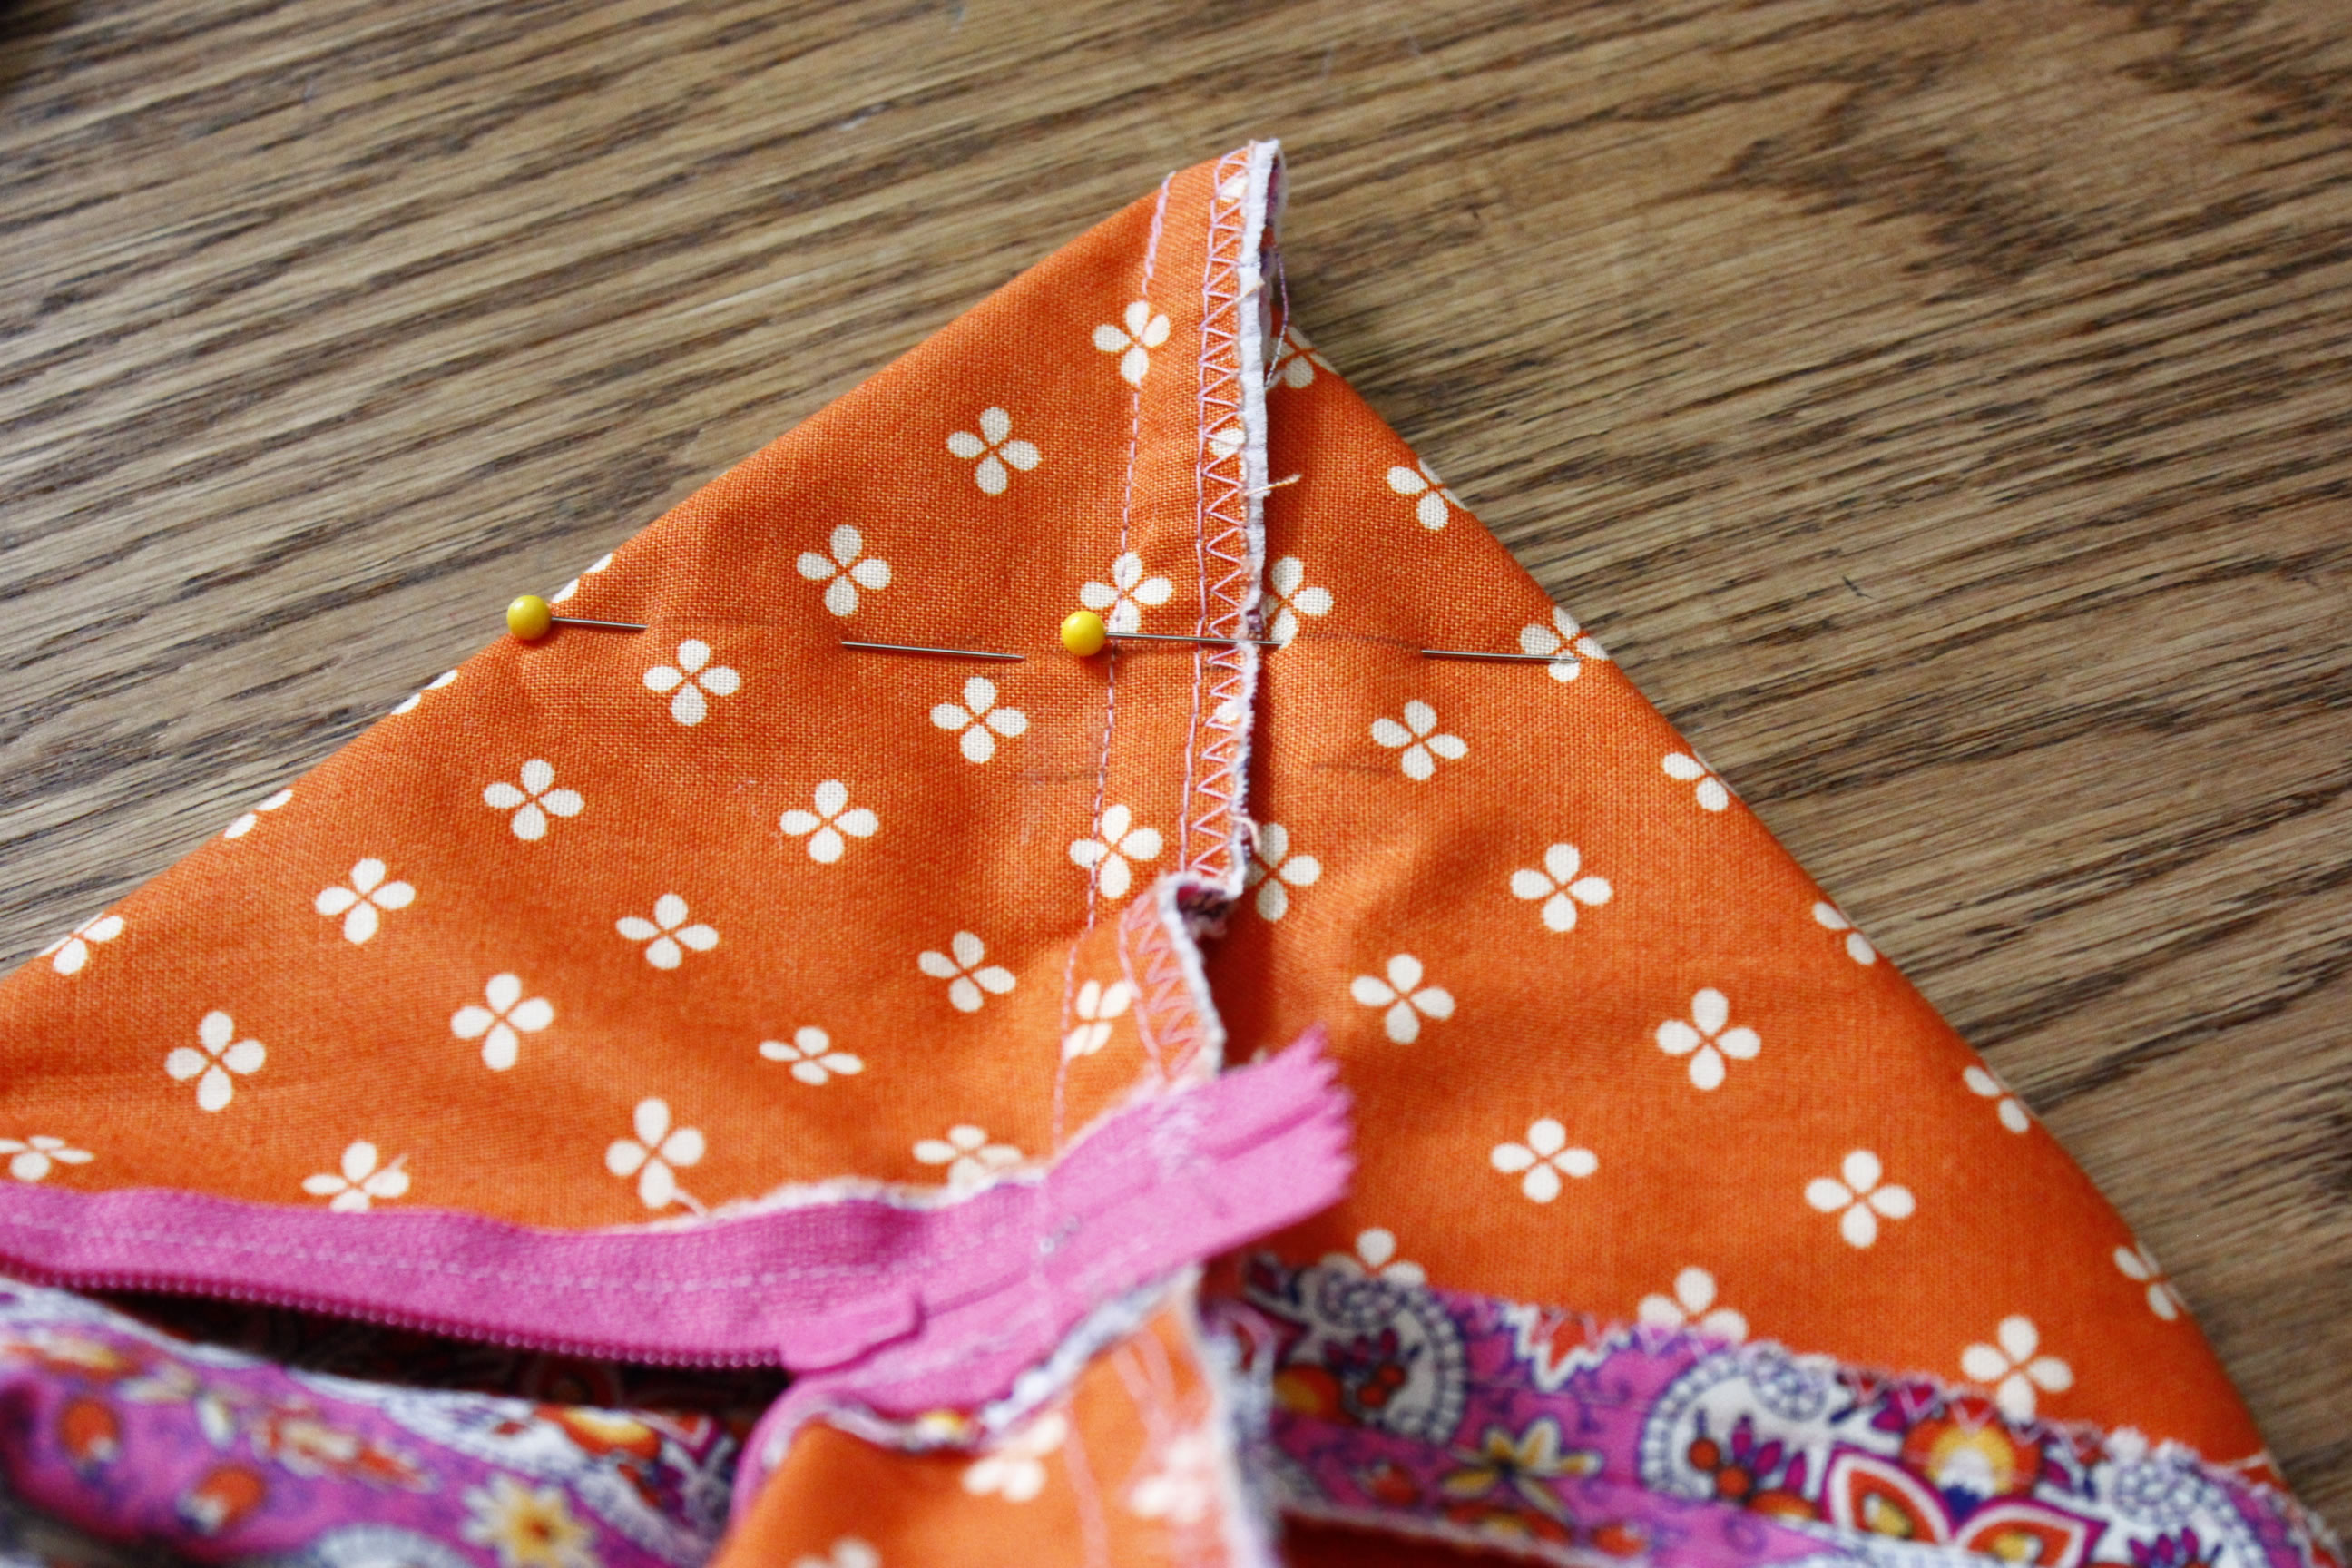
Pin and sew across the 3″ line you drew.
Cut off the corner and serge or zig zag stitch over the edge.
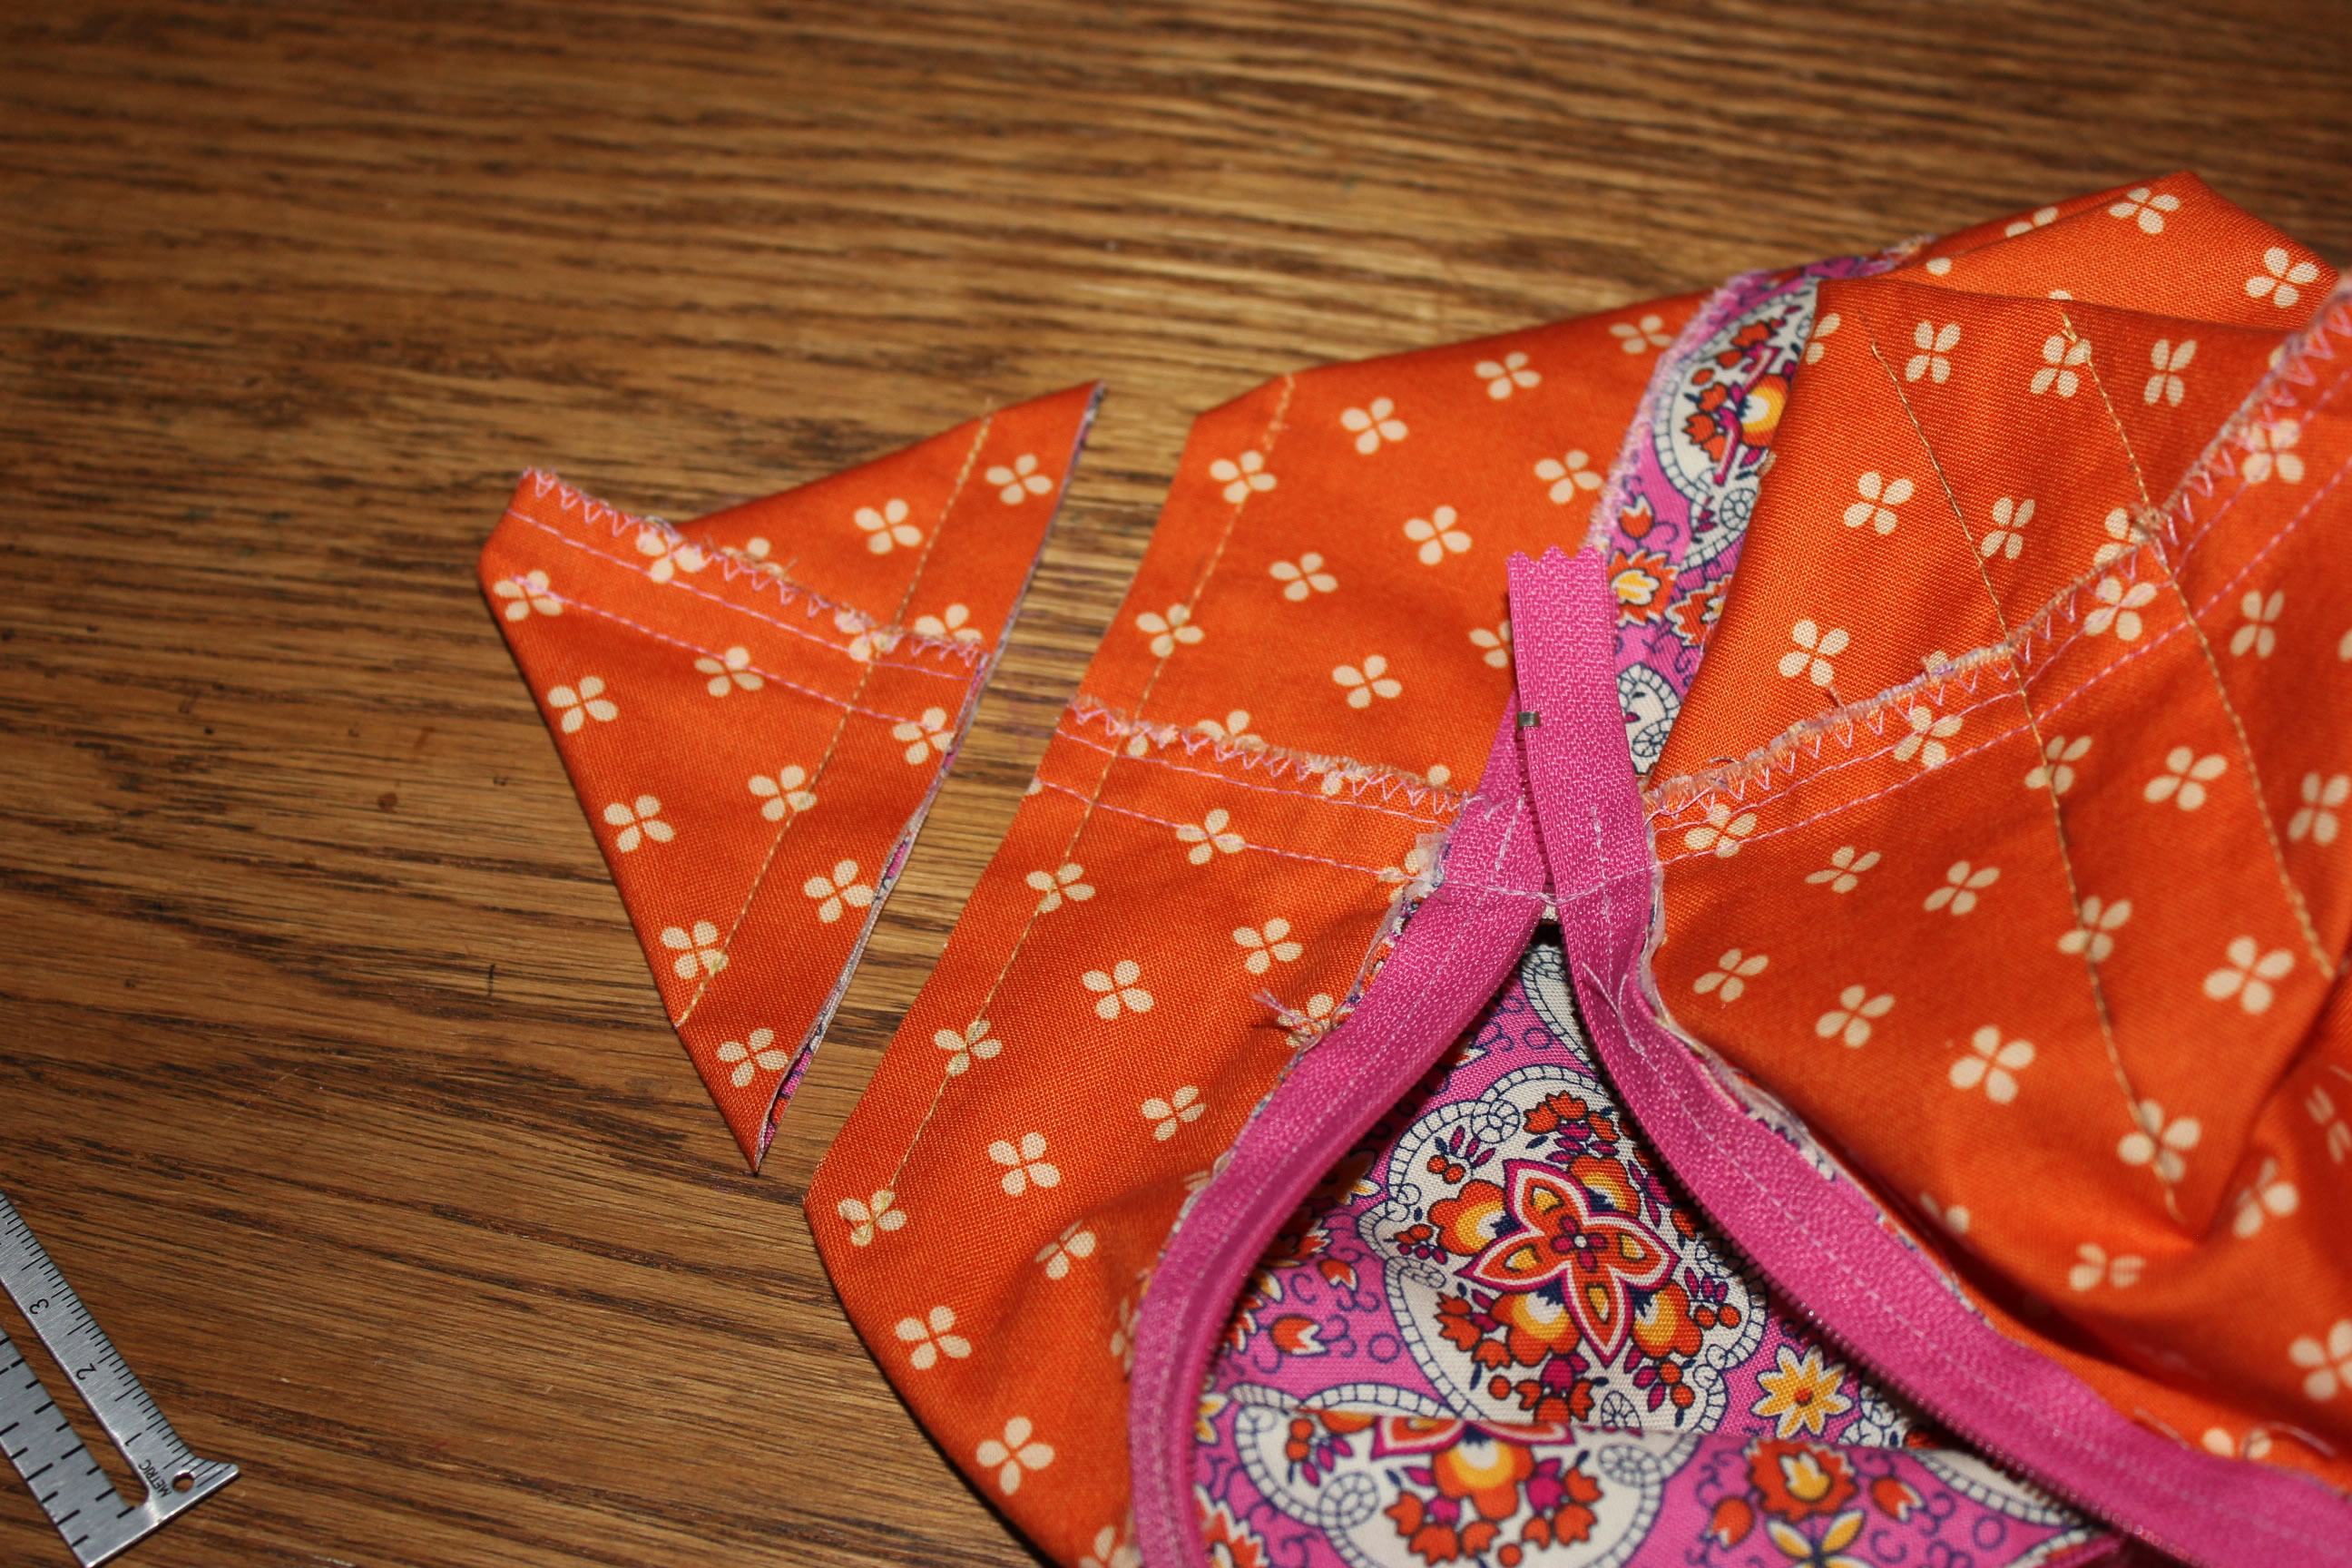
Repeat this process on all three remaining corners.
Turn the bag ride-side out, snip away any loose threads, and you’re done!

If you’d like to get involved with the Project Space, please get in touch here.


 We’re thrilled to announce that we’ve partnered with Tree Nation, the platform to reforest the world & fight climate change! Home to over 90 planting projects in 33 countries, Tree Nation is a non-profit organisation that helps people & companies offset their CO2 emissions.