When my cousin Emma called to say she was getting married, asking my two lovely daughters to be her flower girls, I was absolutely thrilled! The wedding was to be held in the beautiful Doxford Hall, Northumberland, and being a special wedding, it called for a special outfit. I usually struggle to find something I’m happy with, trawling shop after shop & feeling disappointed with the choice.
So it was that I decided to make my own outfit, and loving vintage, plumped for a vintage pattern. Having never used a vintage pattern before and having just got back into sewing after a couple of decades away from it, I felt it would be a good idea to enrol in a local sewing class, to boost my confidence and brush up on my skills. The classes were led by Jenny Smerdon, a wonderful lady who helped me improve my technique and brought me in to contact with a wonderful sewing community. I have no formal training (having been taught the basics by my mum and gran) and taught myself to use a pattern, so thoroughly recommend sewing classes to anyone wanting to learn, or build upon existing skills.
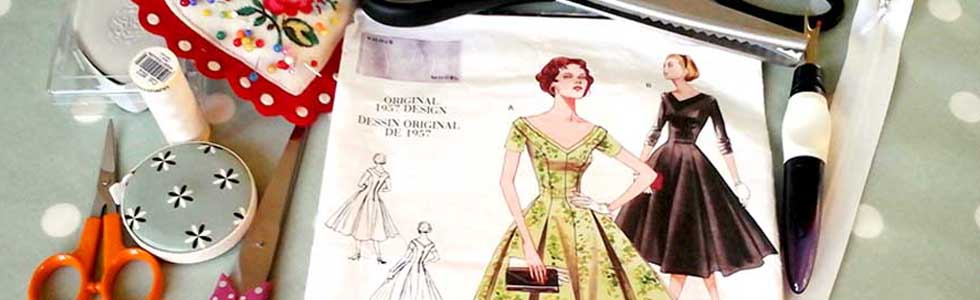
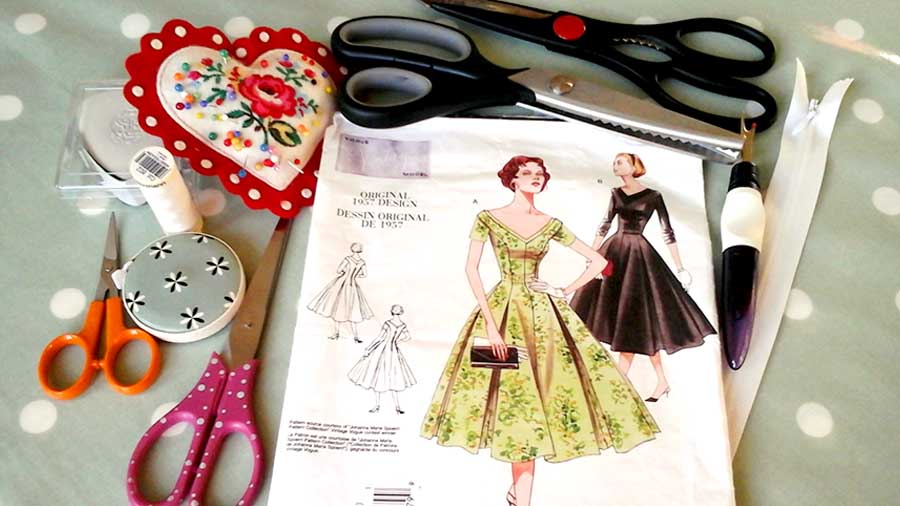
My first step was to seek out a pattern. I was amazed by the choice of reproduction & original vintage patterns. I chose a lovely Vintage Vogue 1957 design (V2903) with its fitted bodice & flared skirt (it turned out to be the first of many vintage makes). I chose the short sleeved version as the wedding was in June, when it would hopefully be warm. I bought 6 metres of a beautiful green & white cotton with a vintage look, whilst Jenny guided me on the Essential Sewing Kit I would need for my sewing box and I was good to go!
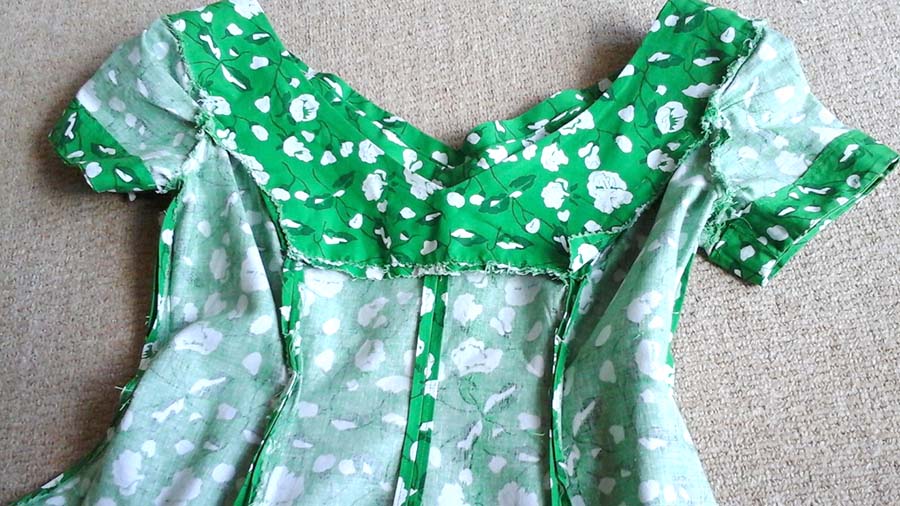
The second step was to take my measurements- a process I go through every time I make myself an outfit now- as my size & shape can alter by a couple of centimetres over the course of a year. My upper body is quite short so the bodice pieces had to be shortened where the pattern indicated. As I am only 5 foot tall, I also had to take a couple of inches off the dress length. After that, the process for the most part was quite straightforward. I made a toile – a mock up using calico fabric – for the bodice first, as the fabric was too expensive to ruin! I was happy that the fit around my bust and waist was nice and snug, so got going with the dress. The main body of the dress has eight panels, so there is a lot of fabric to work with and lots of tailor tacks to mark the princess seams and inverted pleats. The markings were adjusted to take into account the dress having been altered for my shape. Despite being a time consuming process, the preparation is necessary and worth the effort.
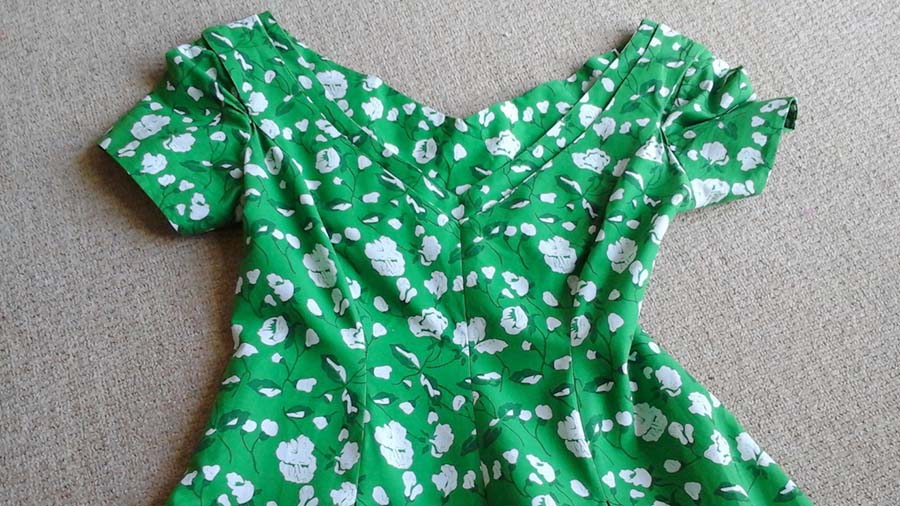
However, inserting the sleeves did prove a challenge. First you have to make and attach the neck/armhole facing, then make the yoke, attach the sleeves to it and then slip the yoke and sleeves under the neck and shoulders of the dress! The yoke is then basted to the seam allowance and then the remainder of the sleeve is sewn to the armhole edge, under the arms. I found this so tricky I ended up finishing this part by hand! Below you can see the yoke basted to the facing seam allowance.
And here is an image of the right side showing the neck with its facing pulled away from the yoke.
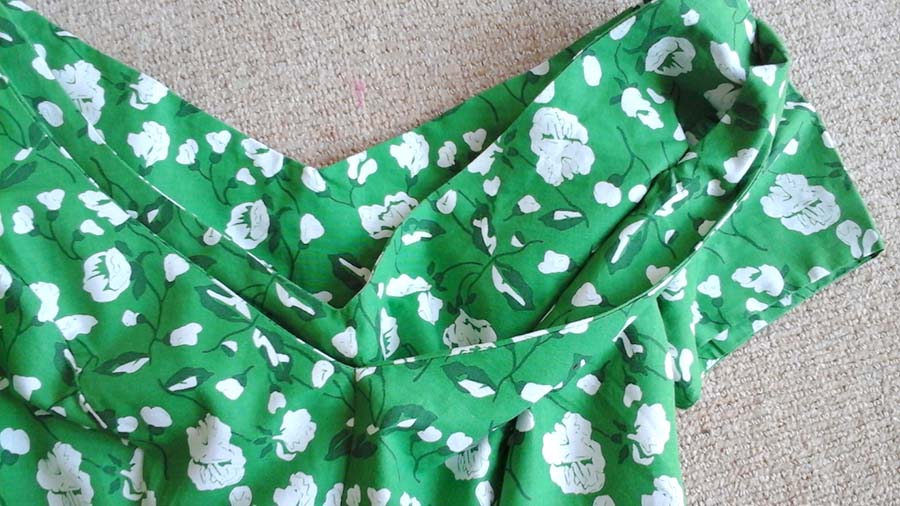
This is how the neckline sits when finished:
I chose to finish off the seams by turning the raw edges in 6mm, then stitching and ironing them. I inserted an invisible zip, which is just a personal preference as I love the finish you get with them. I slipstitched the hems – again time consuming – but it makes for a flawless finish.

I was really proud of the finished dress as the process had taught me so much about sewing vintage & I had a truly original dress that fitted me beautifully (although the bodice is so fitted I do need assistance getting out of it!). I have to add, attending a refresher sewing class was a great way to improve technique and get to know other sewing enthusiasts! I loved sharing what I was making & seeing what others made too.
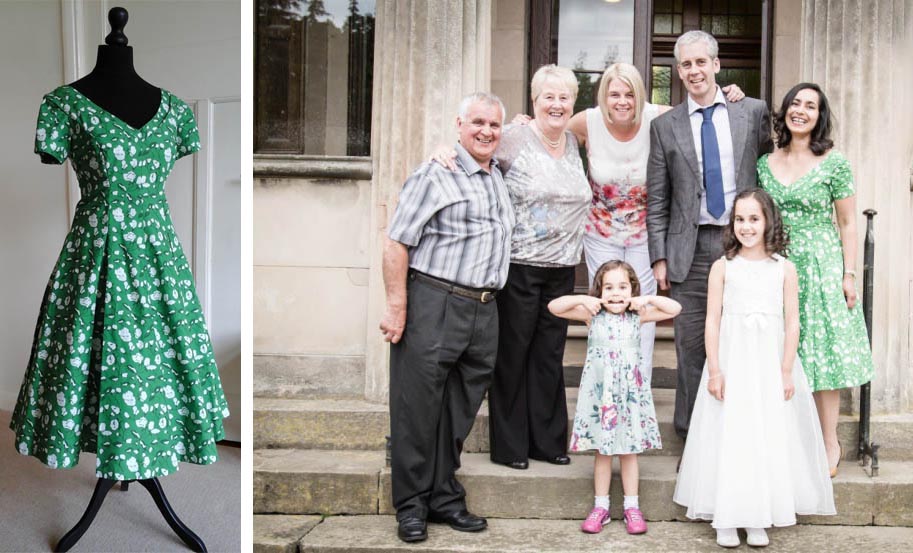
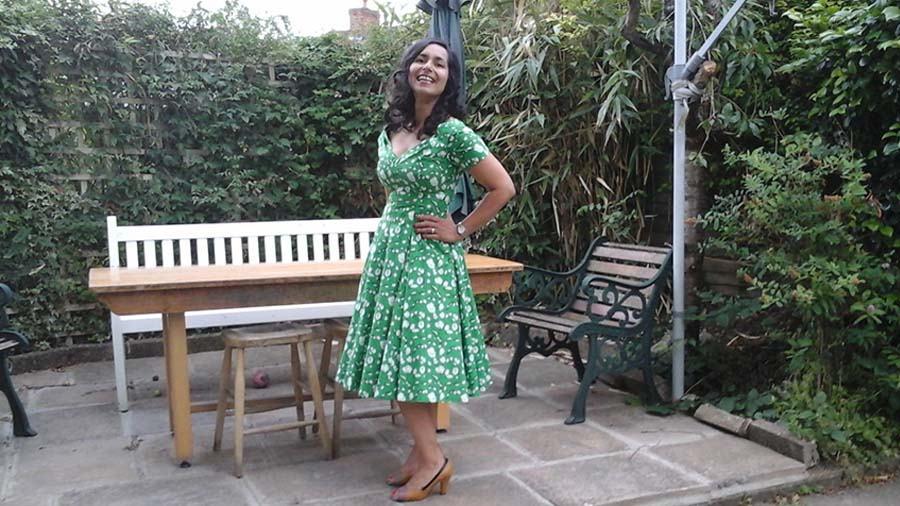
On the day, the sun shone, as did the bride! As for my first vintage make, I wore it with a petticoat for extra glamour and there was no danger of anyone wearing an identical outfit! You can see me here with my beautiful family, although our little one by now has changed out of her flower girl dress and can be seen wearing a more comfy dress with trainers!
I received lots of lovely compliments and felt wonderful wearing a dress I had made myself. I wore it again recently for an outdoor screening of the Hitchcock film ‘Dial M for Murder’, where guests were invited to wear outfits inspired by the film. This dress seemed the perfect homage to Grace Kelly and it was lovely to have an excuse to wear it again.


 We’re thrilled to announce that we’ve partnered with Tree Nation, the platform to reforest the world & fight climate change! Home to over 90 planting projects in 33 countries, Tree Nation is a non-profit organisation that helps people & companies offset their CO2 emissions.